The post Custom framed photo prints for your home appeared first on The Home Scene.
]]>When New Zealand owned company Happy Moose reached out to collaborate on their new custom framed collage photo prints it was perfect timing. I jumped at the chance knowing the products were lovingly hand made in New Zealand from a small and clever creative business and something we would love to have on display in our home.
Scouring through all our photos, it struck me how certain places around New Zealand hold special meanings. Living away from both sides of our family, we look forward to our annual visits and the memories we create in some truly beautiful locations across both the North and South Island.
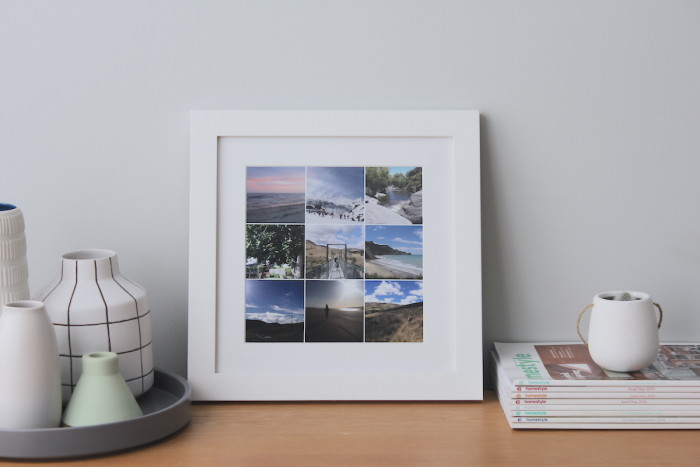
Using the simple layout app to select our photos, I chose ones of Gisborne beach – my home, and of Ranfurly – Jeremy’s home; two places we love to return to. The boys swinging from the old tree is where we held our last Christmas with my Nana before she passed away and is a special place we cherish. The Manawatu windmills, Mt Ruapehu ski trips and trekking through the wide open spaces in Central Otago also feature amongst our faves.
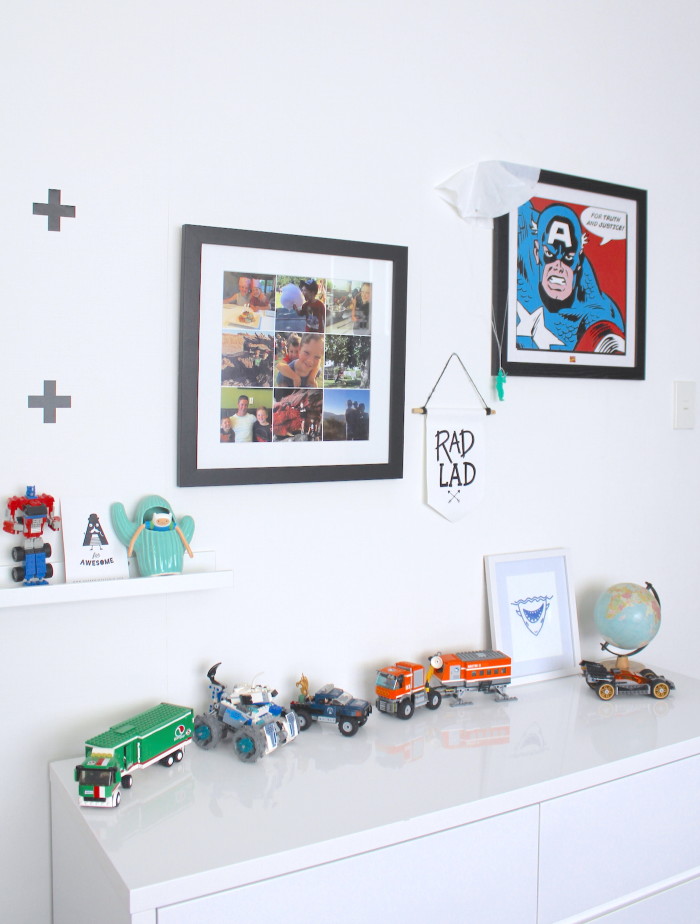
I wanted to create a photo collage dedicated to our boys to display in their rooms alongside their favourite prints and posters. Dylan and Jimmy are five years apart in age but you wouldn’t know it. These two have such a great relationship, both as brothers and as friends and are always making us laugh with their crazy antics and humour. You can see their crazy, fun filled nature in these photos and it makes me smile just looking at them.

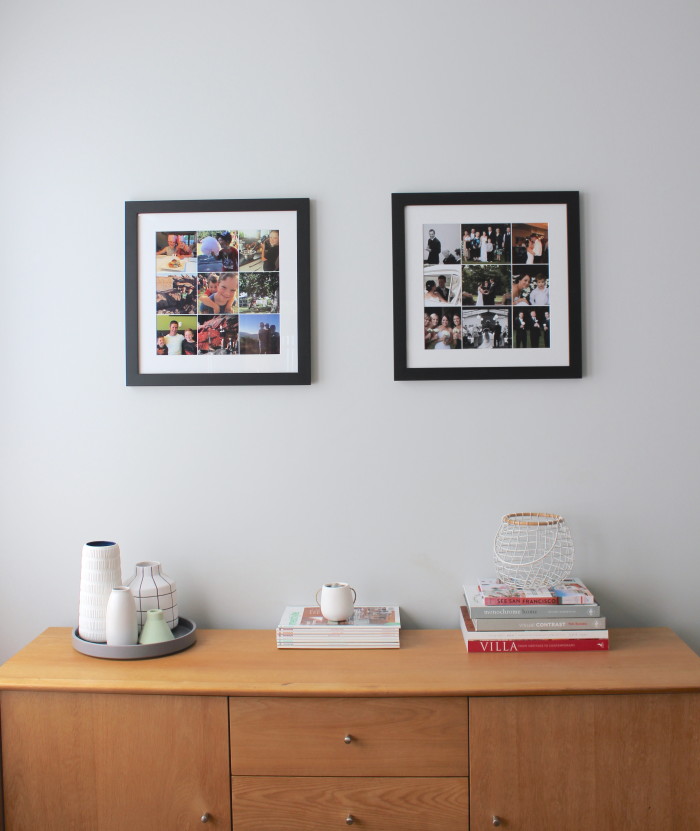
In all the years that have passed since our wedding we have never had any photos professionally printed! On what was naturally one of our favourite days with all our favourite people, it’s so nice to see our favourite memories finally up on the walls. I love how the collage design shares a snapshot of what the day was like from family photos, to hilarious speeches and joking around between shots.
I also had fun moving each of the custom frames around in our home and created a gallery wall in the hallway, which I’ve always wanted to do. These prints look great alongside the kids art works that run down the hallway, greeting us when we arrive home at the end of the day.
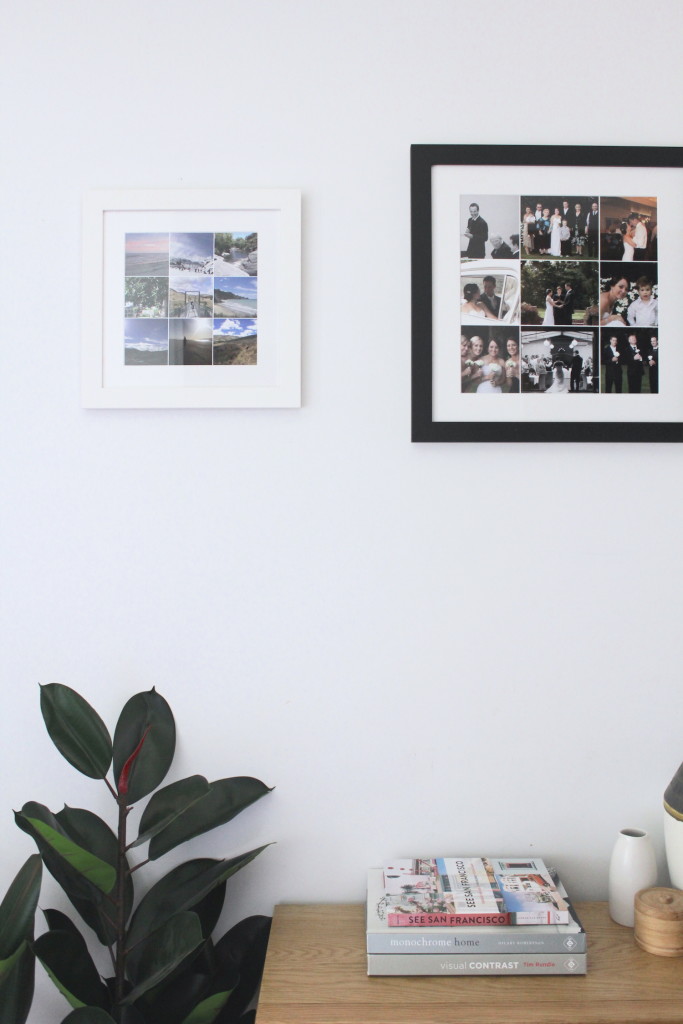
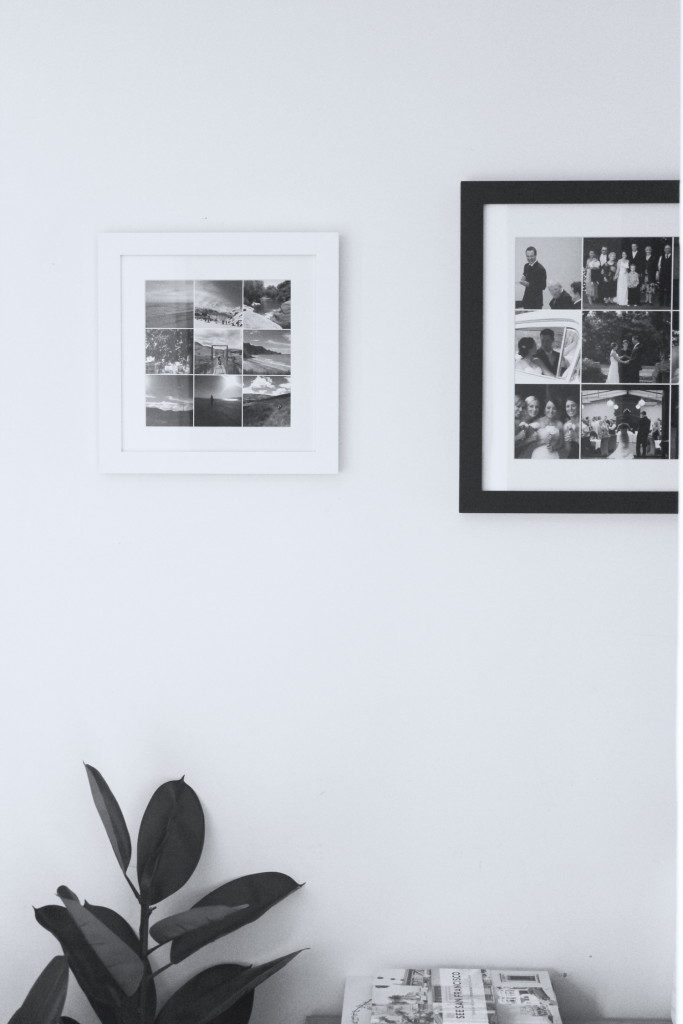
Each of the frames are a gallery grade photo print, mounted on a 4cm thick matte board, finished in either pearl-white or graphite-black custom frame. The whole process was really simple, from creating the photo file through the app, to sending it to Happy Moose and receiving the items so carefully packaged and ready to hang. I’ll definitely be adding more to our home in the future.
This post is brought to you in collaboration with Happy Moose. All opinions are my own and all collaborations are only undertaken if I genuinely love and use the product in my own home.

The post Custom framed photo prints for your home appeared first on The Home Scene.
]]>The post DIY Recessed bedhead appeared first on The Home Scene.
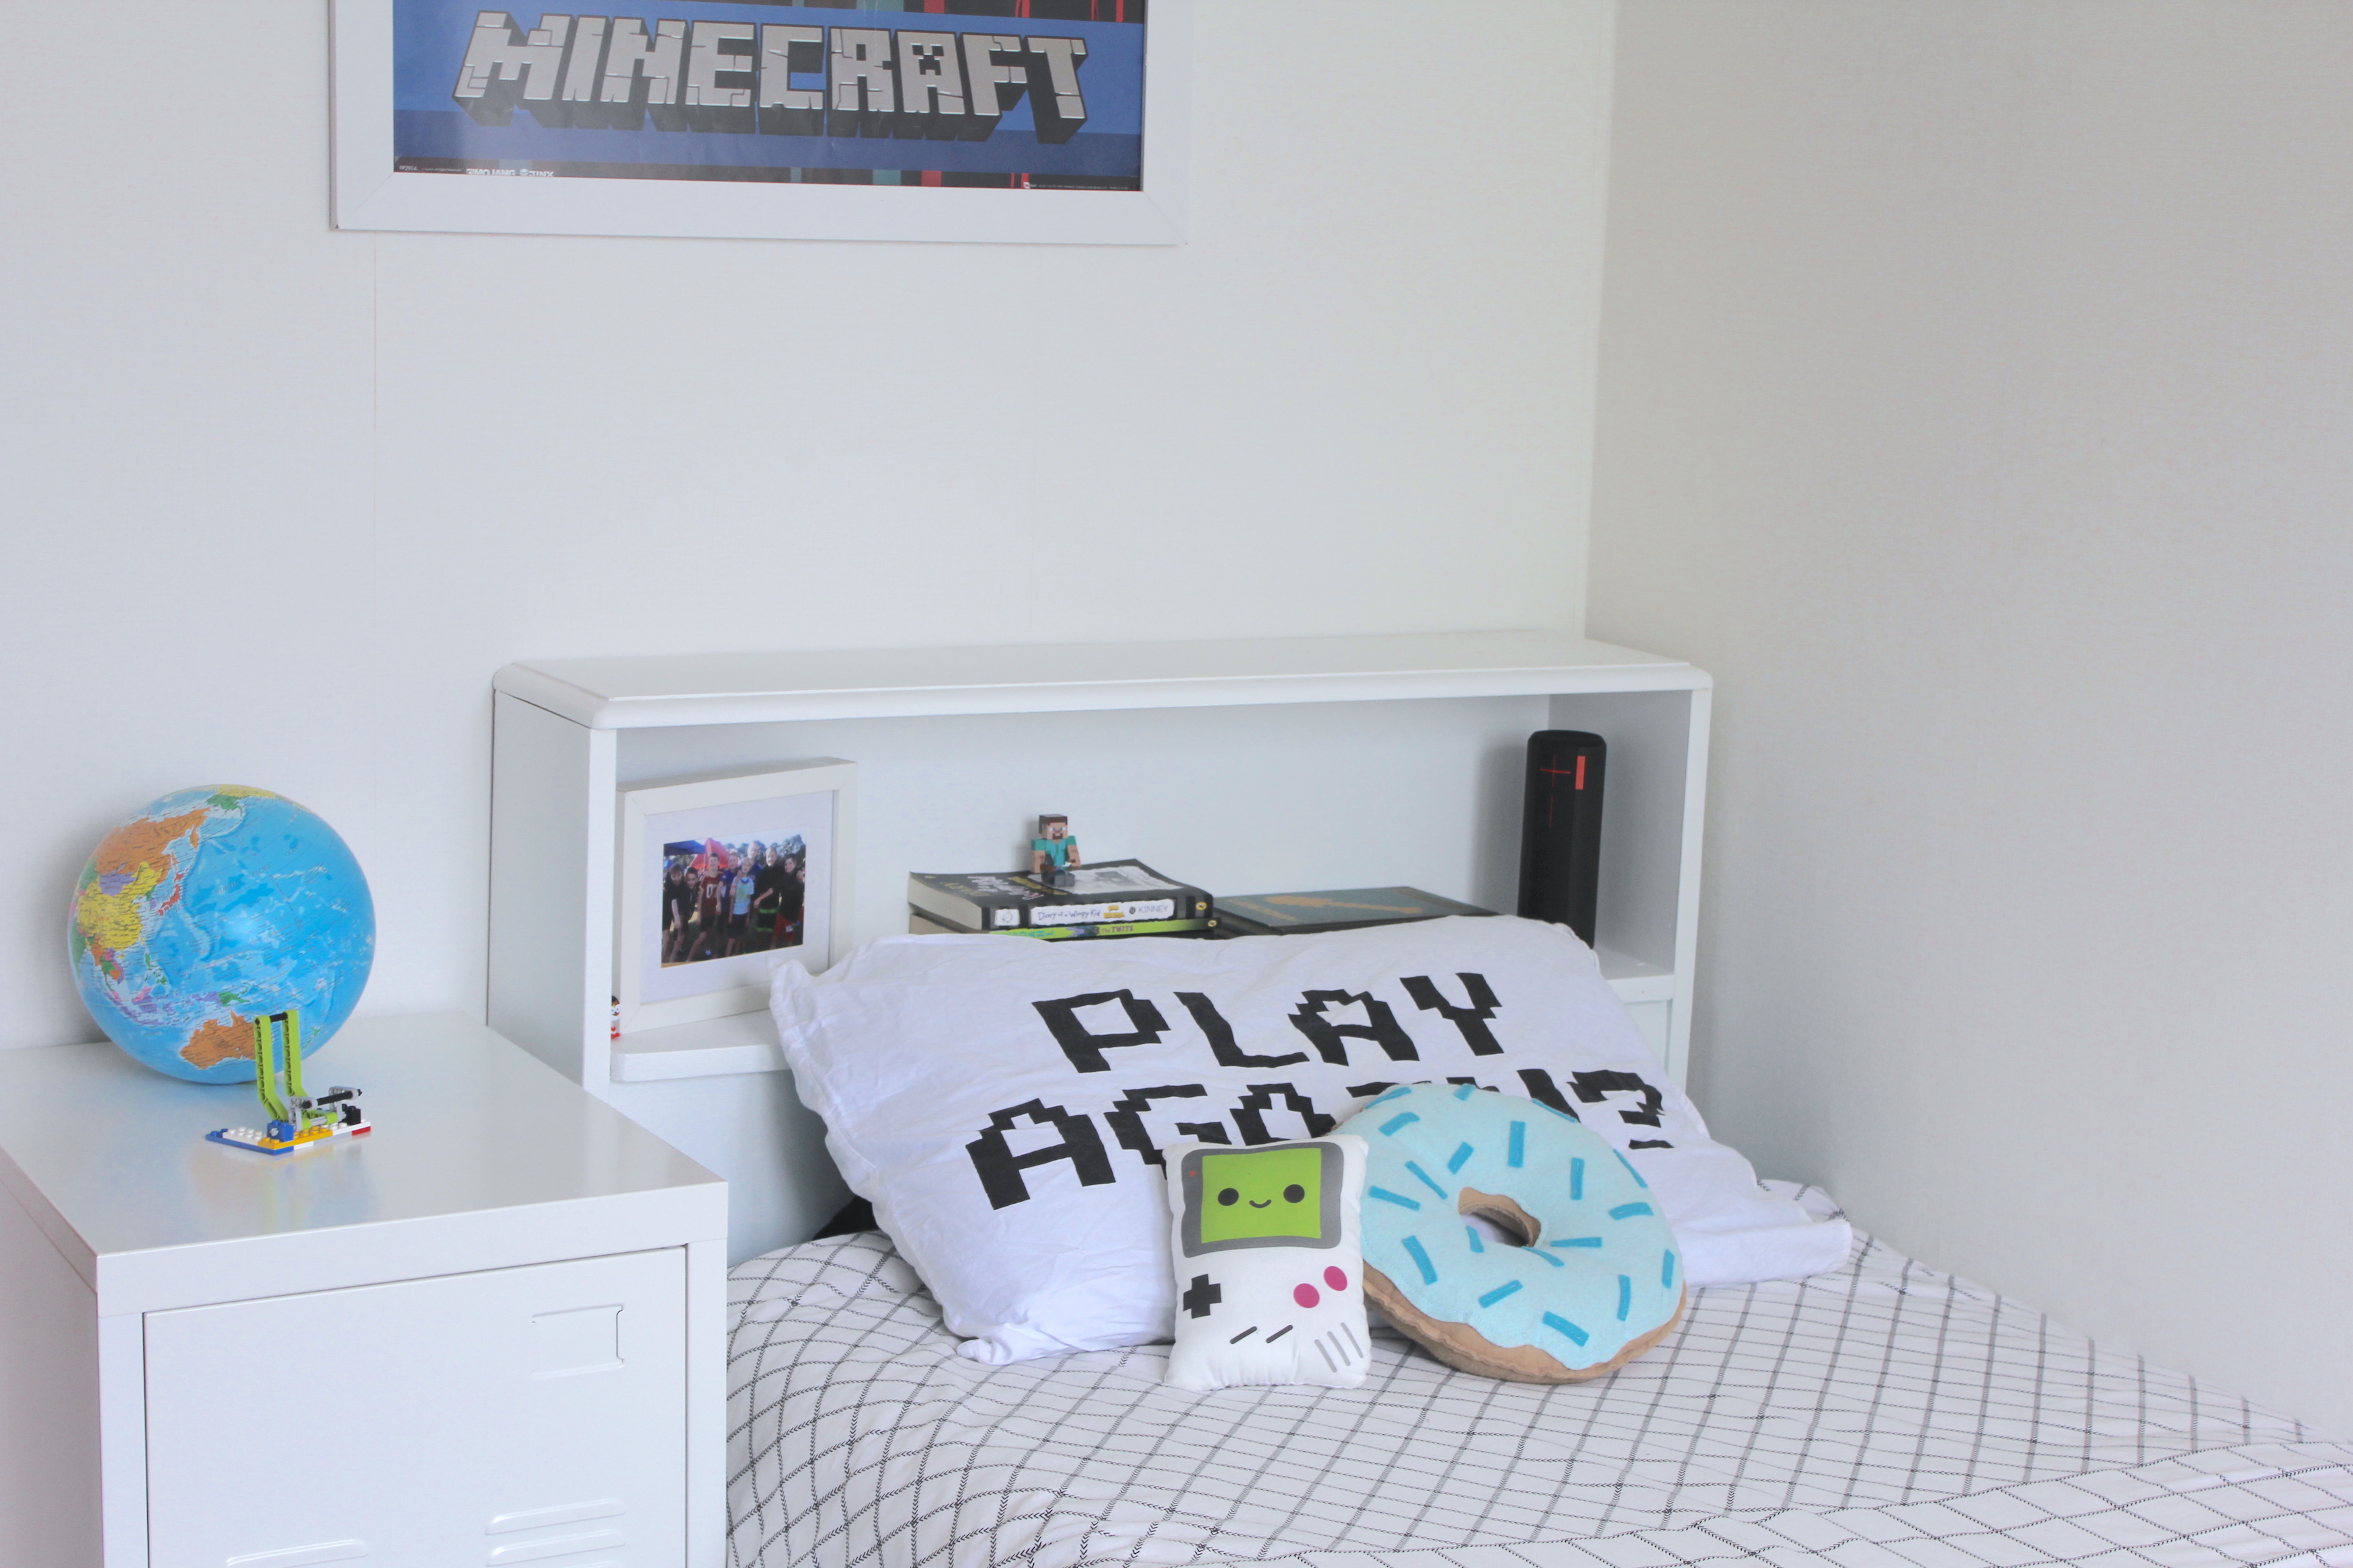
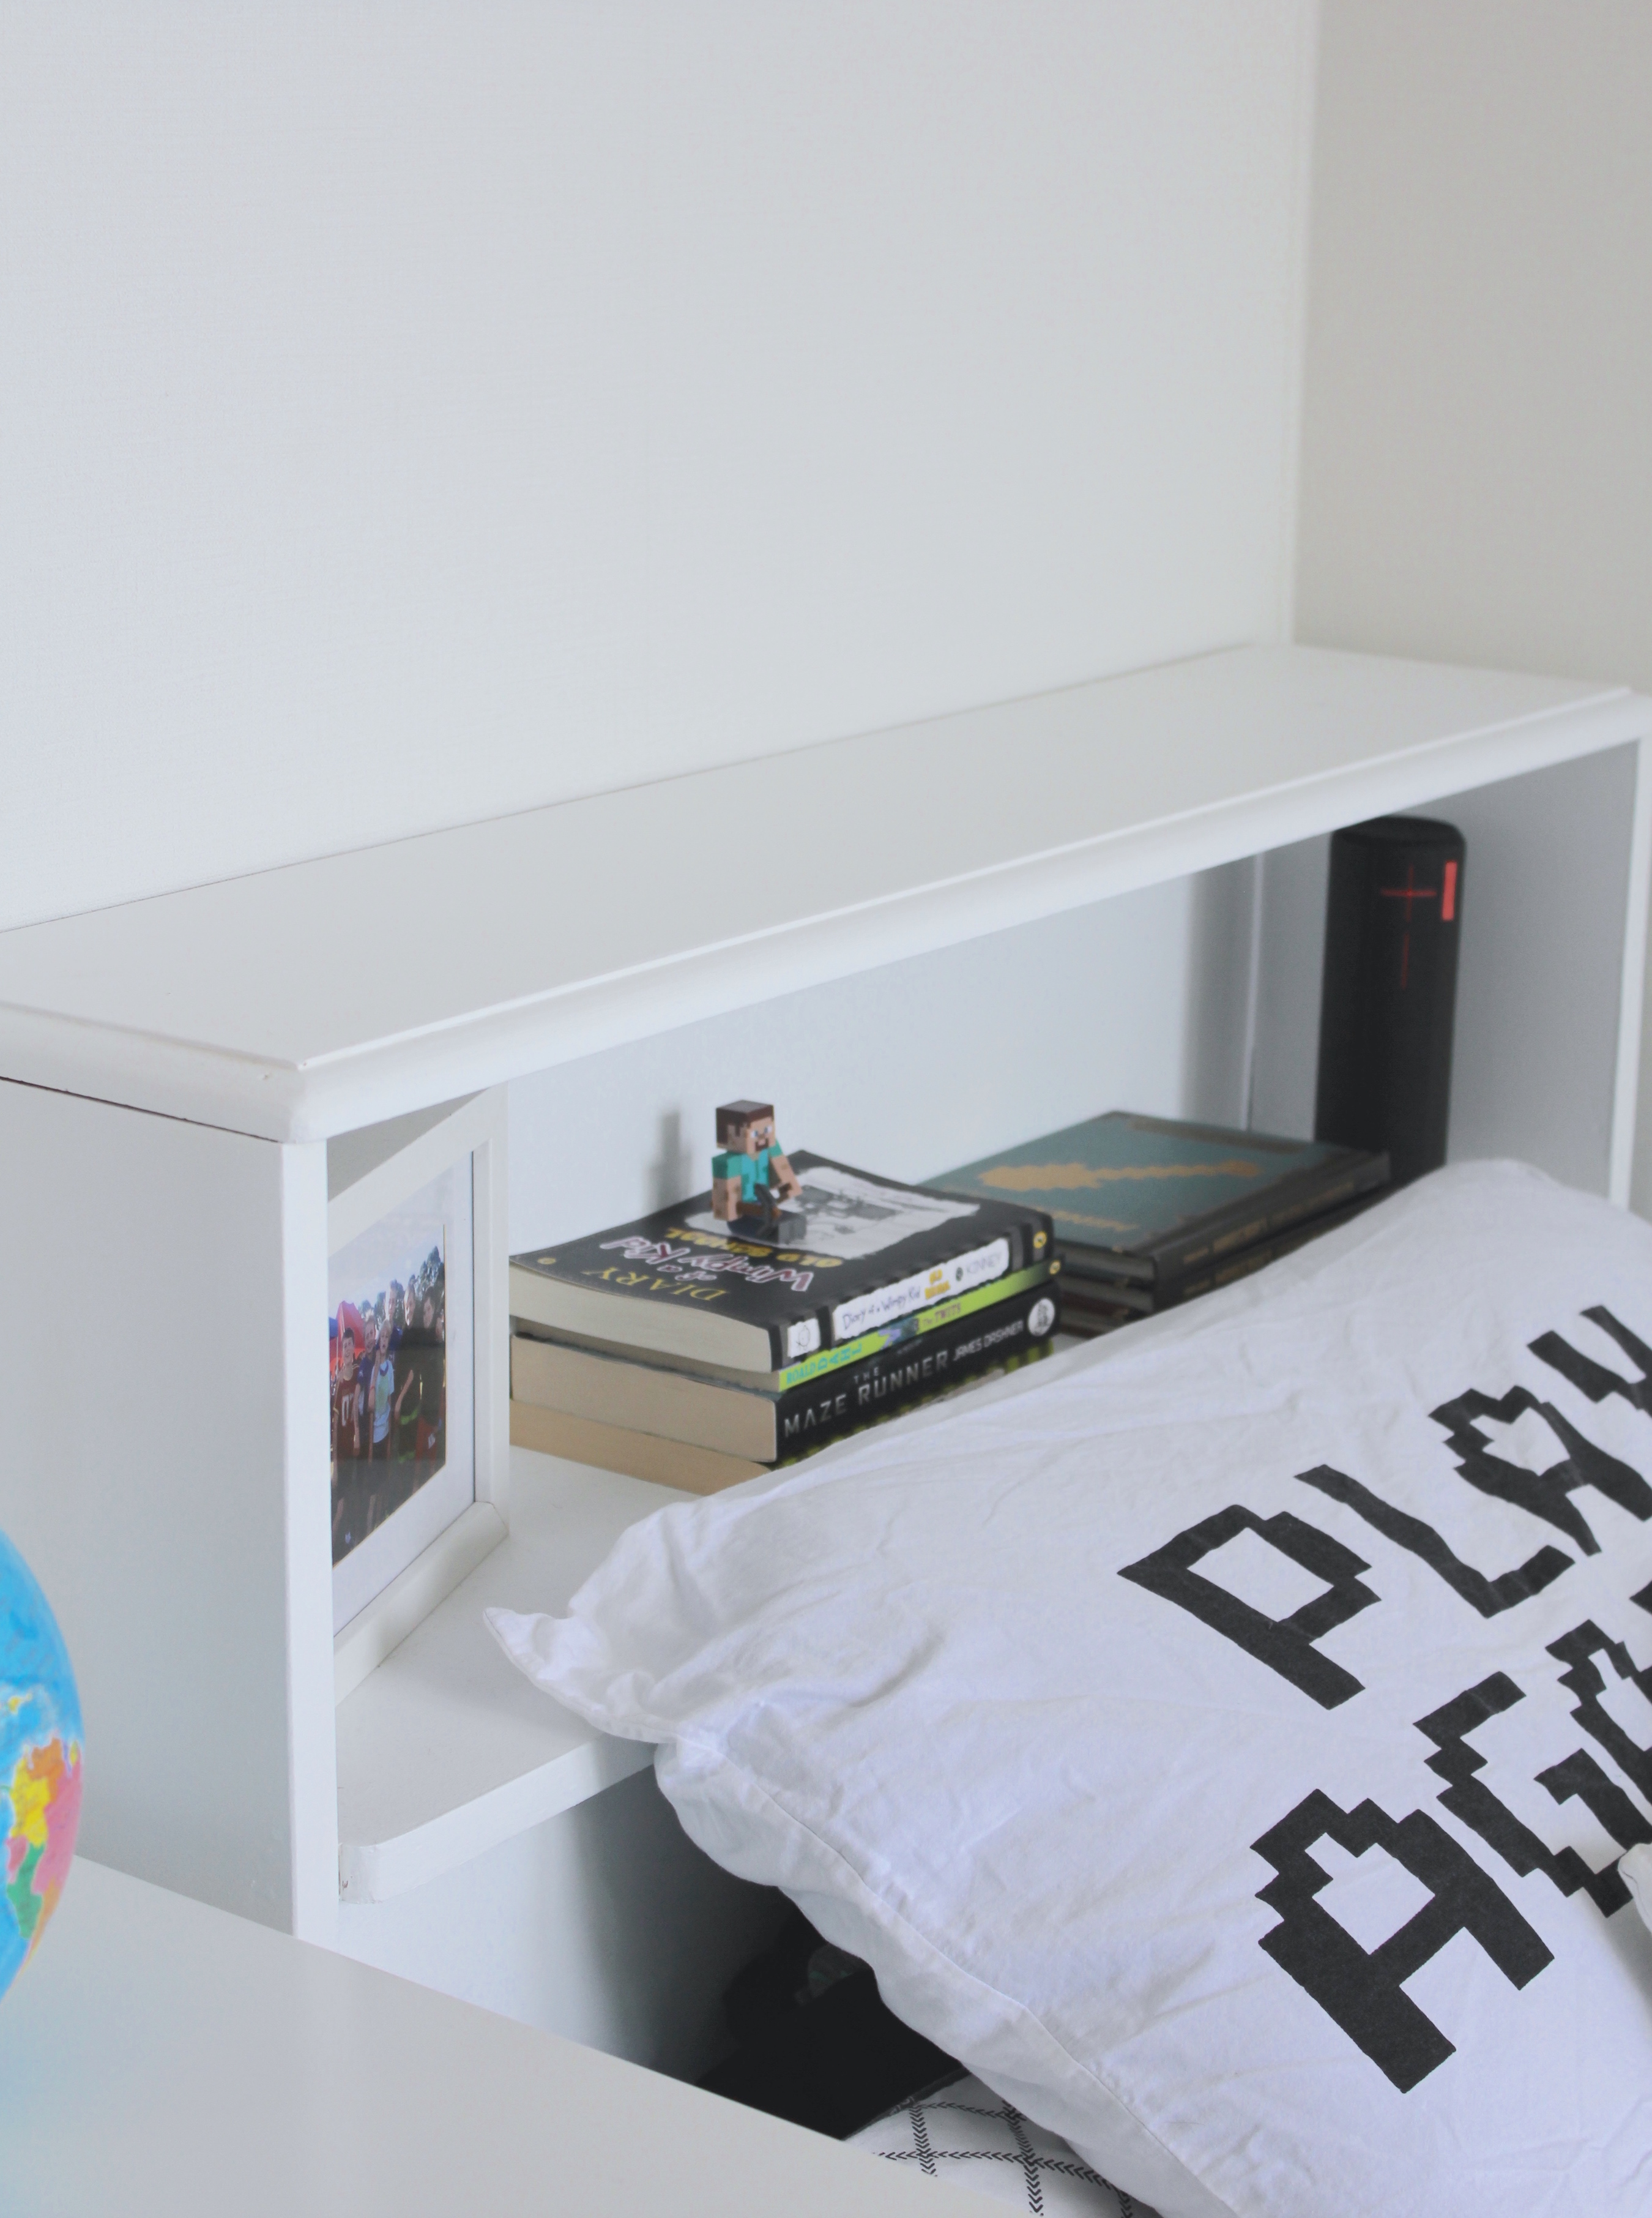
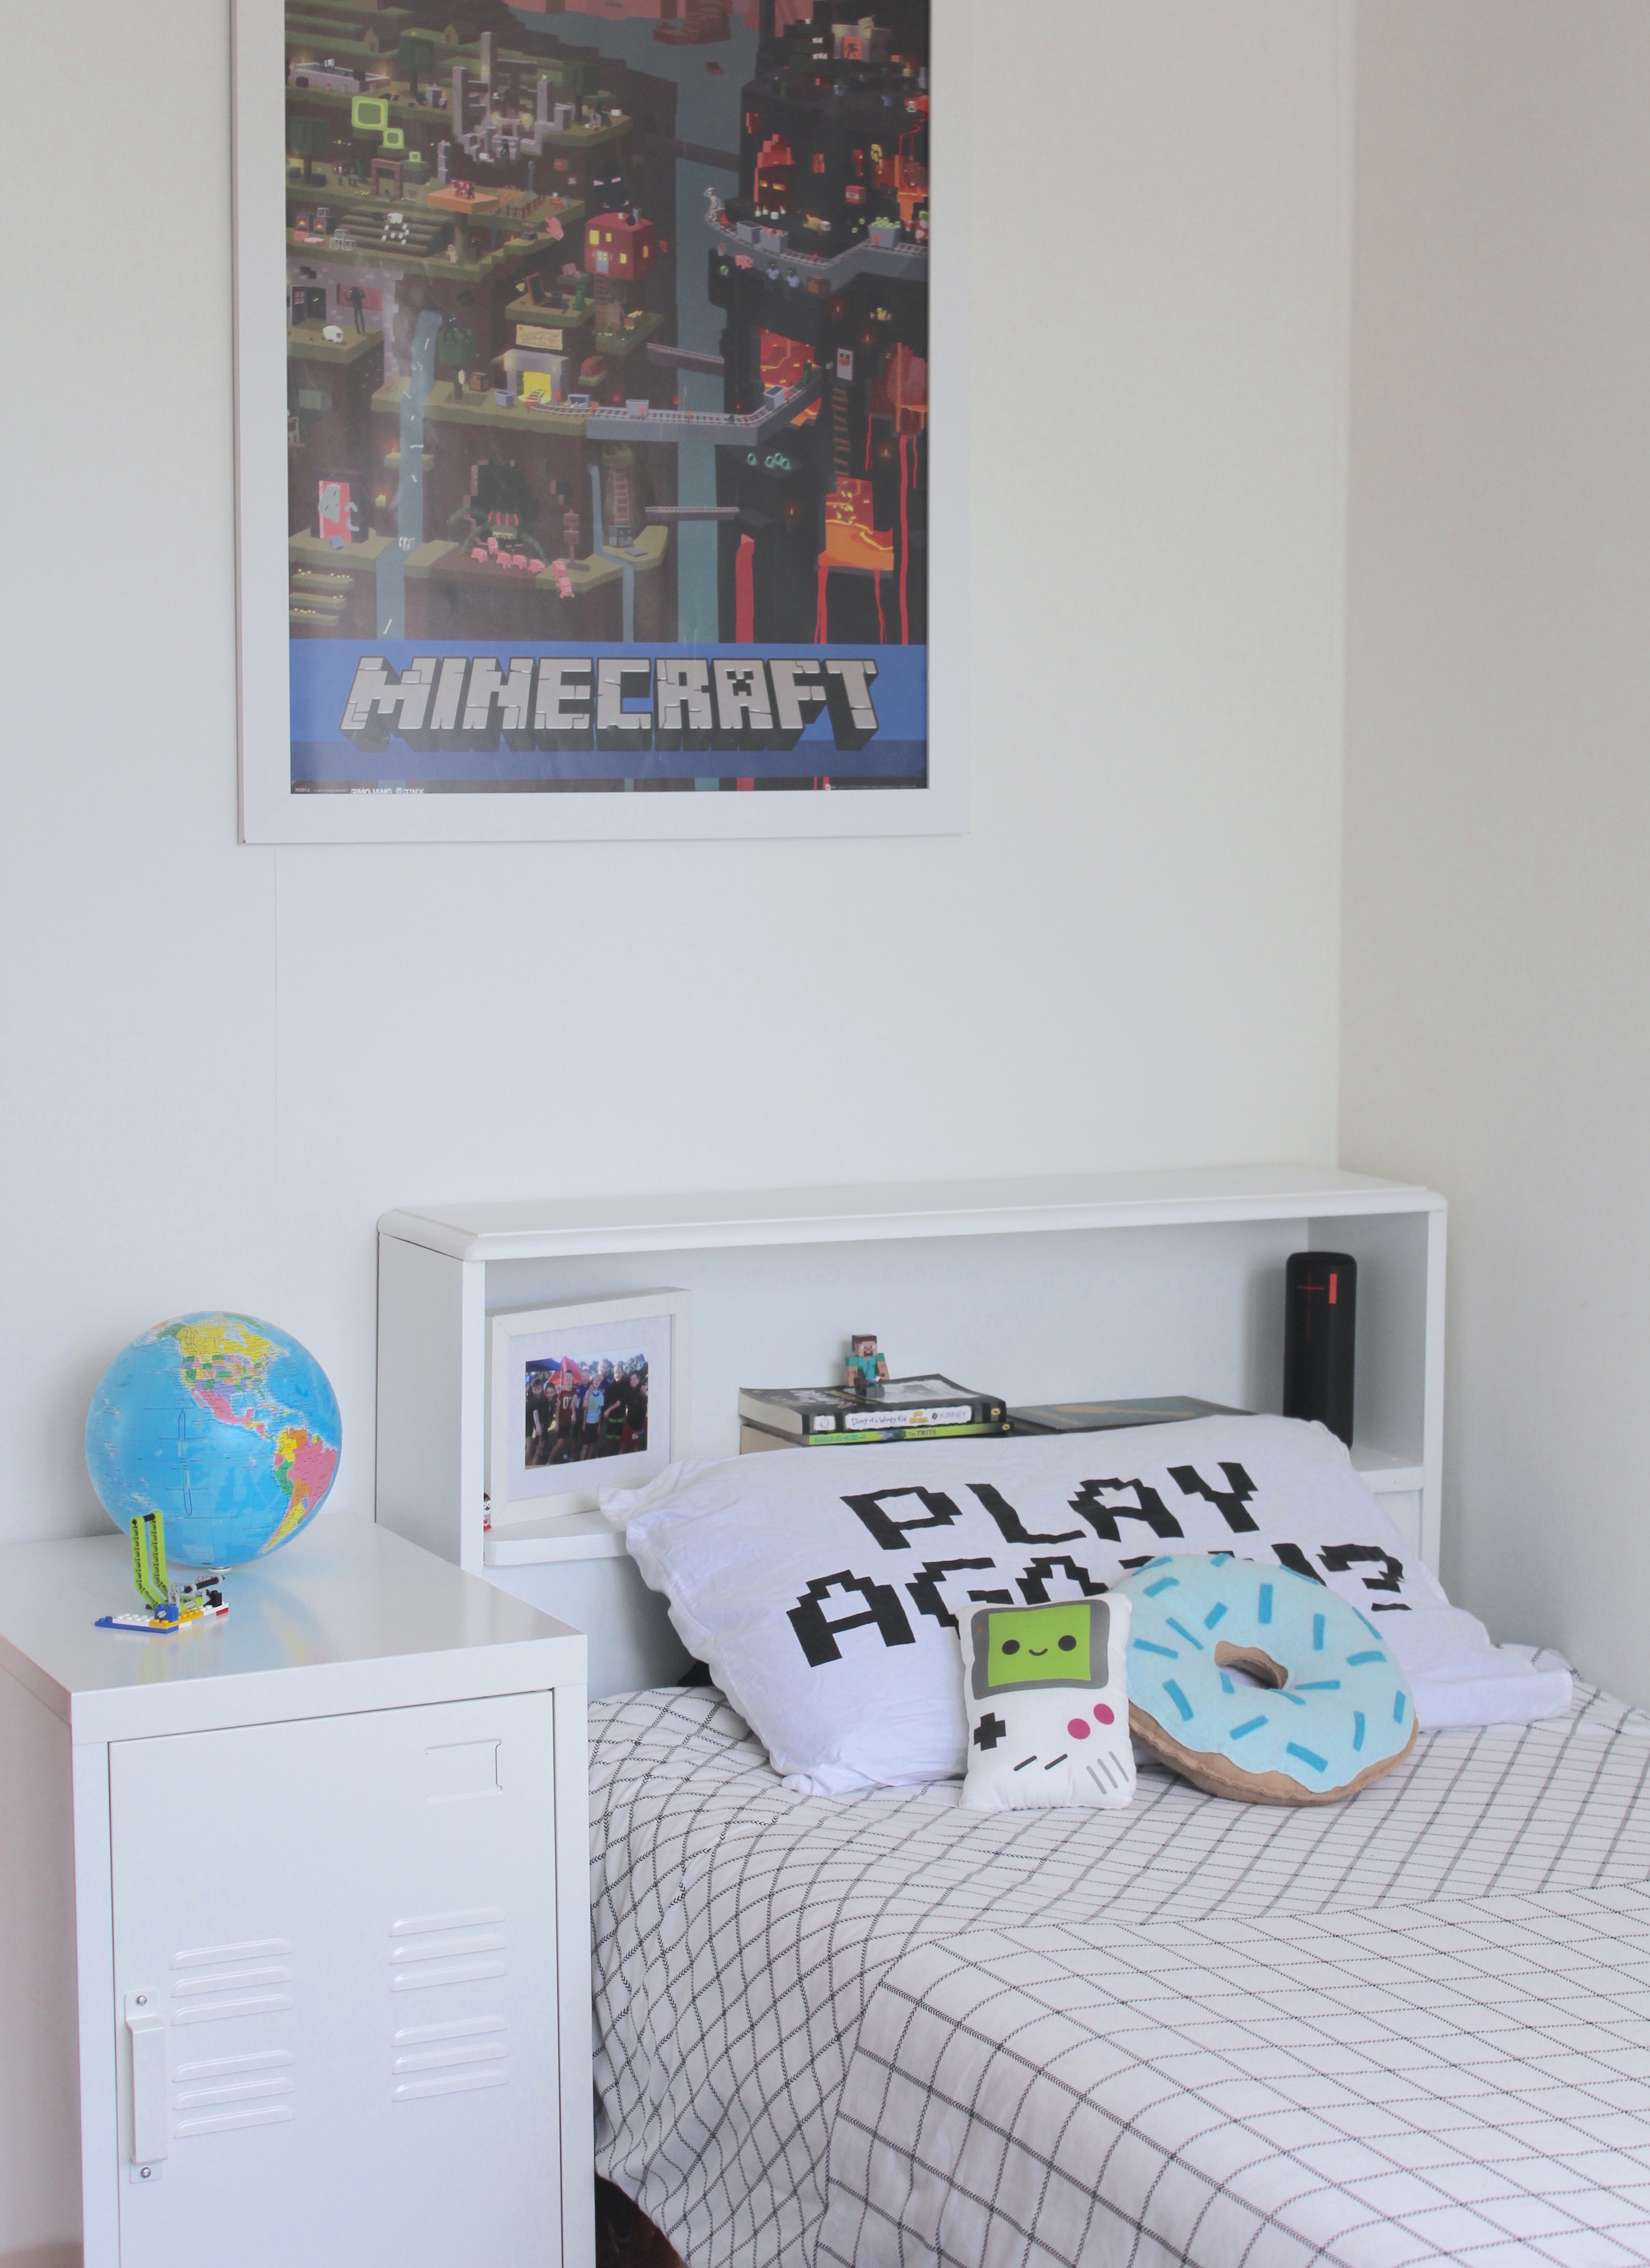
]]>Although Jimmy’s room had been made over, our older son Dylan had been a work in progress while I was still searching for a few key pieces to finish the look of the space. His bed had always looked unfinished and I wanted to find a bedhead that suited his room.
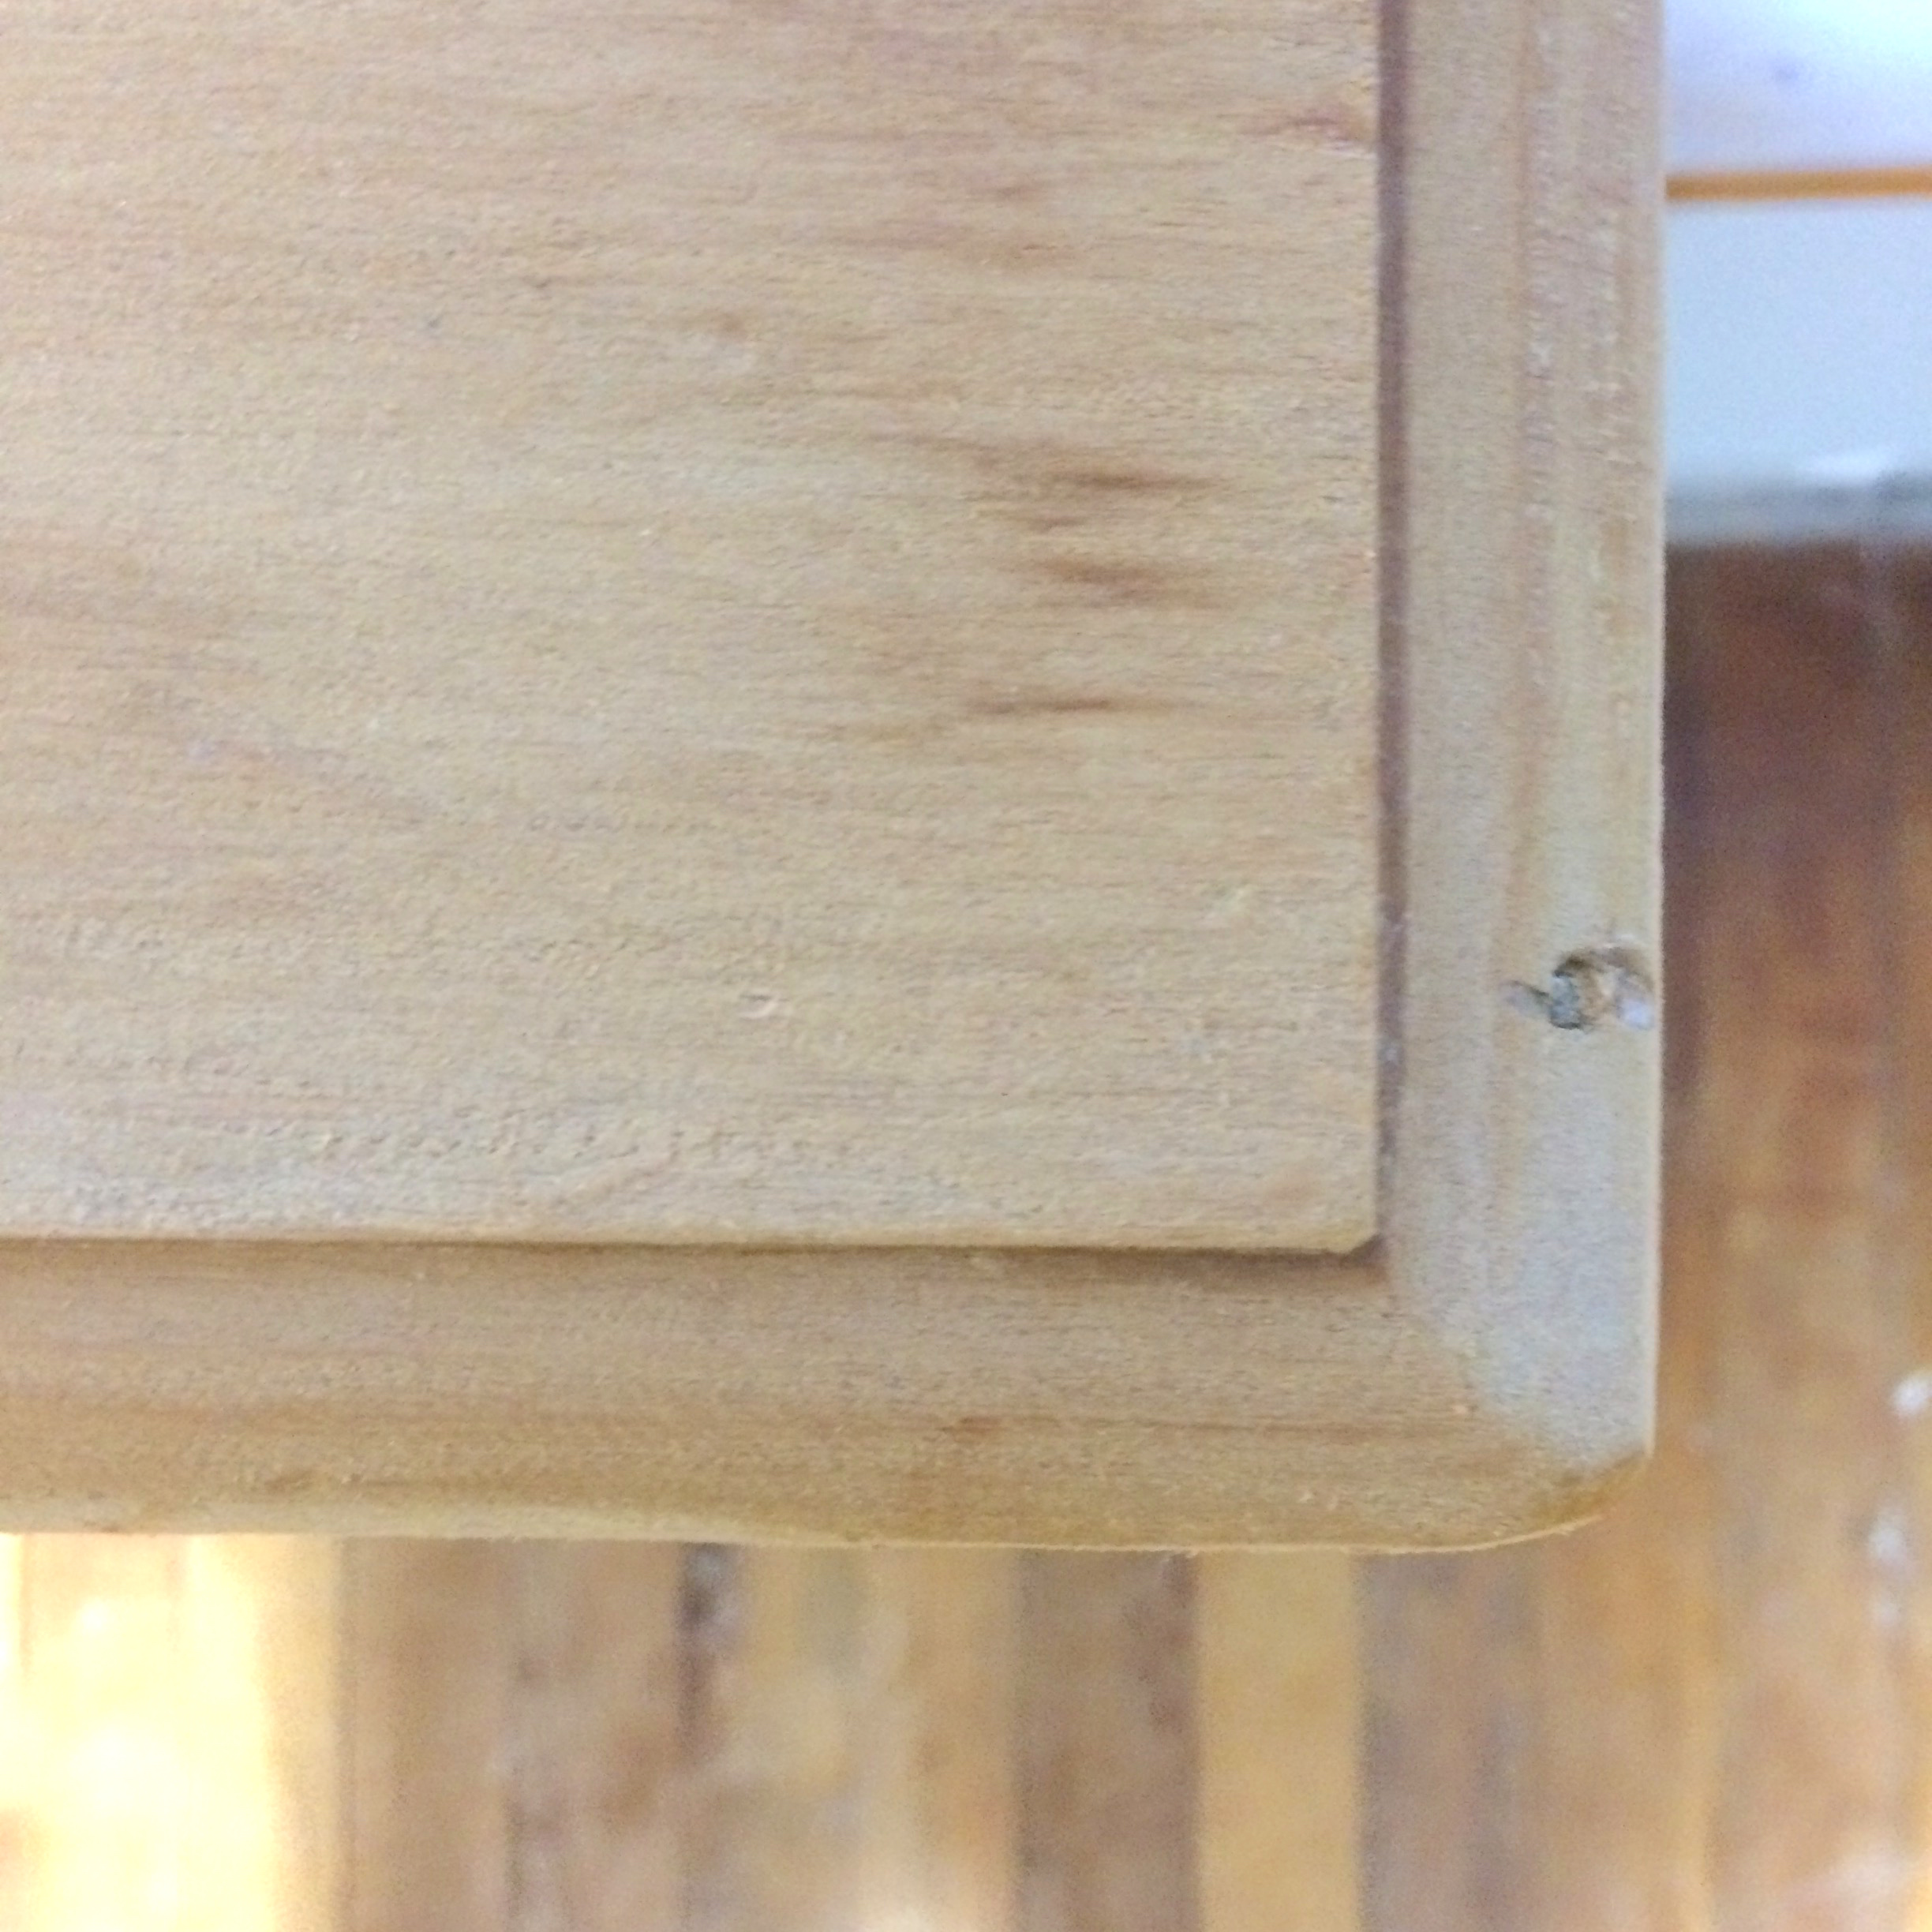
While searching through our local Red Cross, I stumbled across an old timber bedhead with a recessed shelf. The bedhead was the perfect size, and didn’t have any structural damage to it. It was simply in need of a good sanding to remove the yellow tinged varnish and smooth out some of the rough finishes to the timber.

Better yet it was only $5 and if Dylan didn’t like the finished product, we could return it to Red Cross or sell it. Plus a fun weekend project to get stuck in to with the boys and a good excuse to get out the power tools and paint.
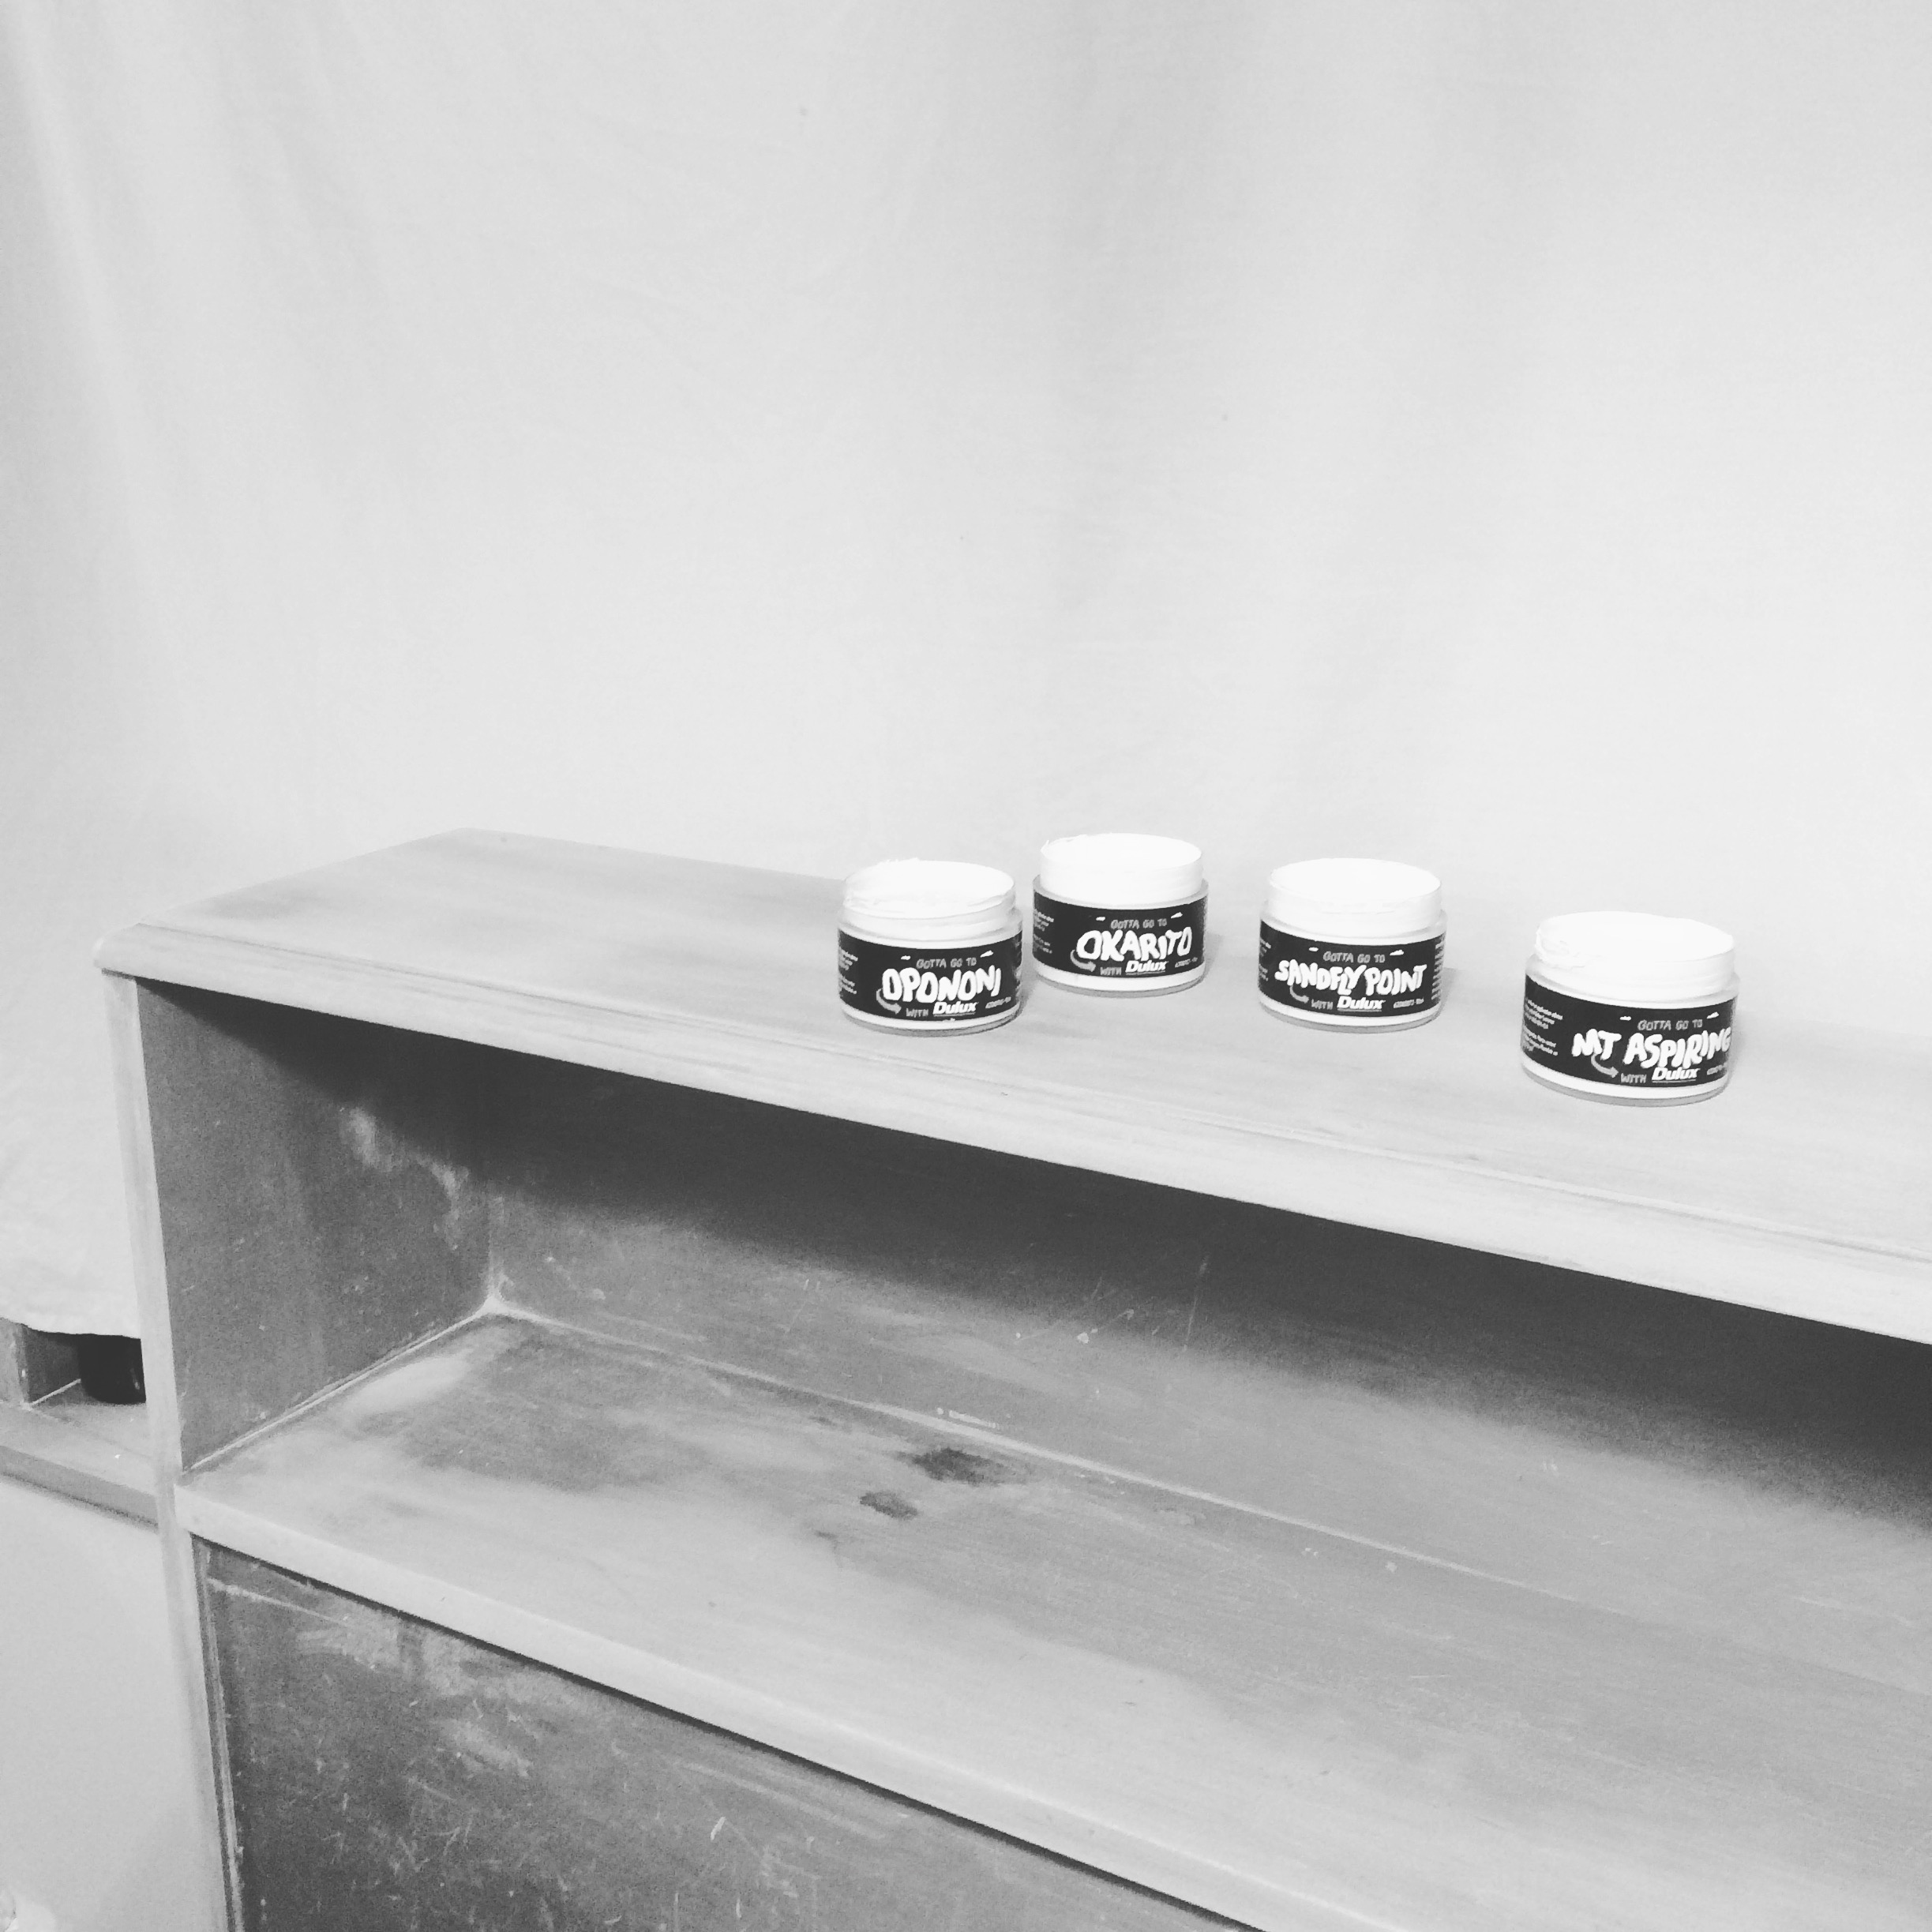
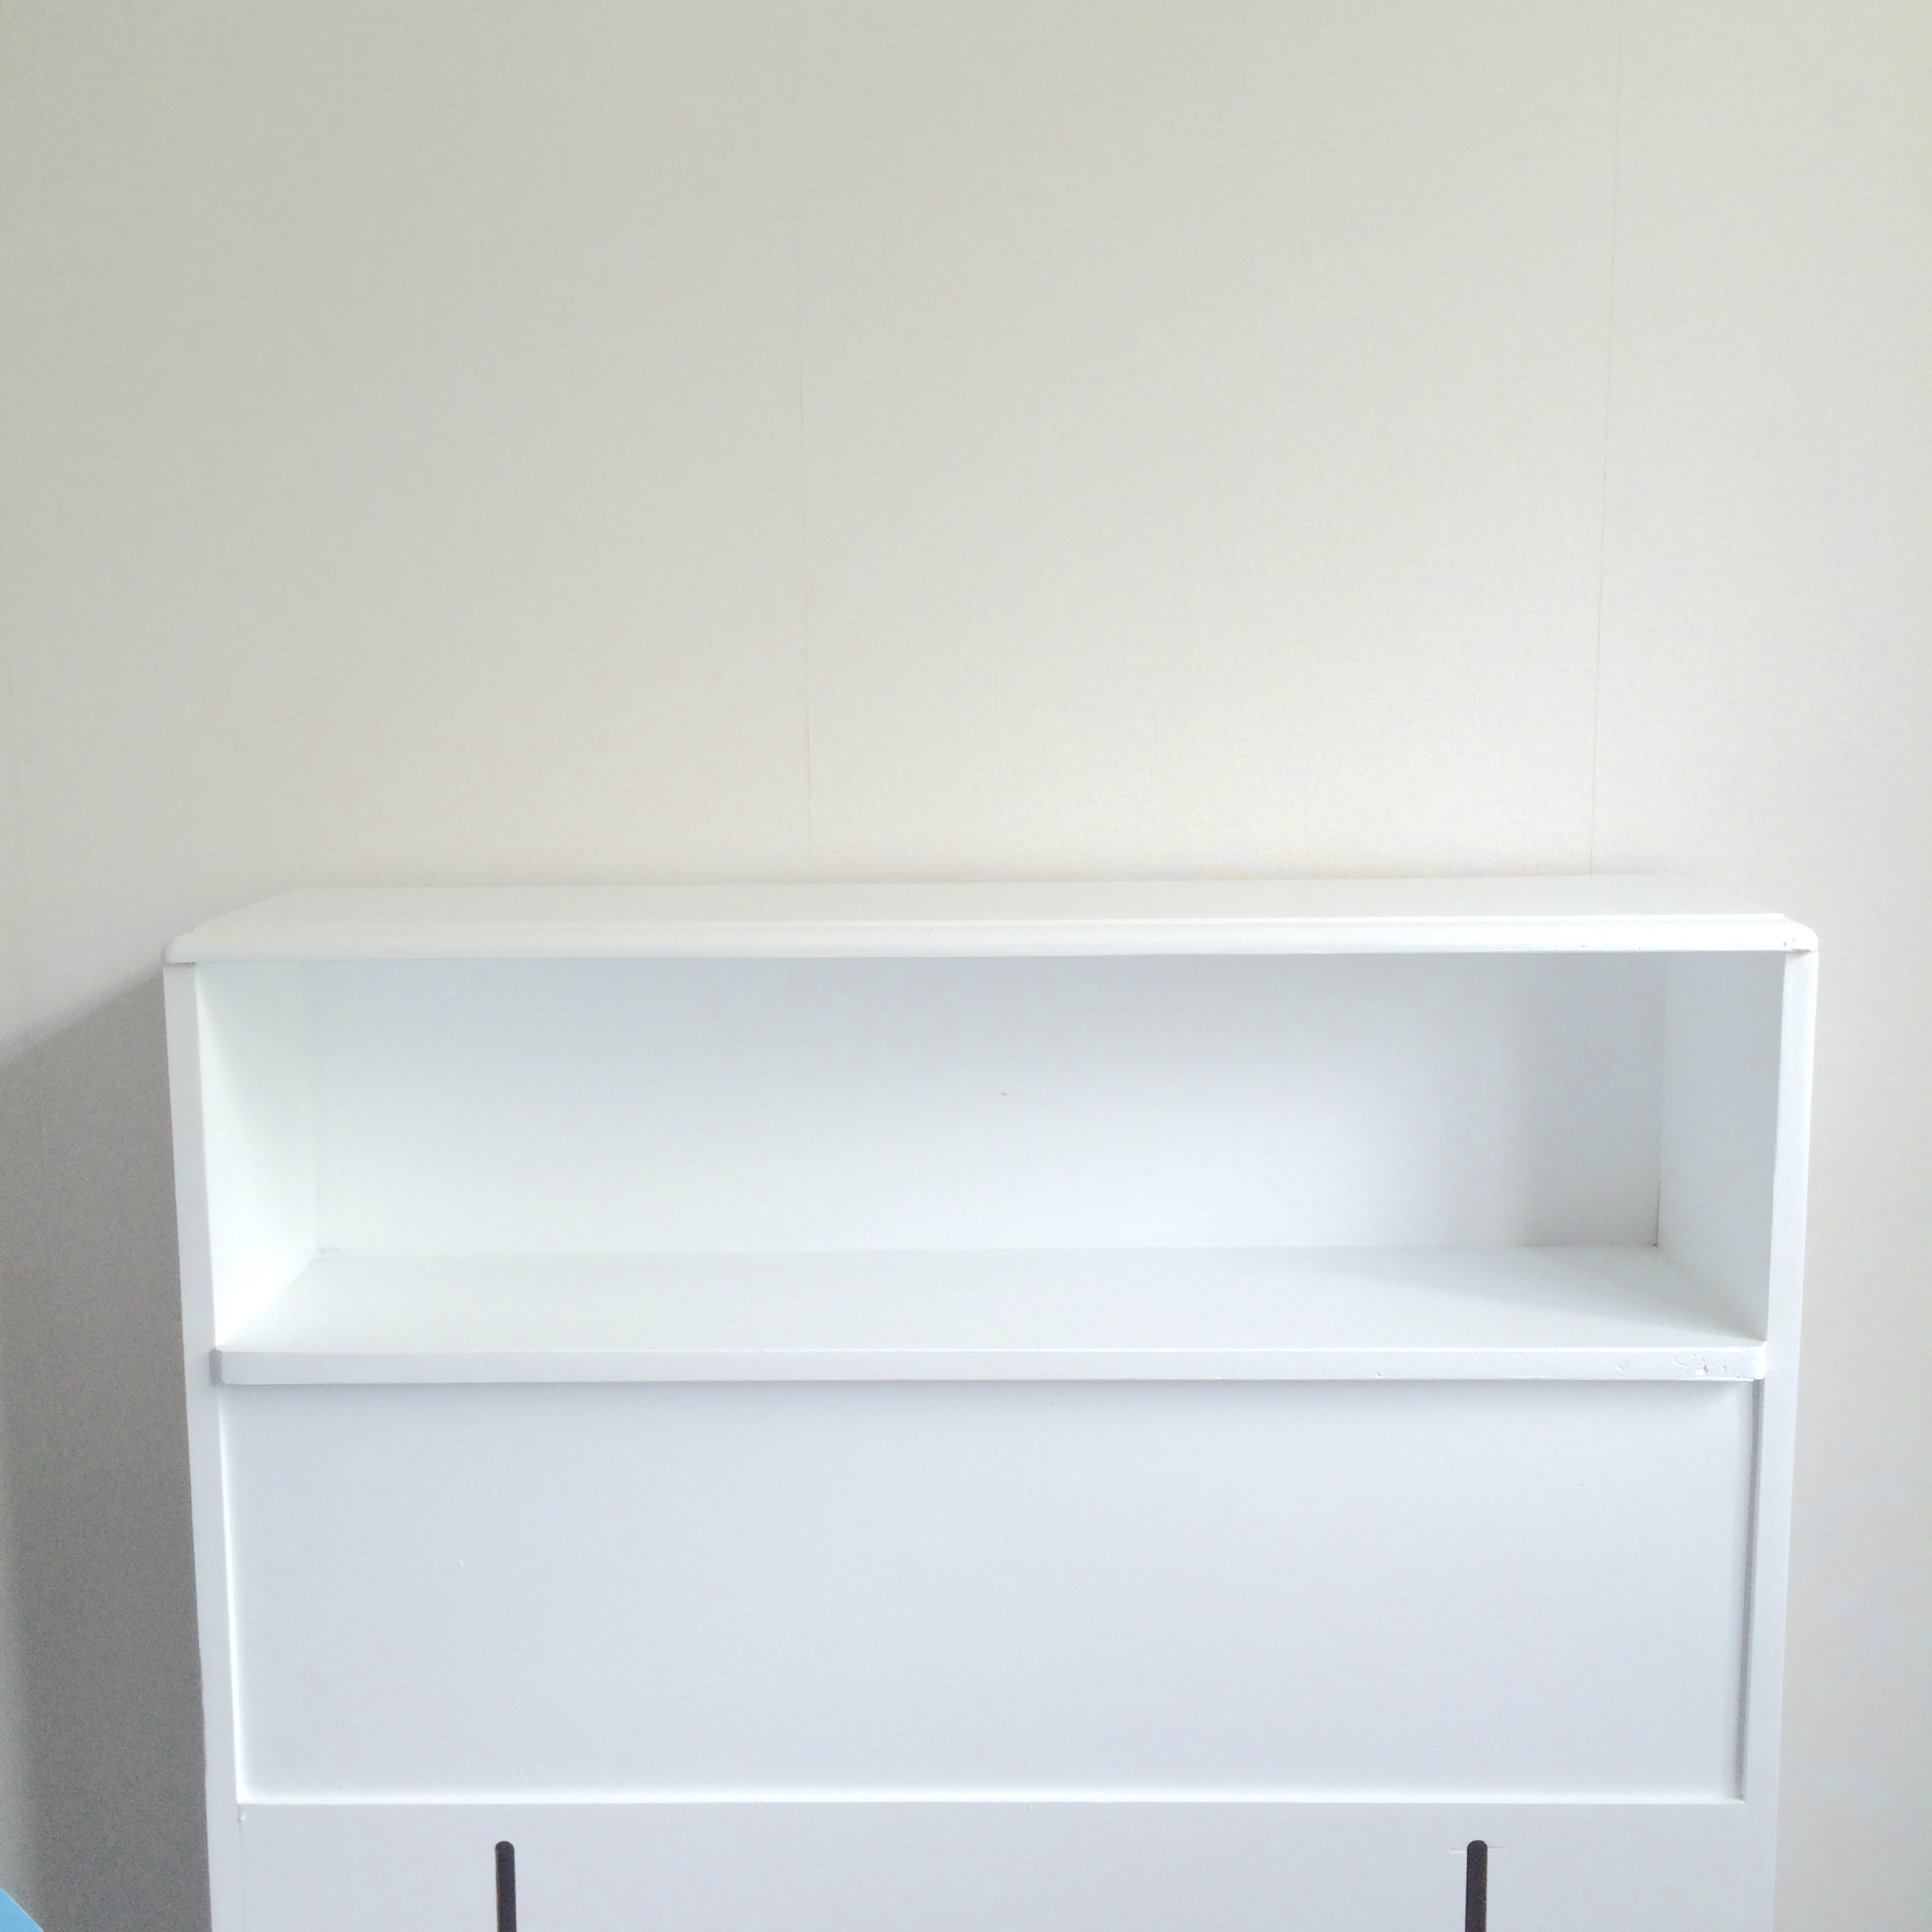
Initially the yellow stain was throwing it off for me and I wasn’t 100% sure if it was going to work. After sanding, priming and painting in Dulux Okarito White, the finished product was better than expected. A cheap project for a total spend of $15 and a great functional piece of furniture that Dylan can style himself.

The post DIY Recessed bedhead appeared first on The Home Scene.
]]>The post Style your entryway appeared first on The Home Scene.
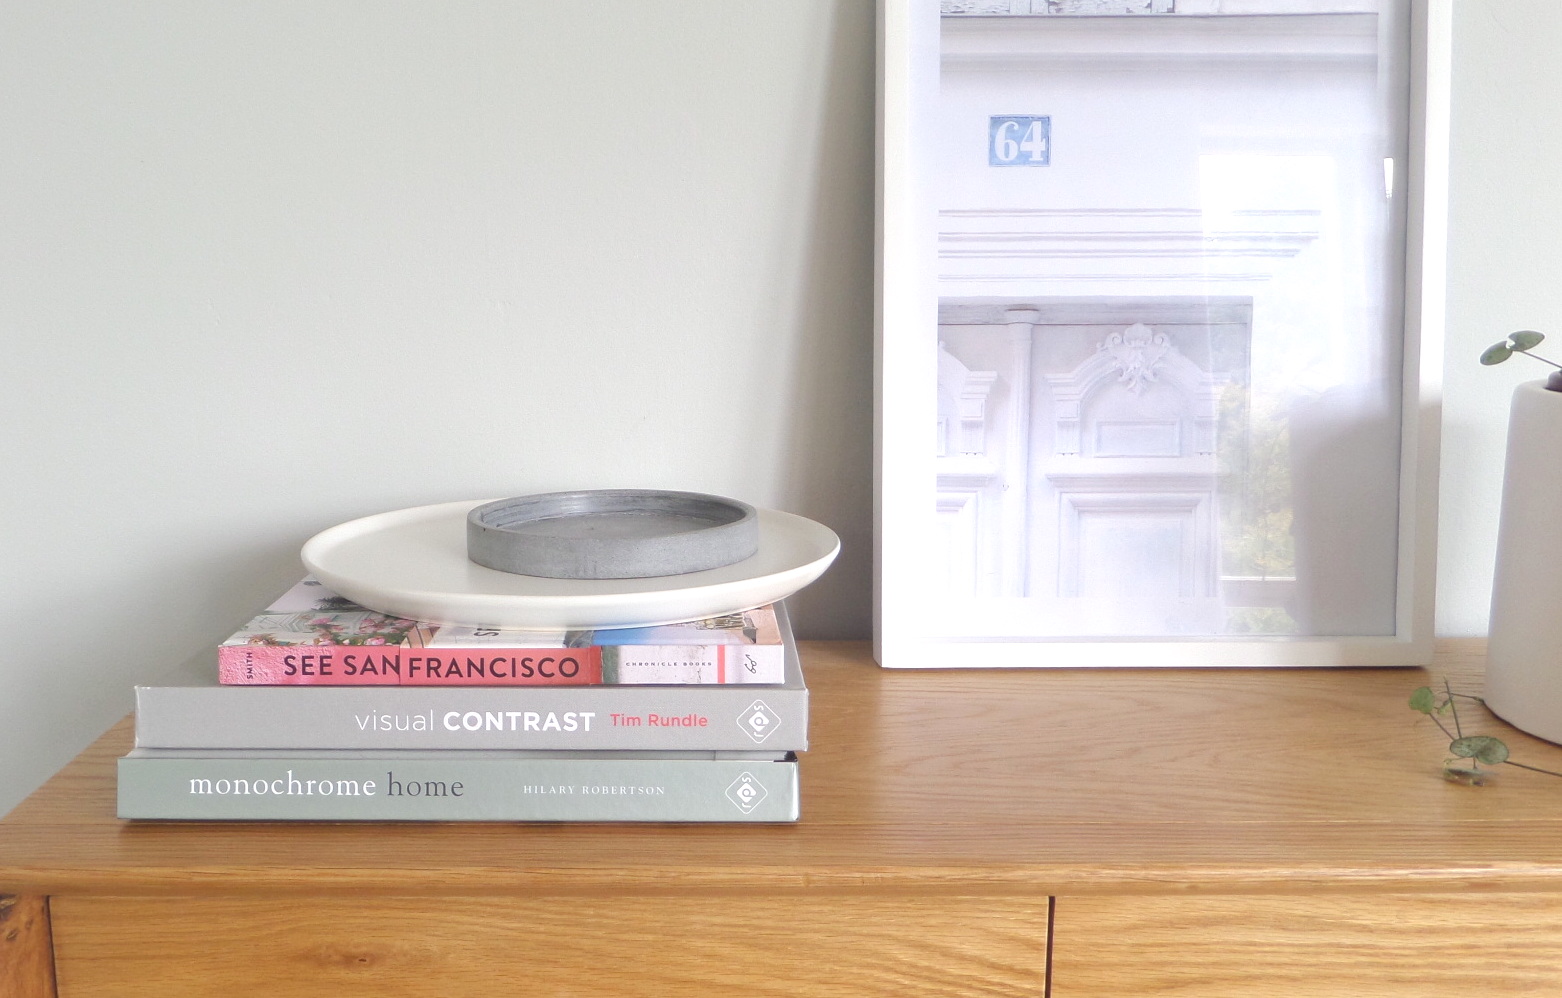
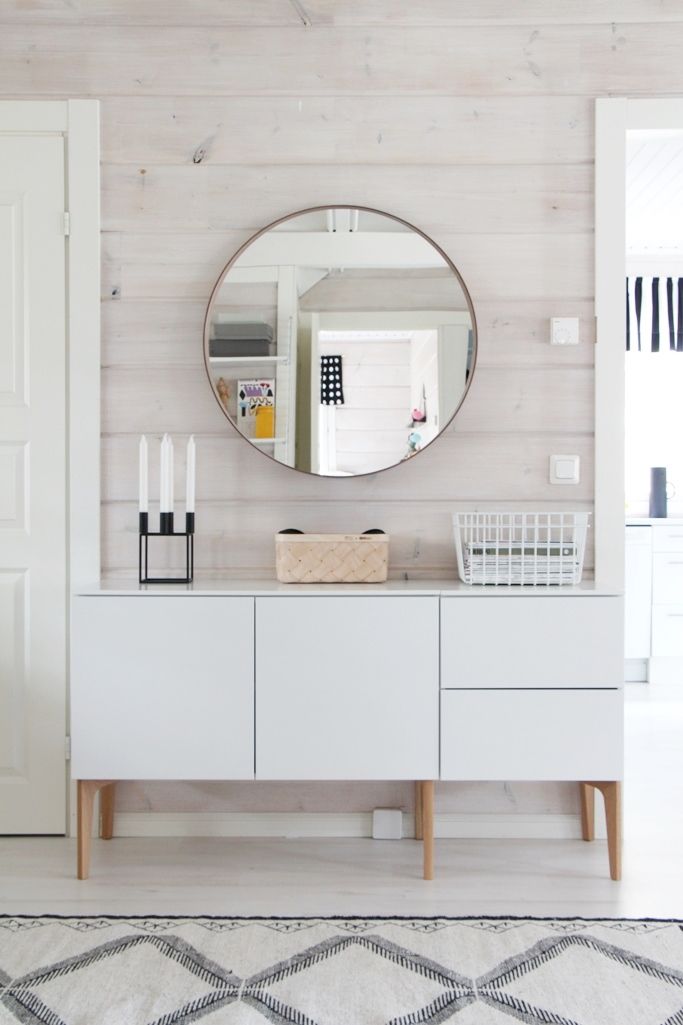
]]>Styling your entryway doesn’t need to be fussy or over complicated. Think stylish and functional with a pared back and tidy approach. Showcase a few of your favourite things and provide a landing space for those items such as your keys and wallet you want to keep out of sight but readily accessible.
Our Piccadilly Console from Freedom Furniture table takes pride of place in our own entryway. The narrow depth of the console is perfect for our small space and the natural oak fits in with our overall style and allows me to change up the homewares as often as I like.
You don’t have to be an interior designer or stylist to make your entryway appealing, all you need is a few key homewares that you love, and a great print or two to hang on the wall or as I’ve done, place it on the table – then arrange the placement until you’re happy.
Play with texture and don’t be concerned with everything matching. If anything, avoiding matching for a more natural look. Add some large foliage such as these Monsteria leaves below, or hanging berry branches as seen above.
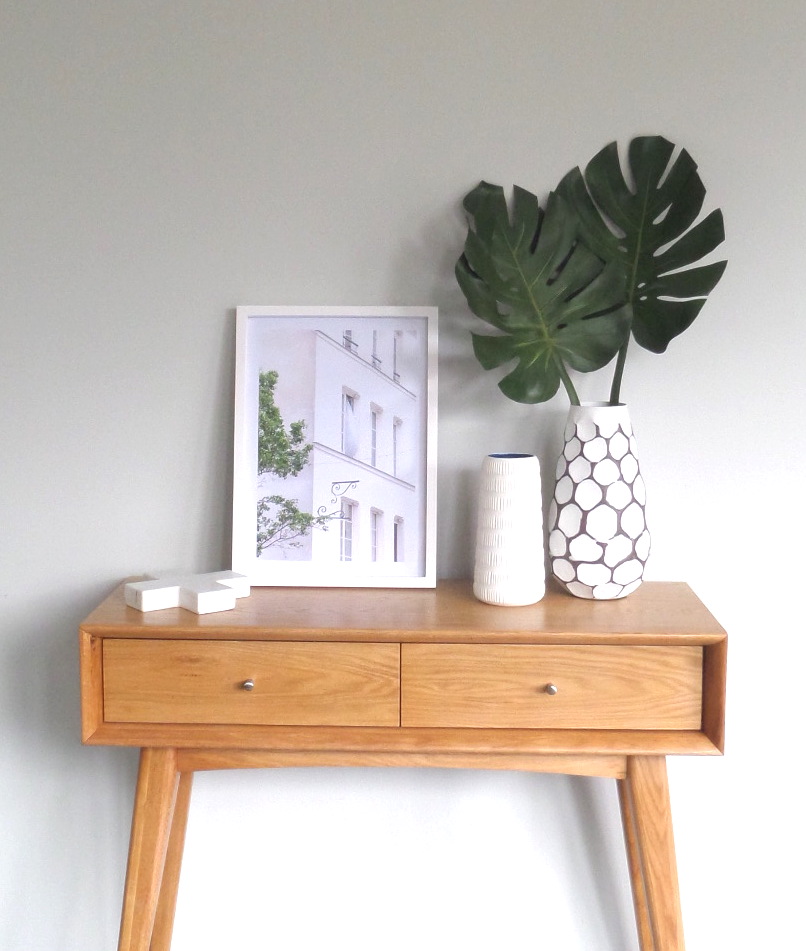
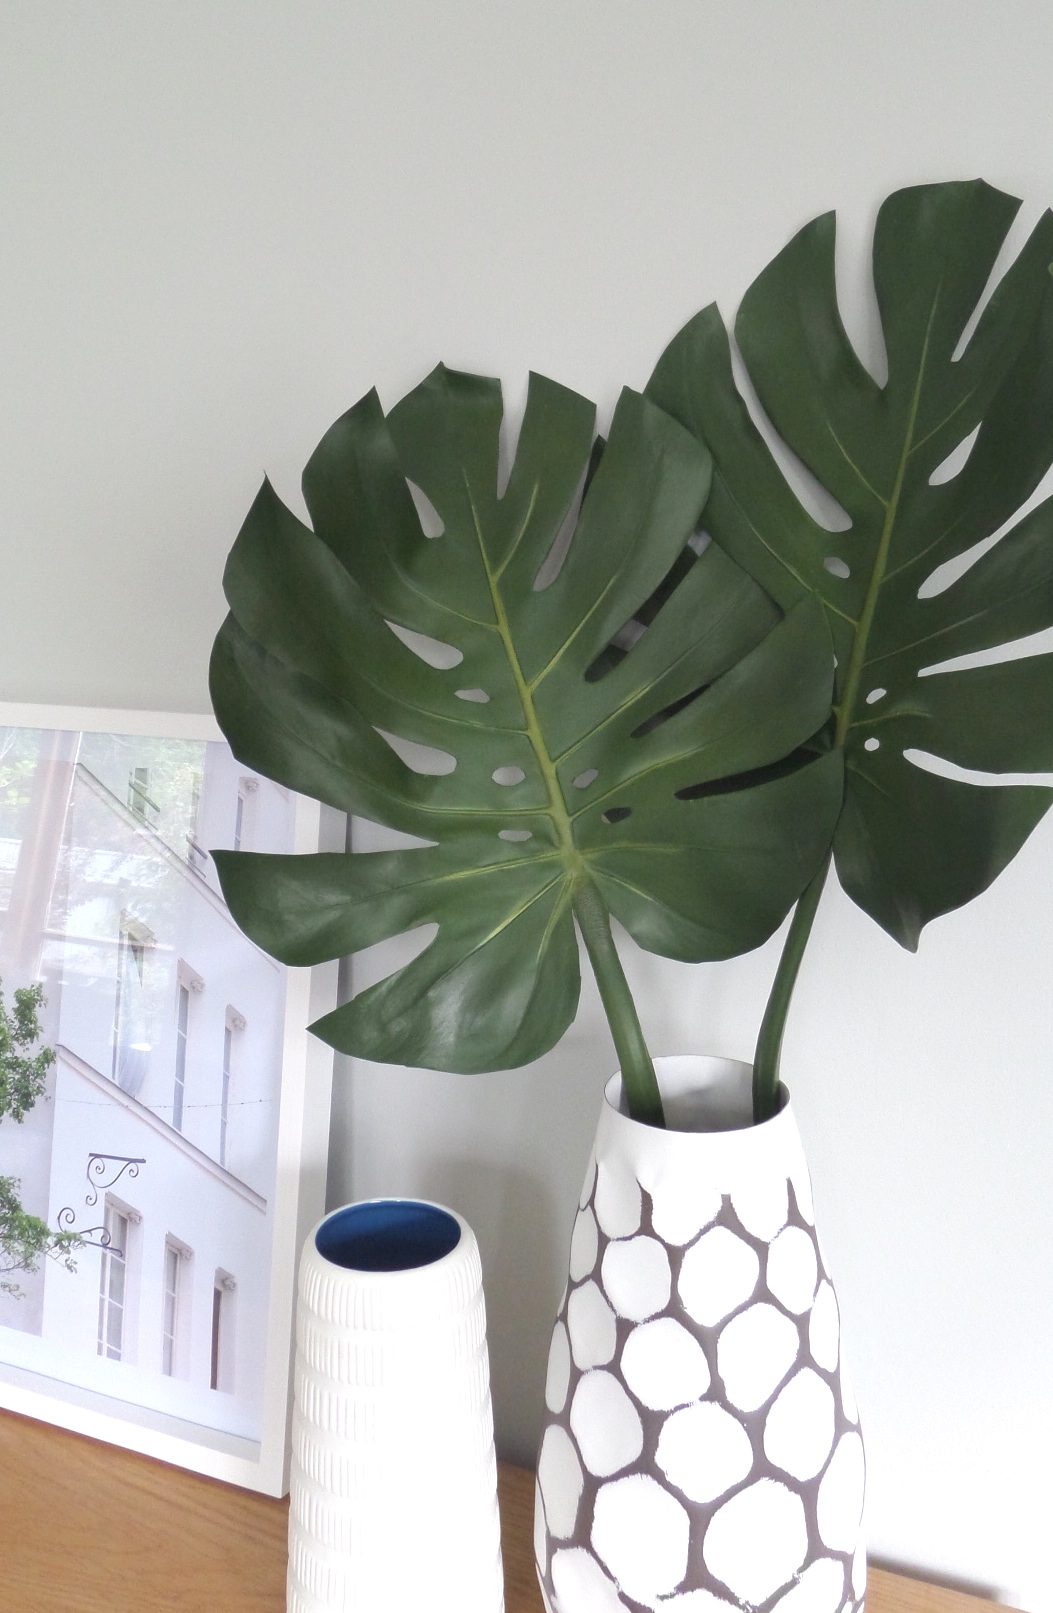
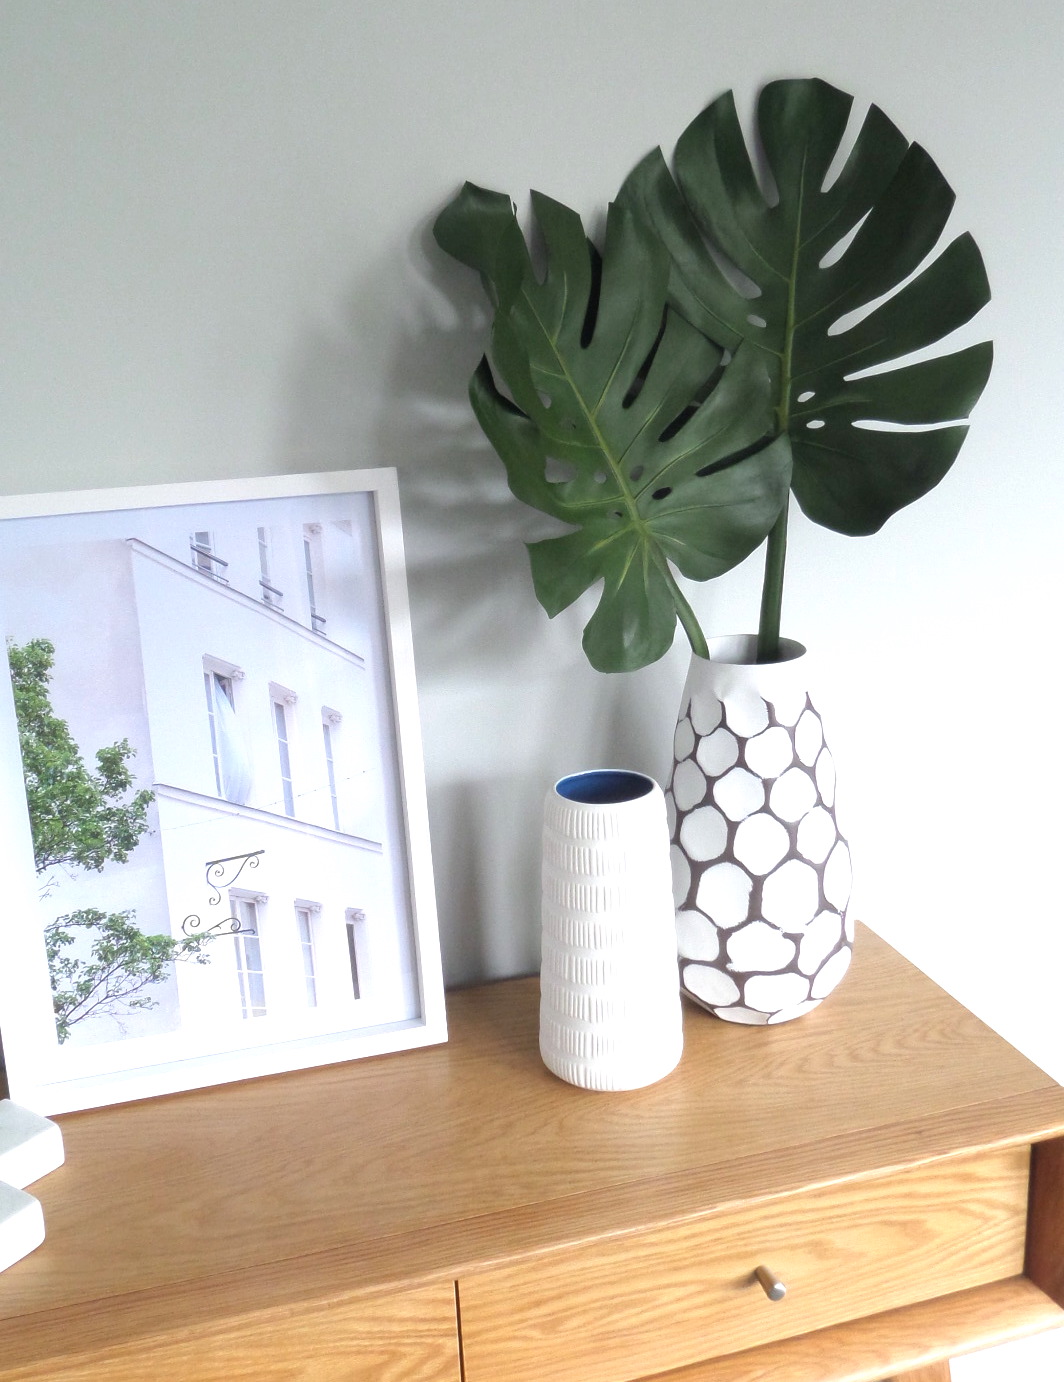
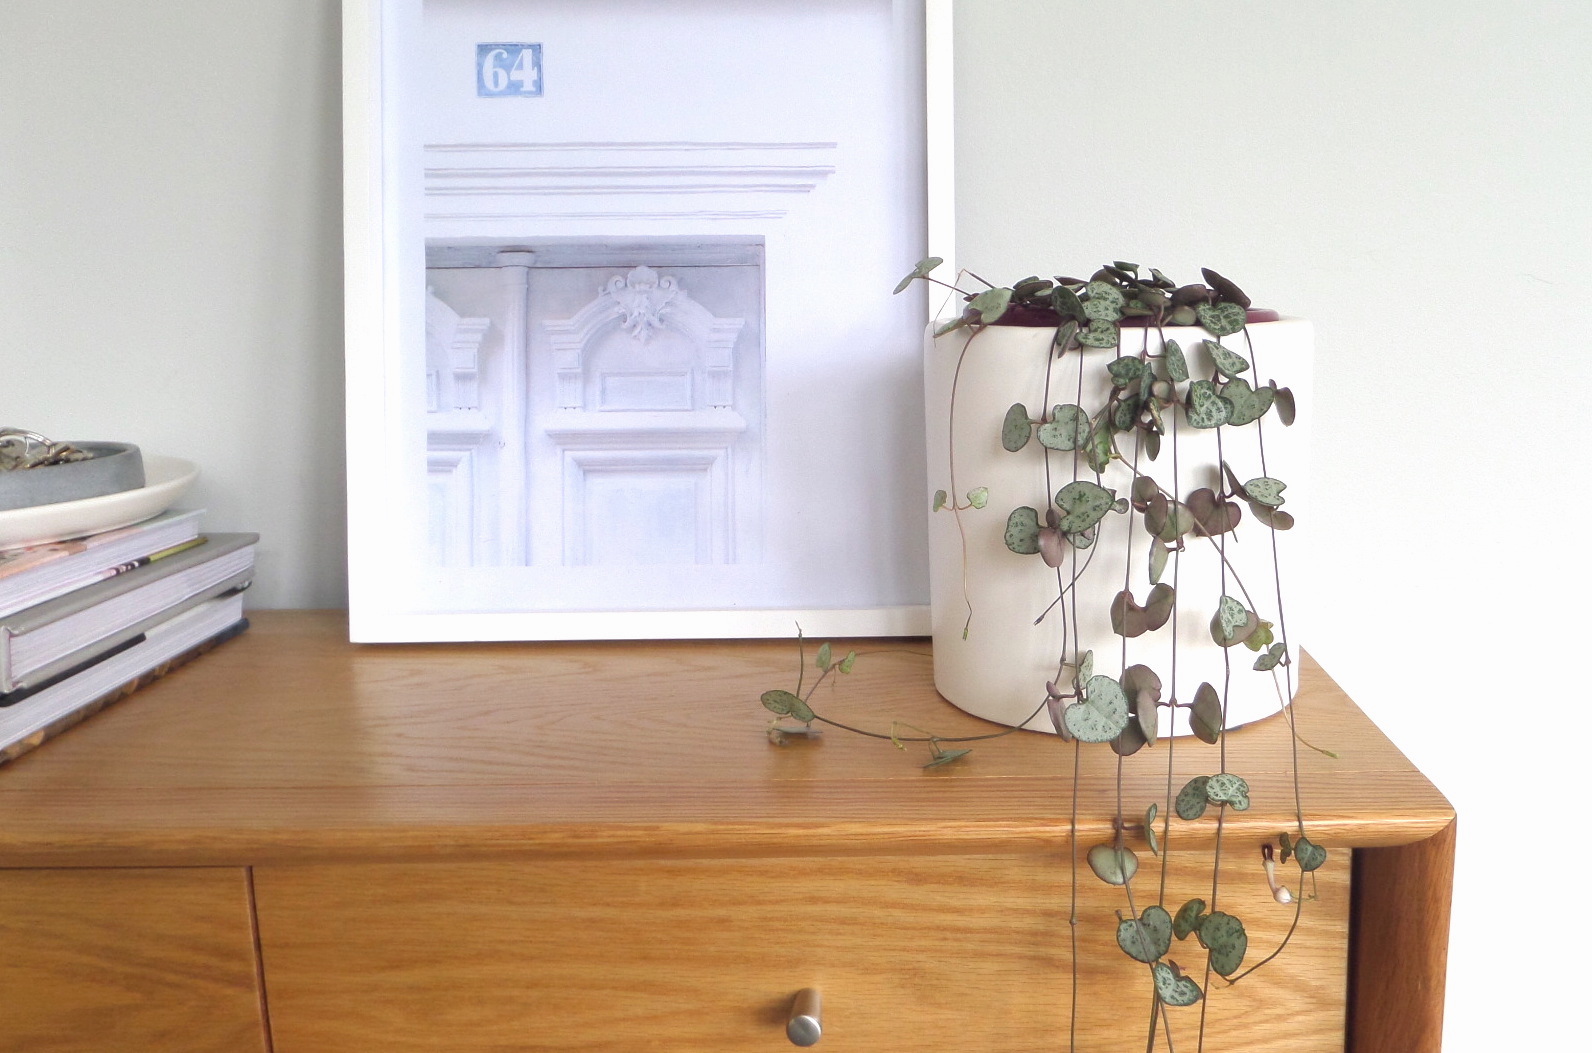
Art prints don’t always have to be hung on the wall. Casually but lovingly display them pride of place on your table and decorate around them. This allows you to change them up as much as you like. I have a number of Print by George‘s prints in our home and love walking in our front door and being greeted by her talented work.
Incorporate a few of your favourite books as well rather than leave them to collect dust on your bookcase. Stack a few of your favourites or choose those with colour on the spine for a bit of detail.

You don’t have to stop there.
Place a mirror above your entryway table, a rug or runner and add a basket to the side for shoes, scarves and hats. A potted plant in a simple plant stand or change up your art and homewares and you have an inexpensive way to refresh your entrance way.
What are your favourite homewares you like to display in your entryway?

The post Style your entryway appeared first on The Home Scene.
]]>The post Weekend Reno’s appeared first on The Home Scene.
]]>Over the process of renovating our first home, a lot of planned projects had been put on hold until money was available in the budget. This stems from starting the renovation journey at ages 21 and 22, with entry level incomes, and growing our family.
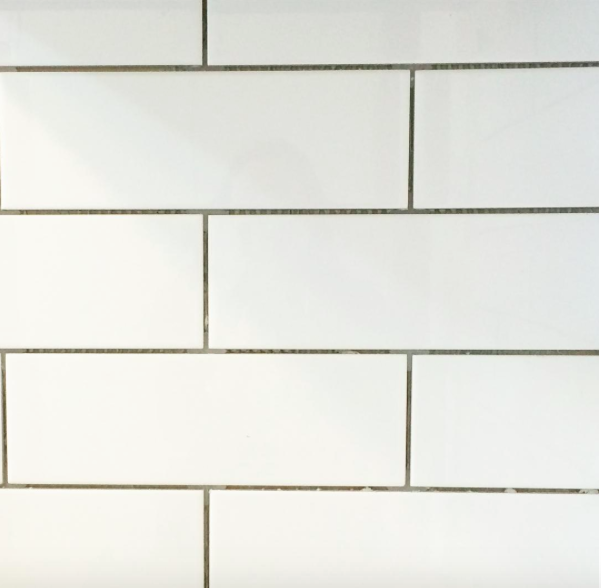
The kitchen is always an issue with former state homes, and ours was no exception. We completely gutted the kitchen and installed a new streamlined, clean, white kitchen, opening up the space and bringing into the new millennium. After enjoying beautiful exposed Gib walls for nearly a year, it was time to get the tiling ticked and finishing painting this area. Waiting a year with bare walls is simply a by product of my husband travelling a lot with his work as a builder in the army and timing not always being available.
The delay worked out well from a design perspective with a change in our original thoughts of a long glass splash back to tiling. We purchased white subway tiles with a light grey grout from Mitre 10 for their simple design and the fact that they won’t date as quickly, even though they are currently trending. My love of herringbone tiles will have to wait so I’m told, we after all moving on and won’t be here long enough to enjoy them.

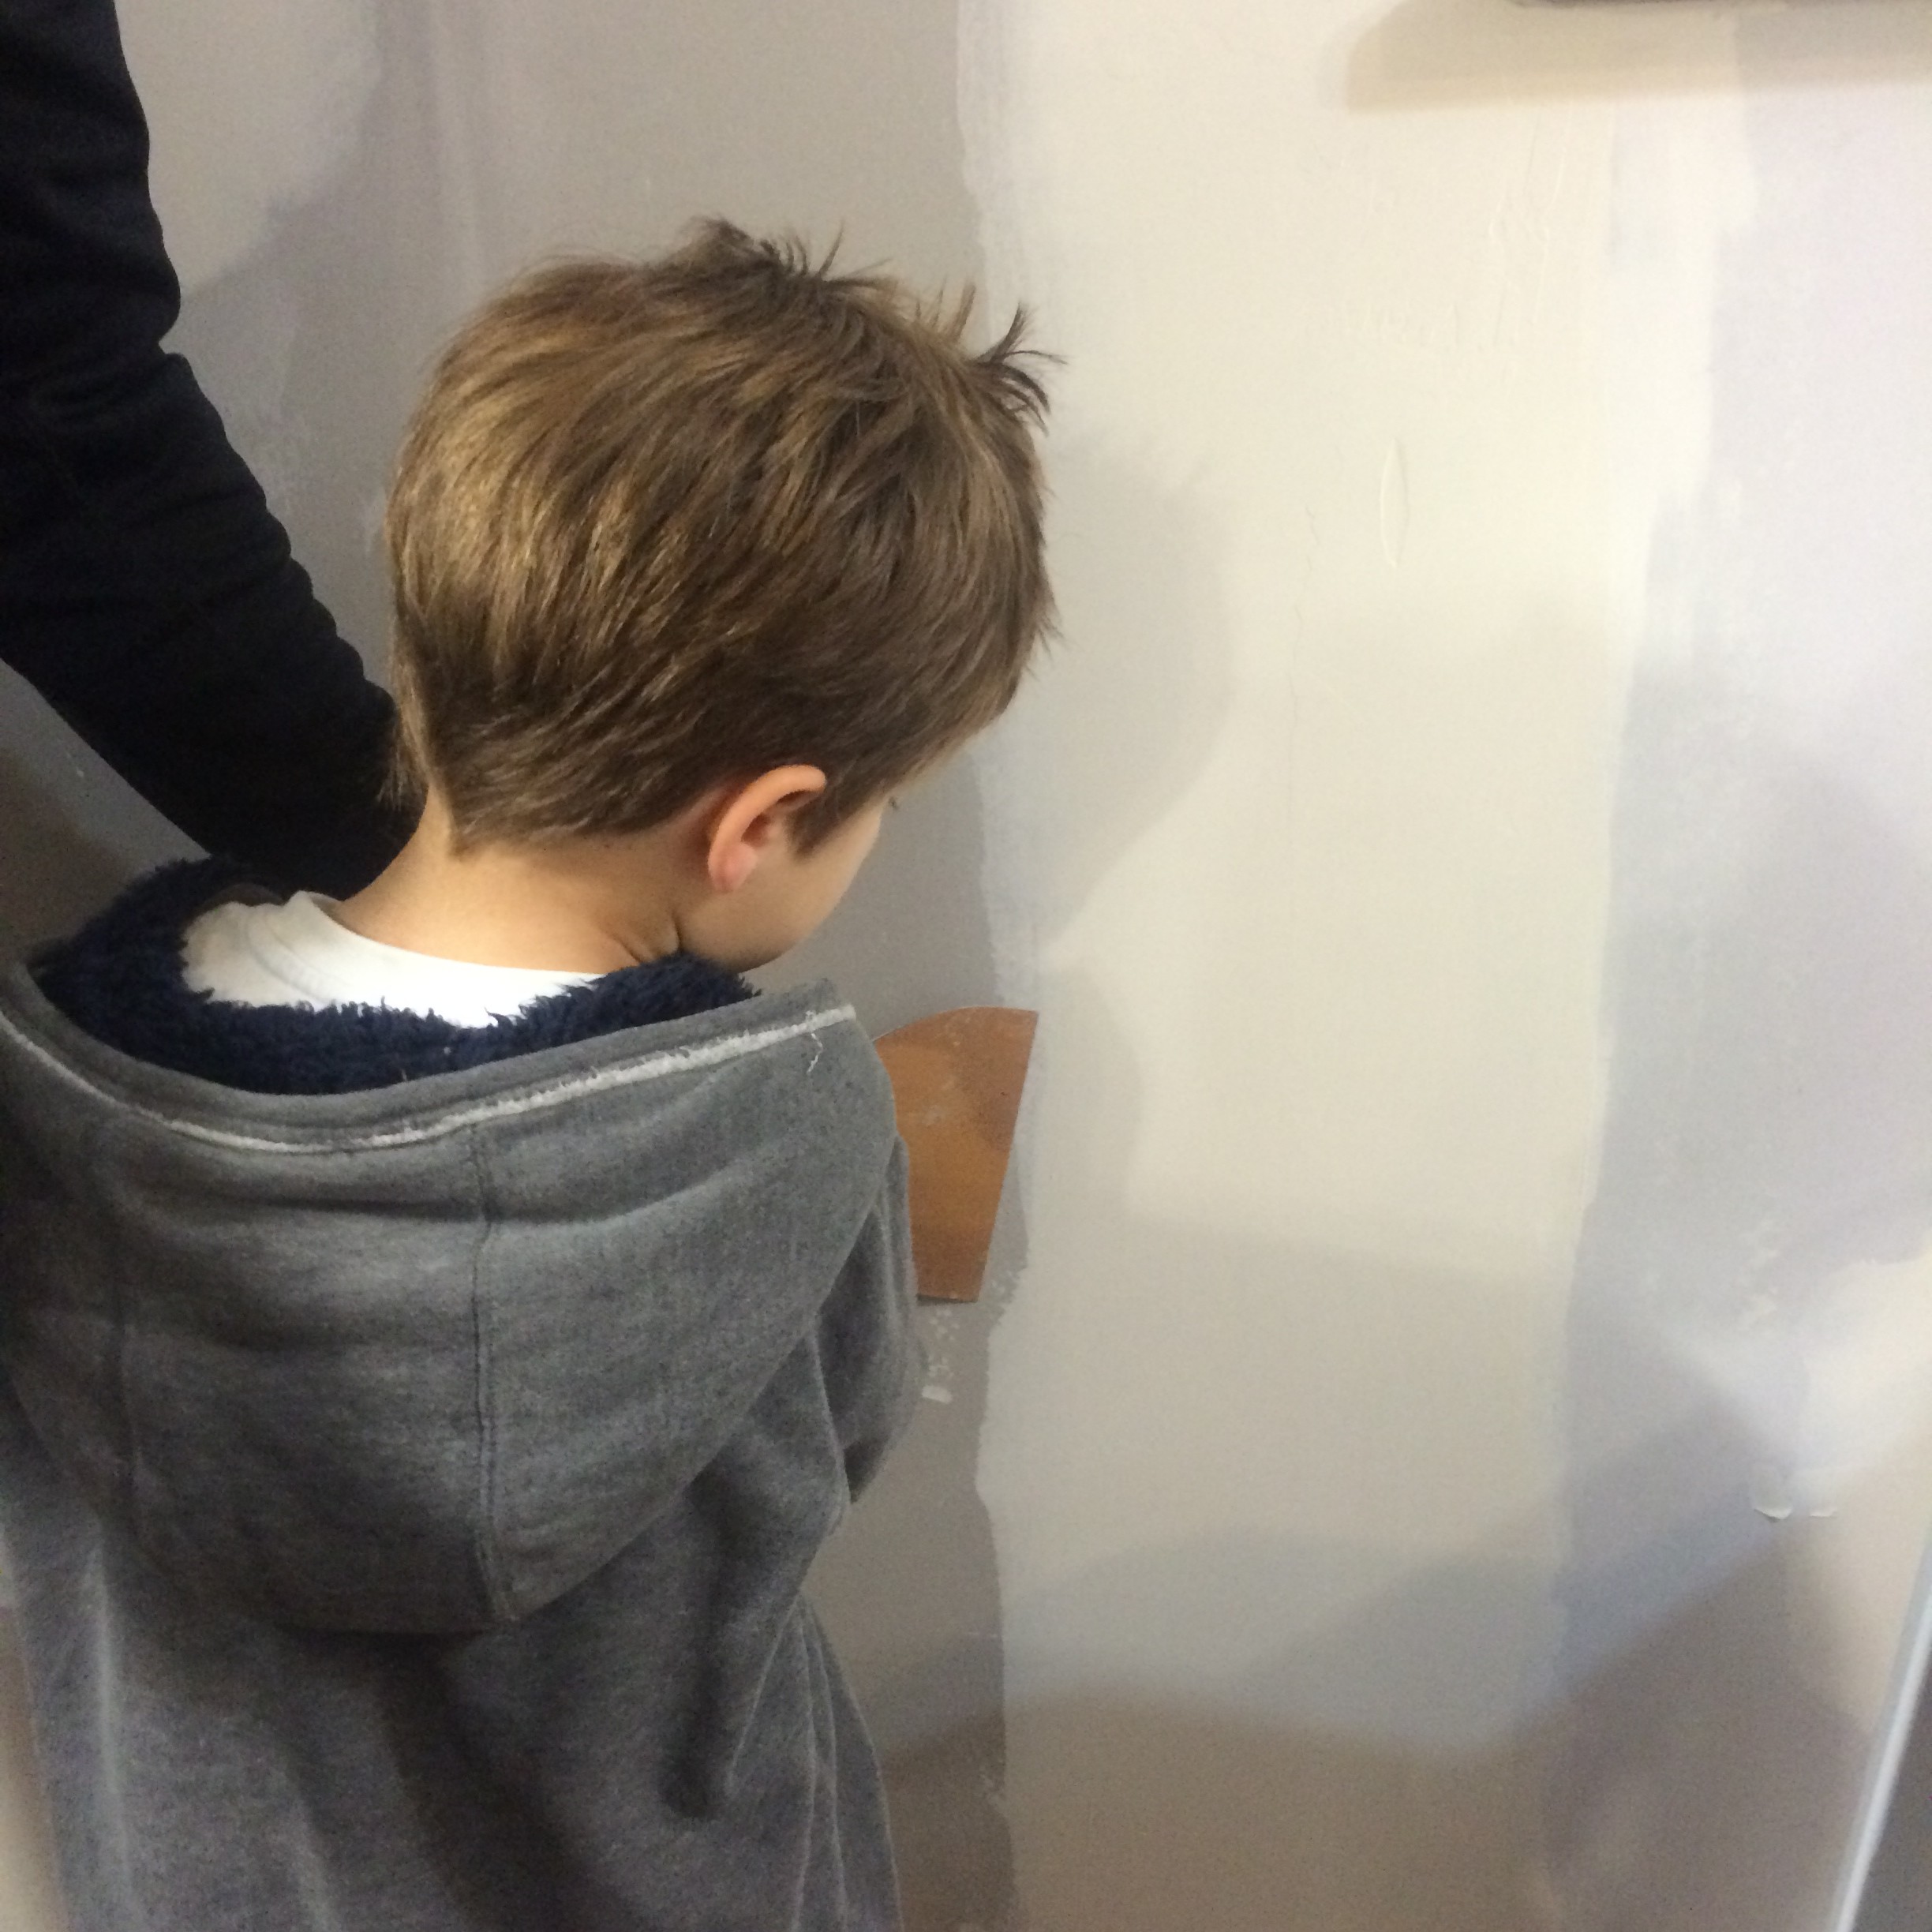
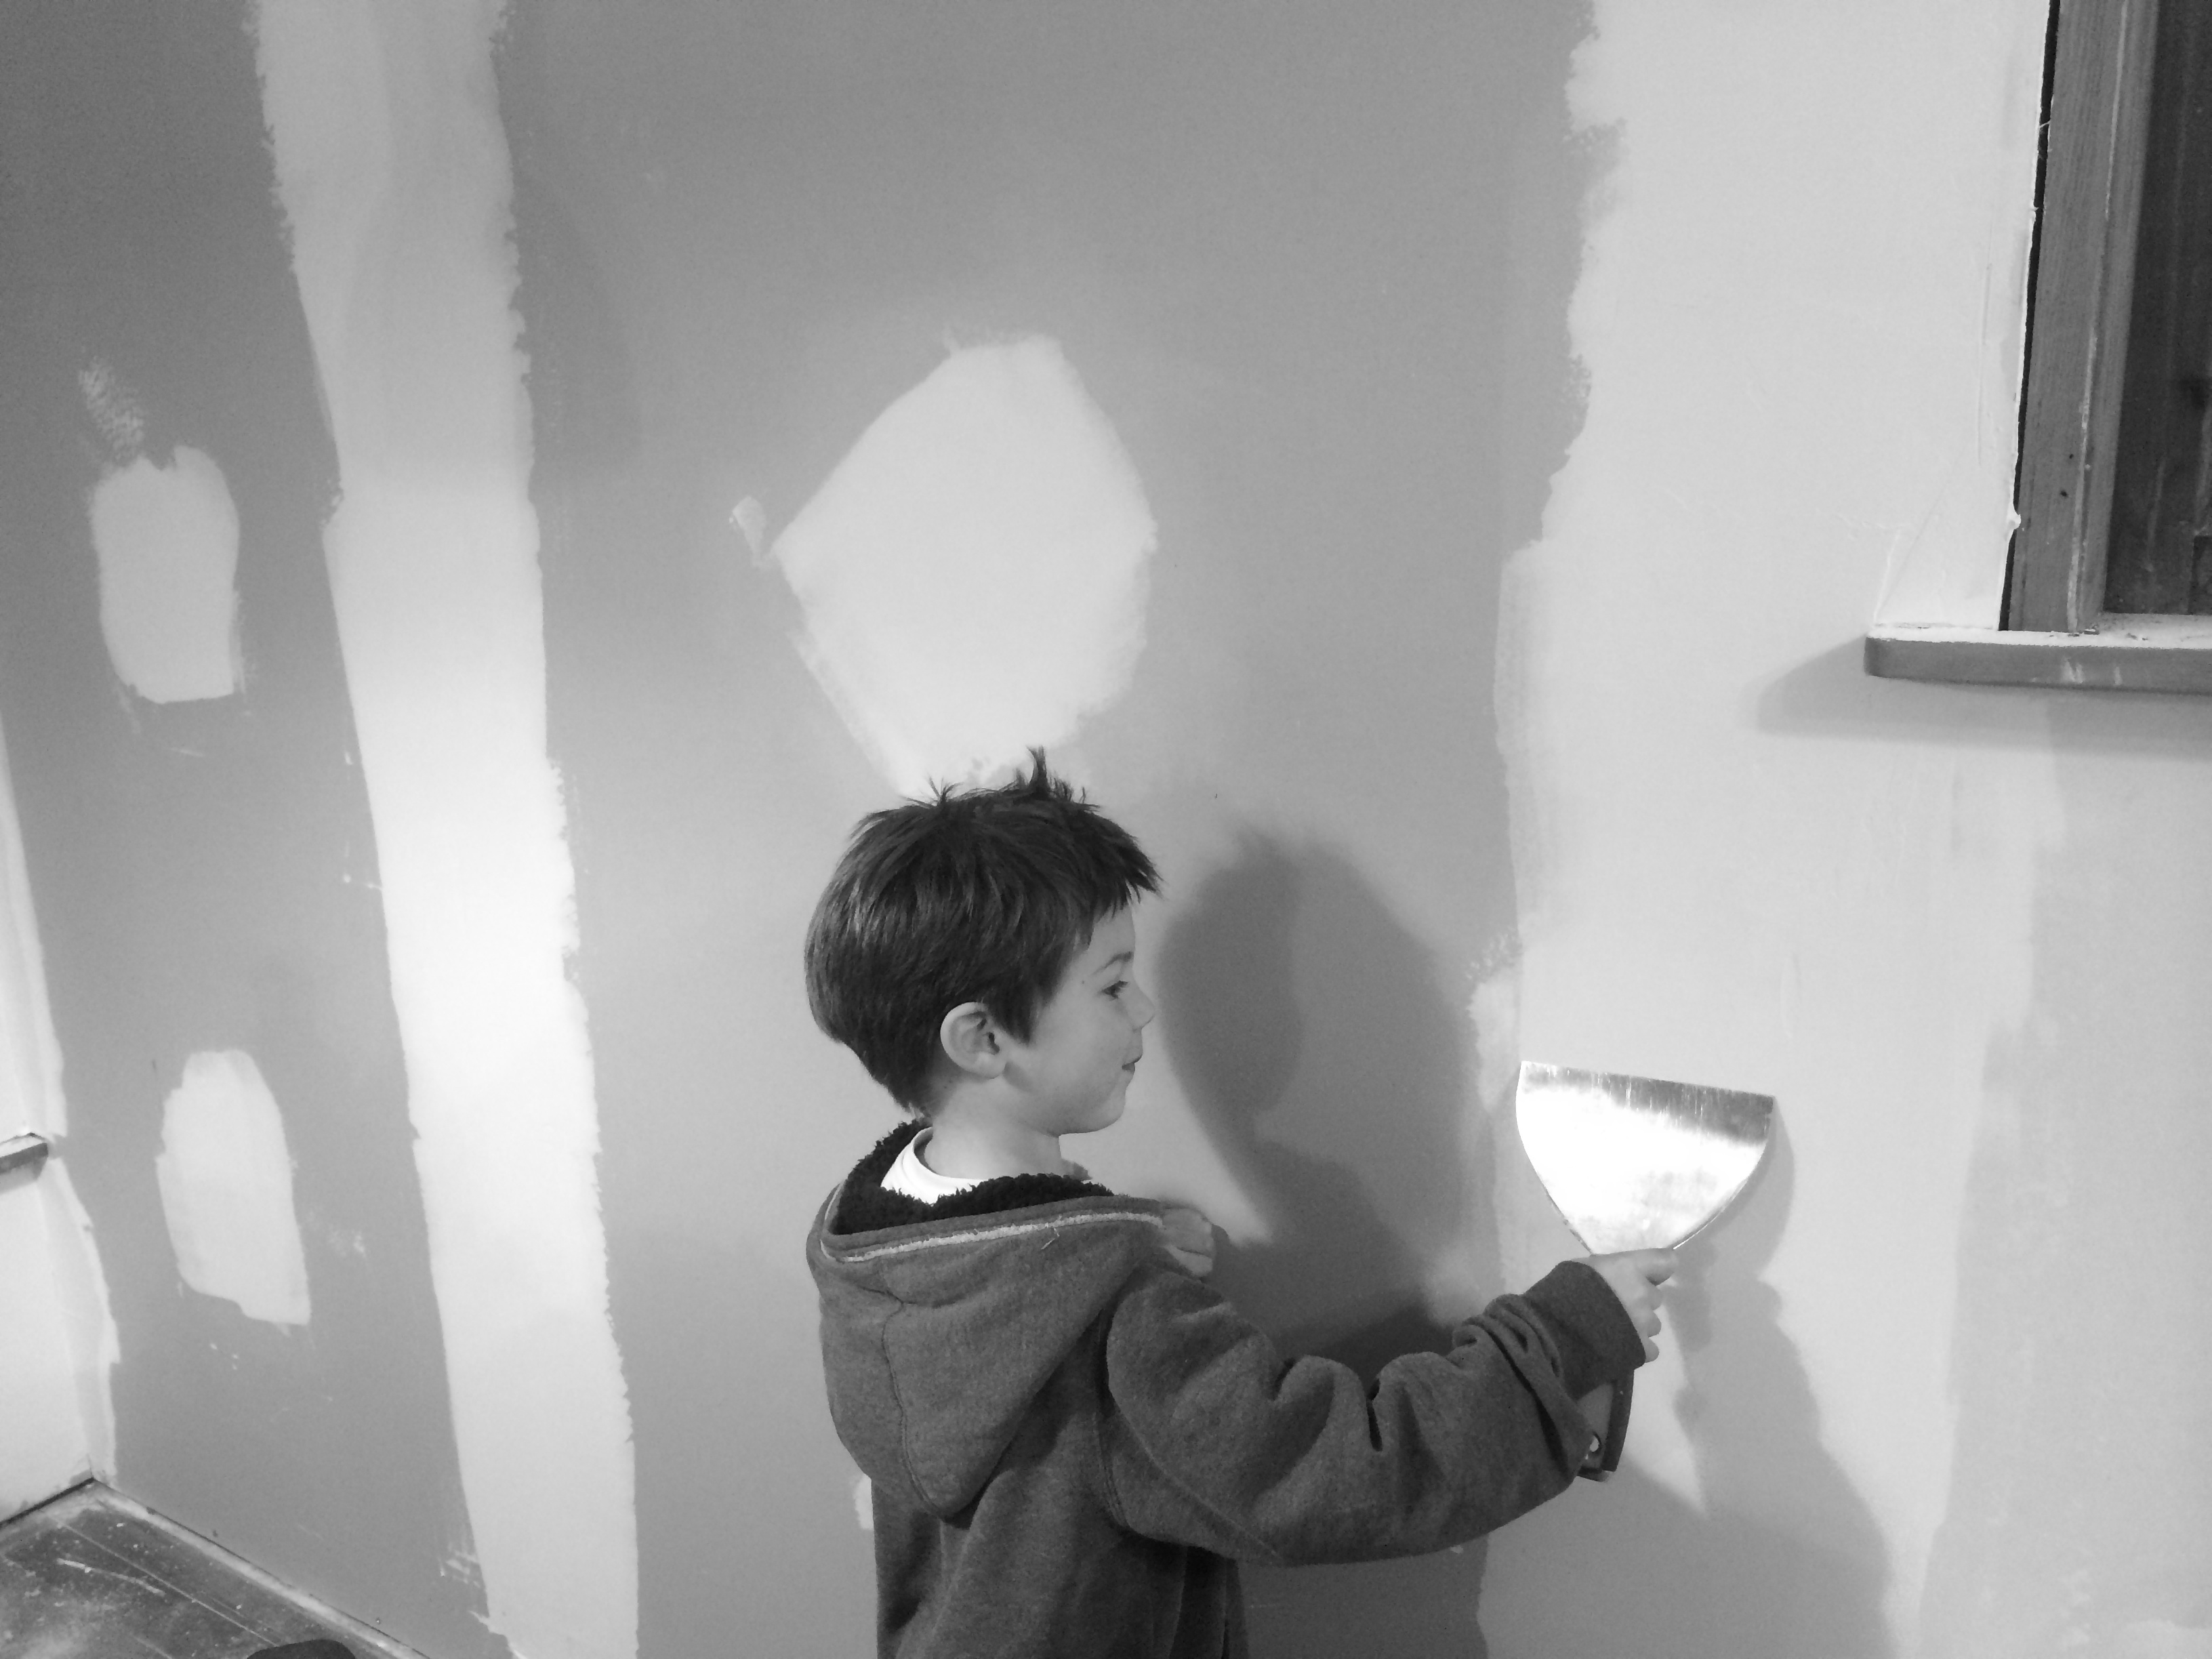
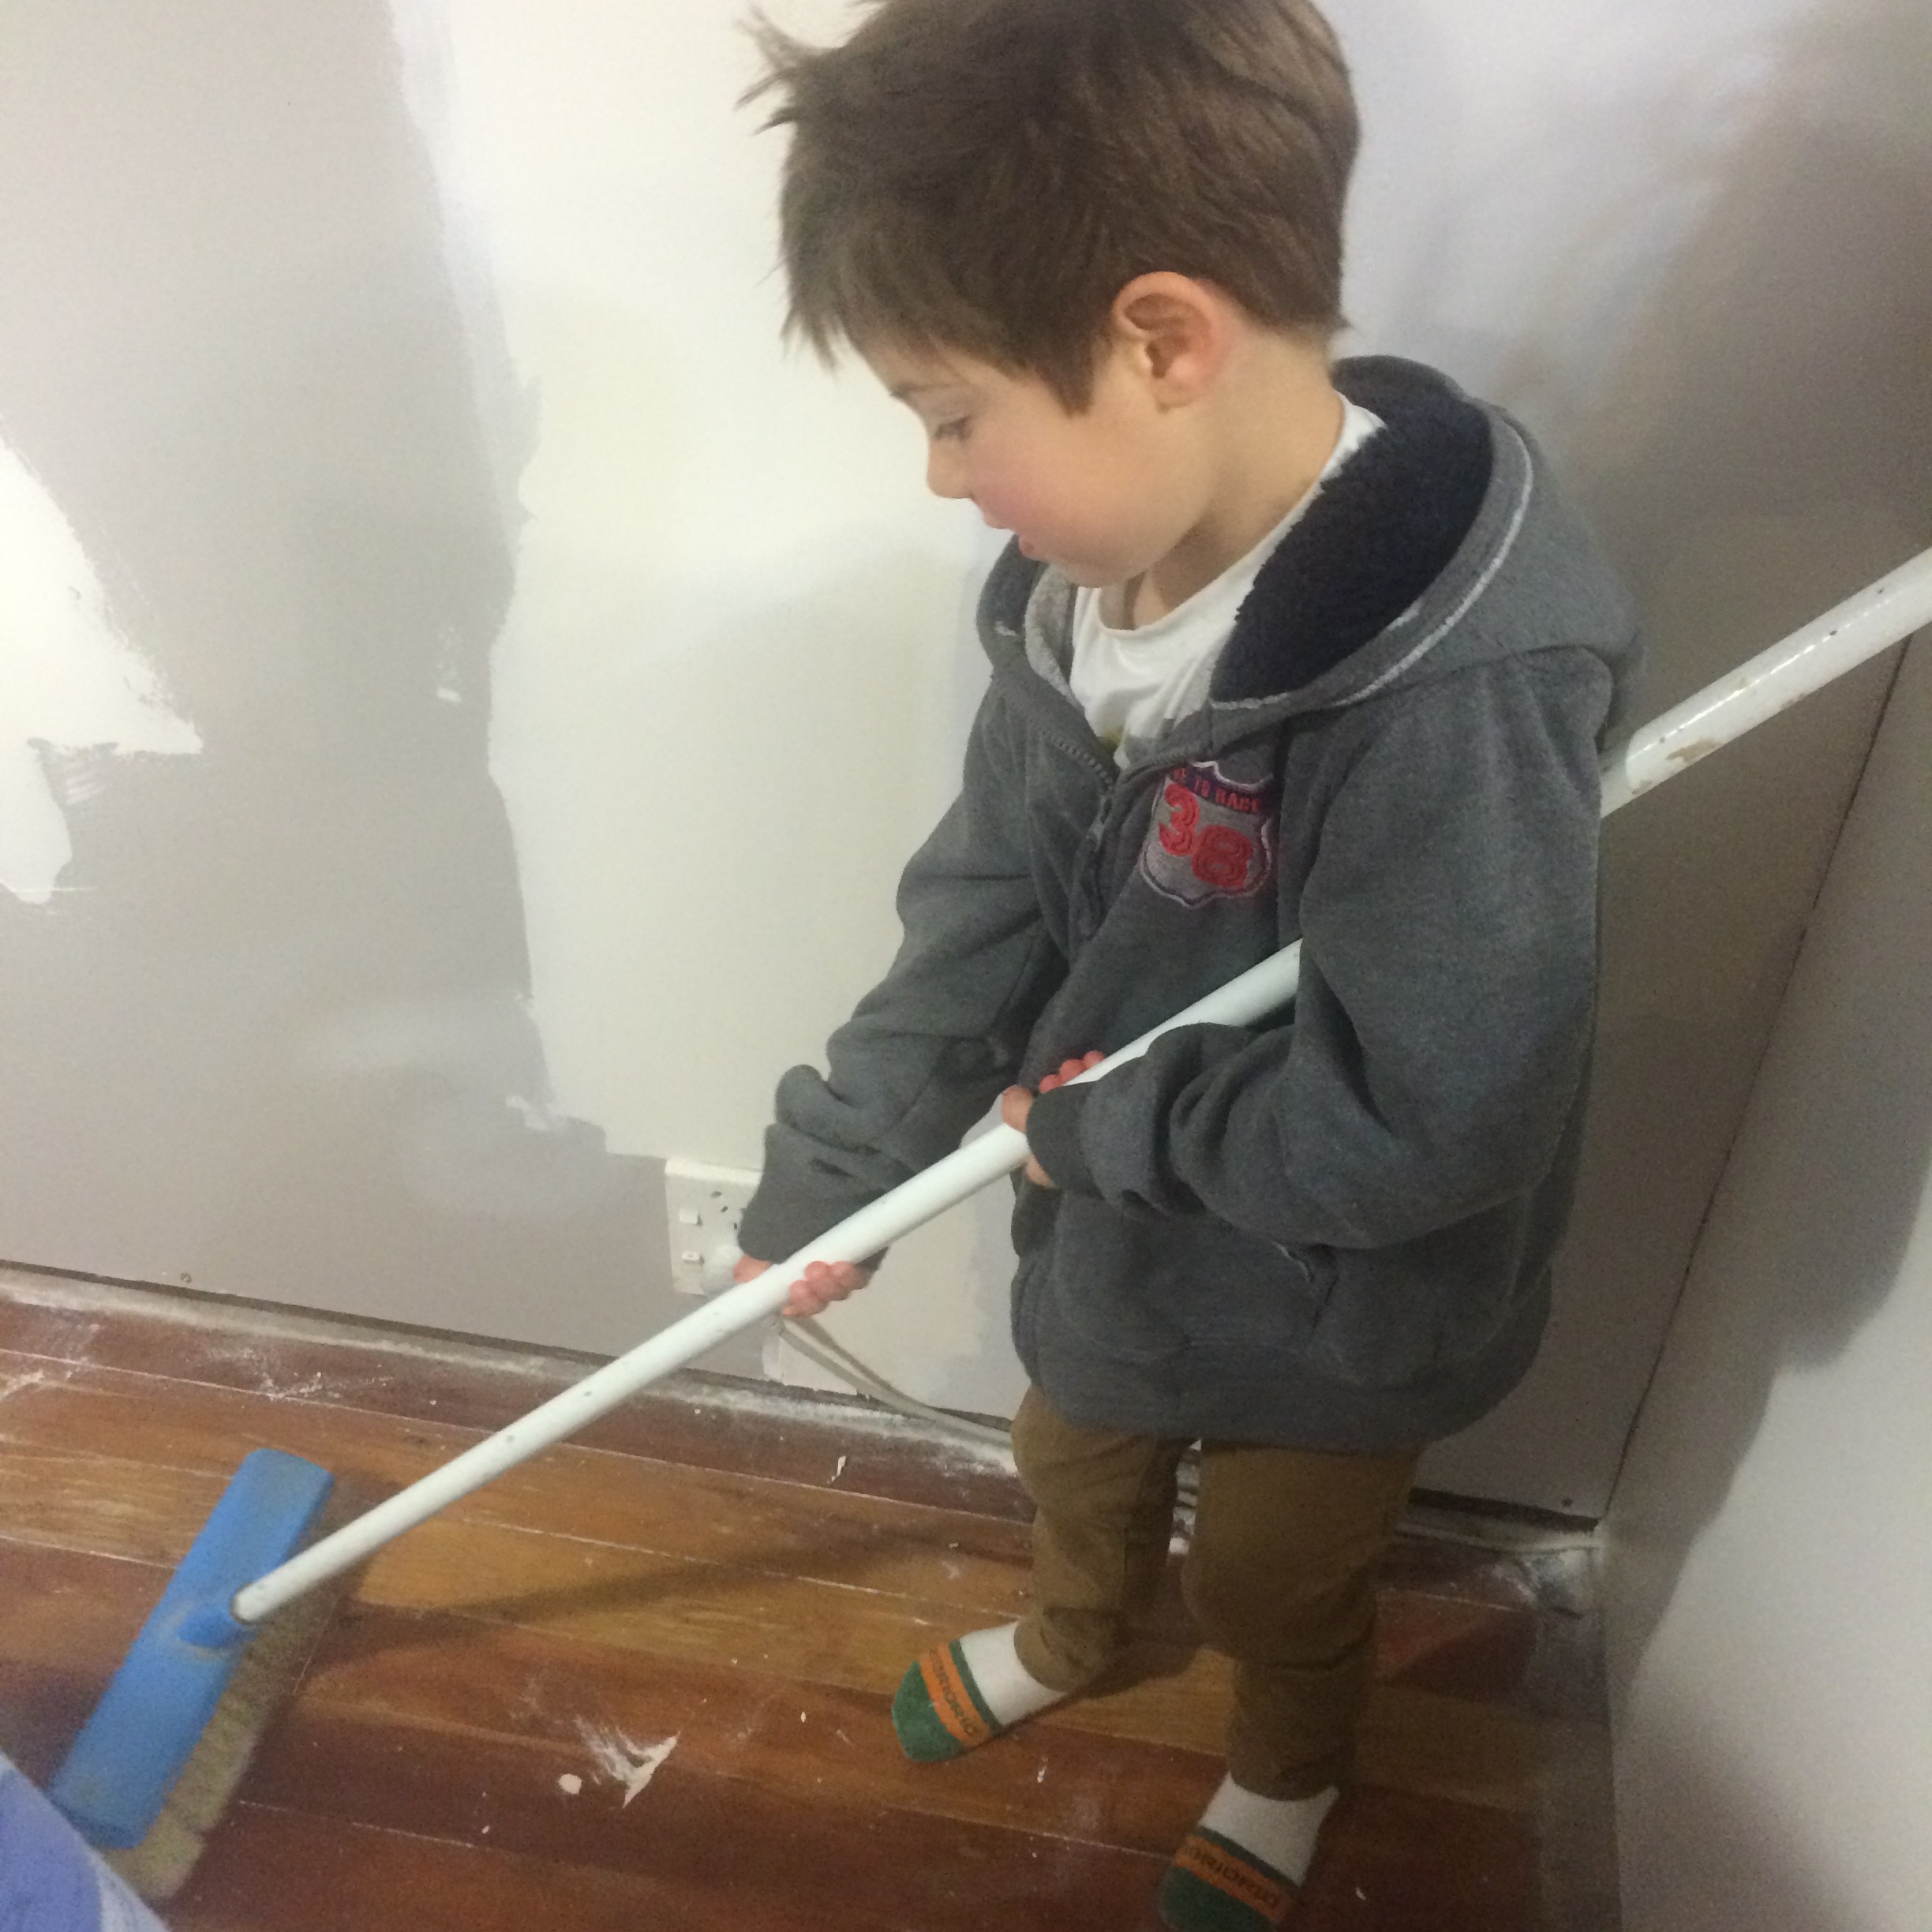
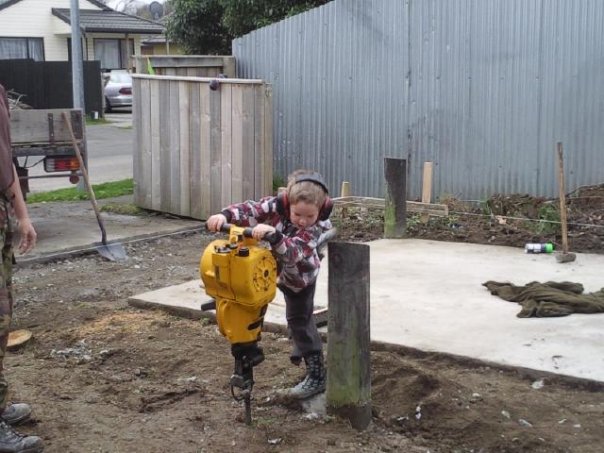
A number of structural renovations were done pre-Jimmy, so while Dylan has had the joy of swinging a hammer through a wall, Jimmy hadn’t before this weekend.
The joy on his face was brilliant. Mind you I was a tad nervous watching him swing that hammer harder each time as it got closer and closer to his head in his swing. It took him a while to break through the wall but he was loving it as you can see.


Throughout our renovation process we have taken plenty of before and after photos, creating an album of our first home to be able to look back on as a family (the old school approach). I often take photos of my husband Jeremy whilst saying, ‘this is for the reno album’. Now he’s noticing that they are slowly slipping onto the blog. Say hello Jeremy….

Gib stopping Sunday and after dinner this week to get the walls done and off to choose paint colours this weekend coming. Hilariously in the perils of renovating slowly – we painted our living room four years ago, and well, we created our own shade at the time – not so smart now, as we have no idea how to get the same mix again. I guess we will be painting the living room in the new colour too since its one open plan space.
Looking forward to sharing the finished space soon, for now in the words of Jeremy – “a clean site, is a safe site”, plus I think he enjoys having his apprentices at home.
What renovations projects have you been tackling recently or on your to-do list? I’d love to know your working on in your own home.
Kelly

The post Weekend Reno’s appeared first on The Home Scene.
]]>The post Jimmy’s room appeared first on The Home Scene.
]]>Although we loved the boys sharing a room, as Dylan got older we moved him in to the spare room to give the boys their own space. Rather than a quick makeover, the room was a slow renovation over a few months, earlier this year.
My style aesthetic leans towards monochrome and Scandinavian design, with my love of black, white, neutrals and timber simplicity. For those who aren’t fans of this style (I know there are quite a few….), I do love to incorporate pops of colour throughout our home.
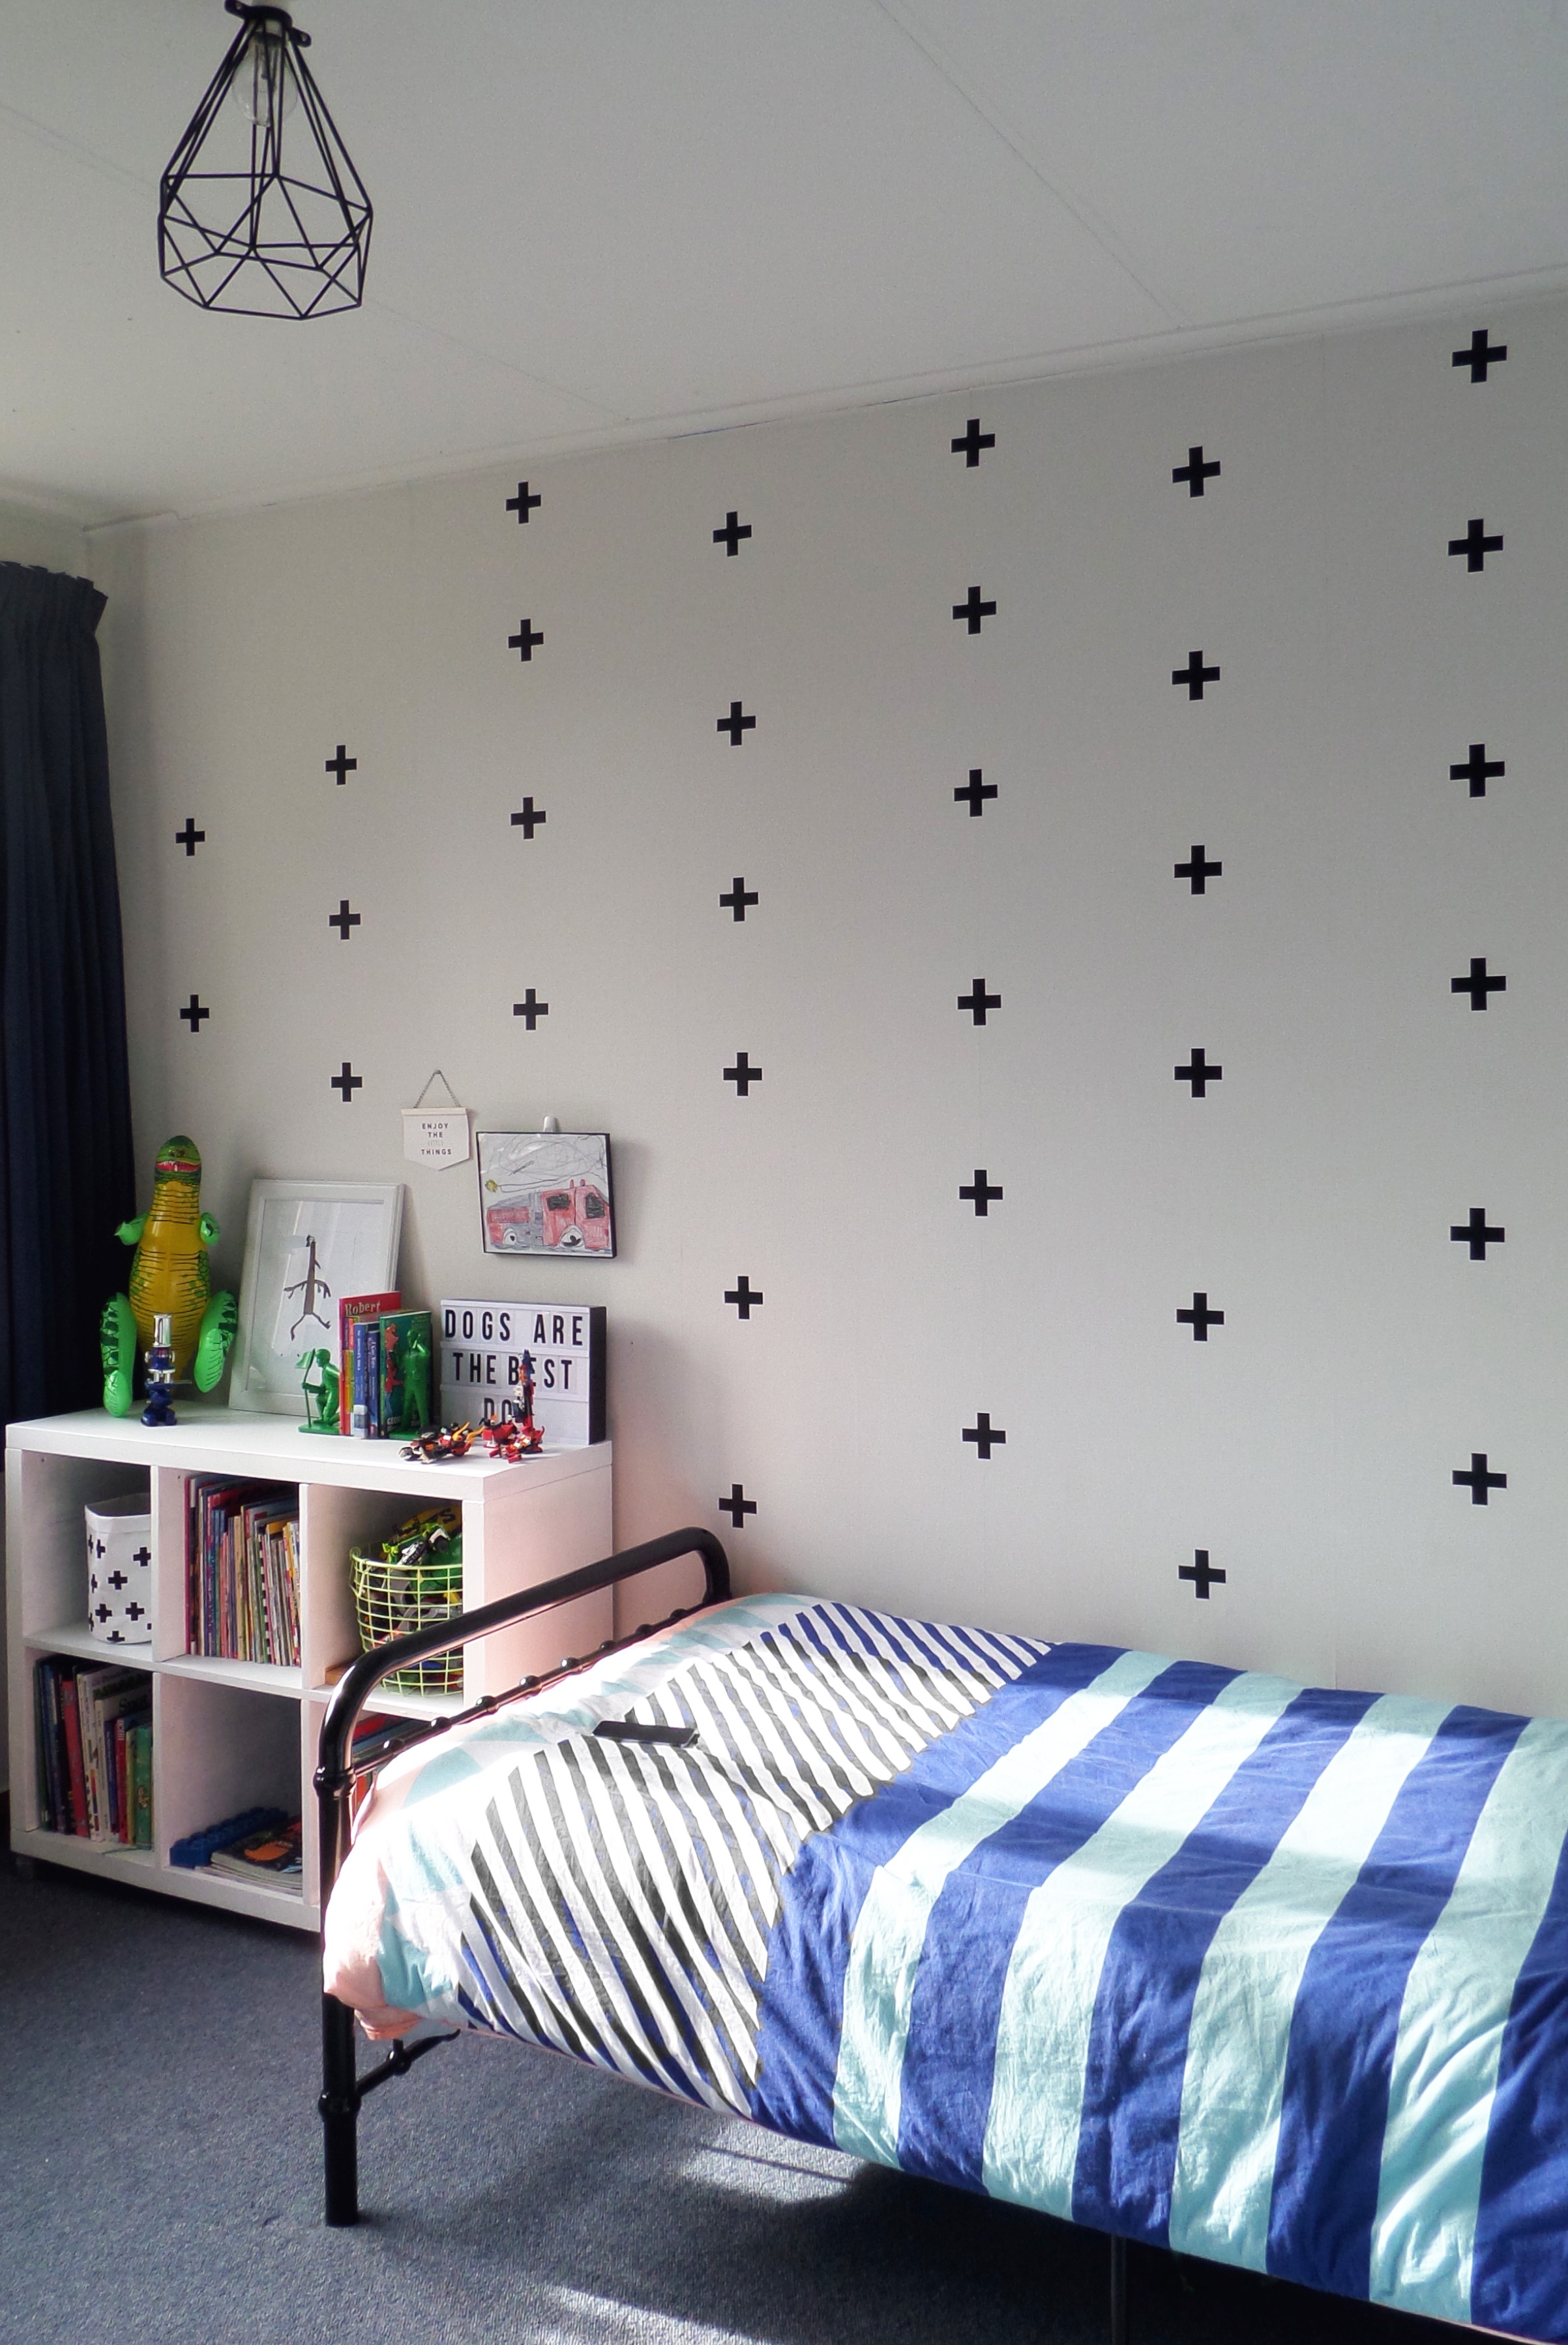
Jimmy loves all things super hero so I wanted to incorporate this in to the design without taking over the space. The newly purchased black Sonata bed from Mocka has replaced the old tired wooden frame and has transformed the room, pulling the look of it altogether.
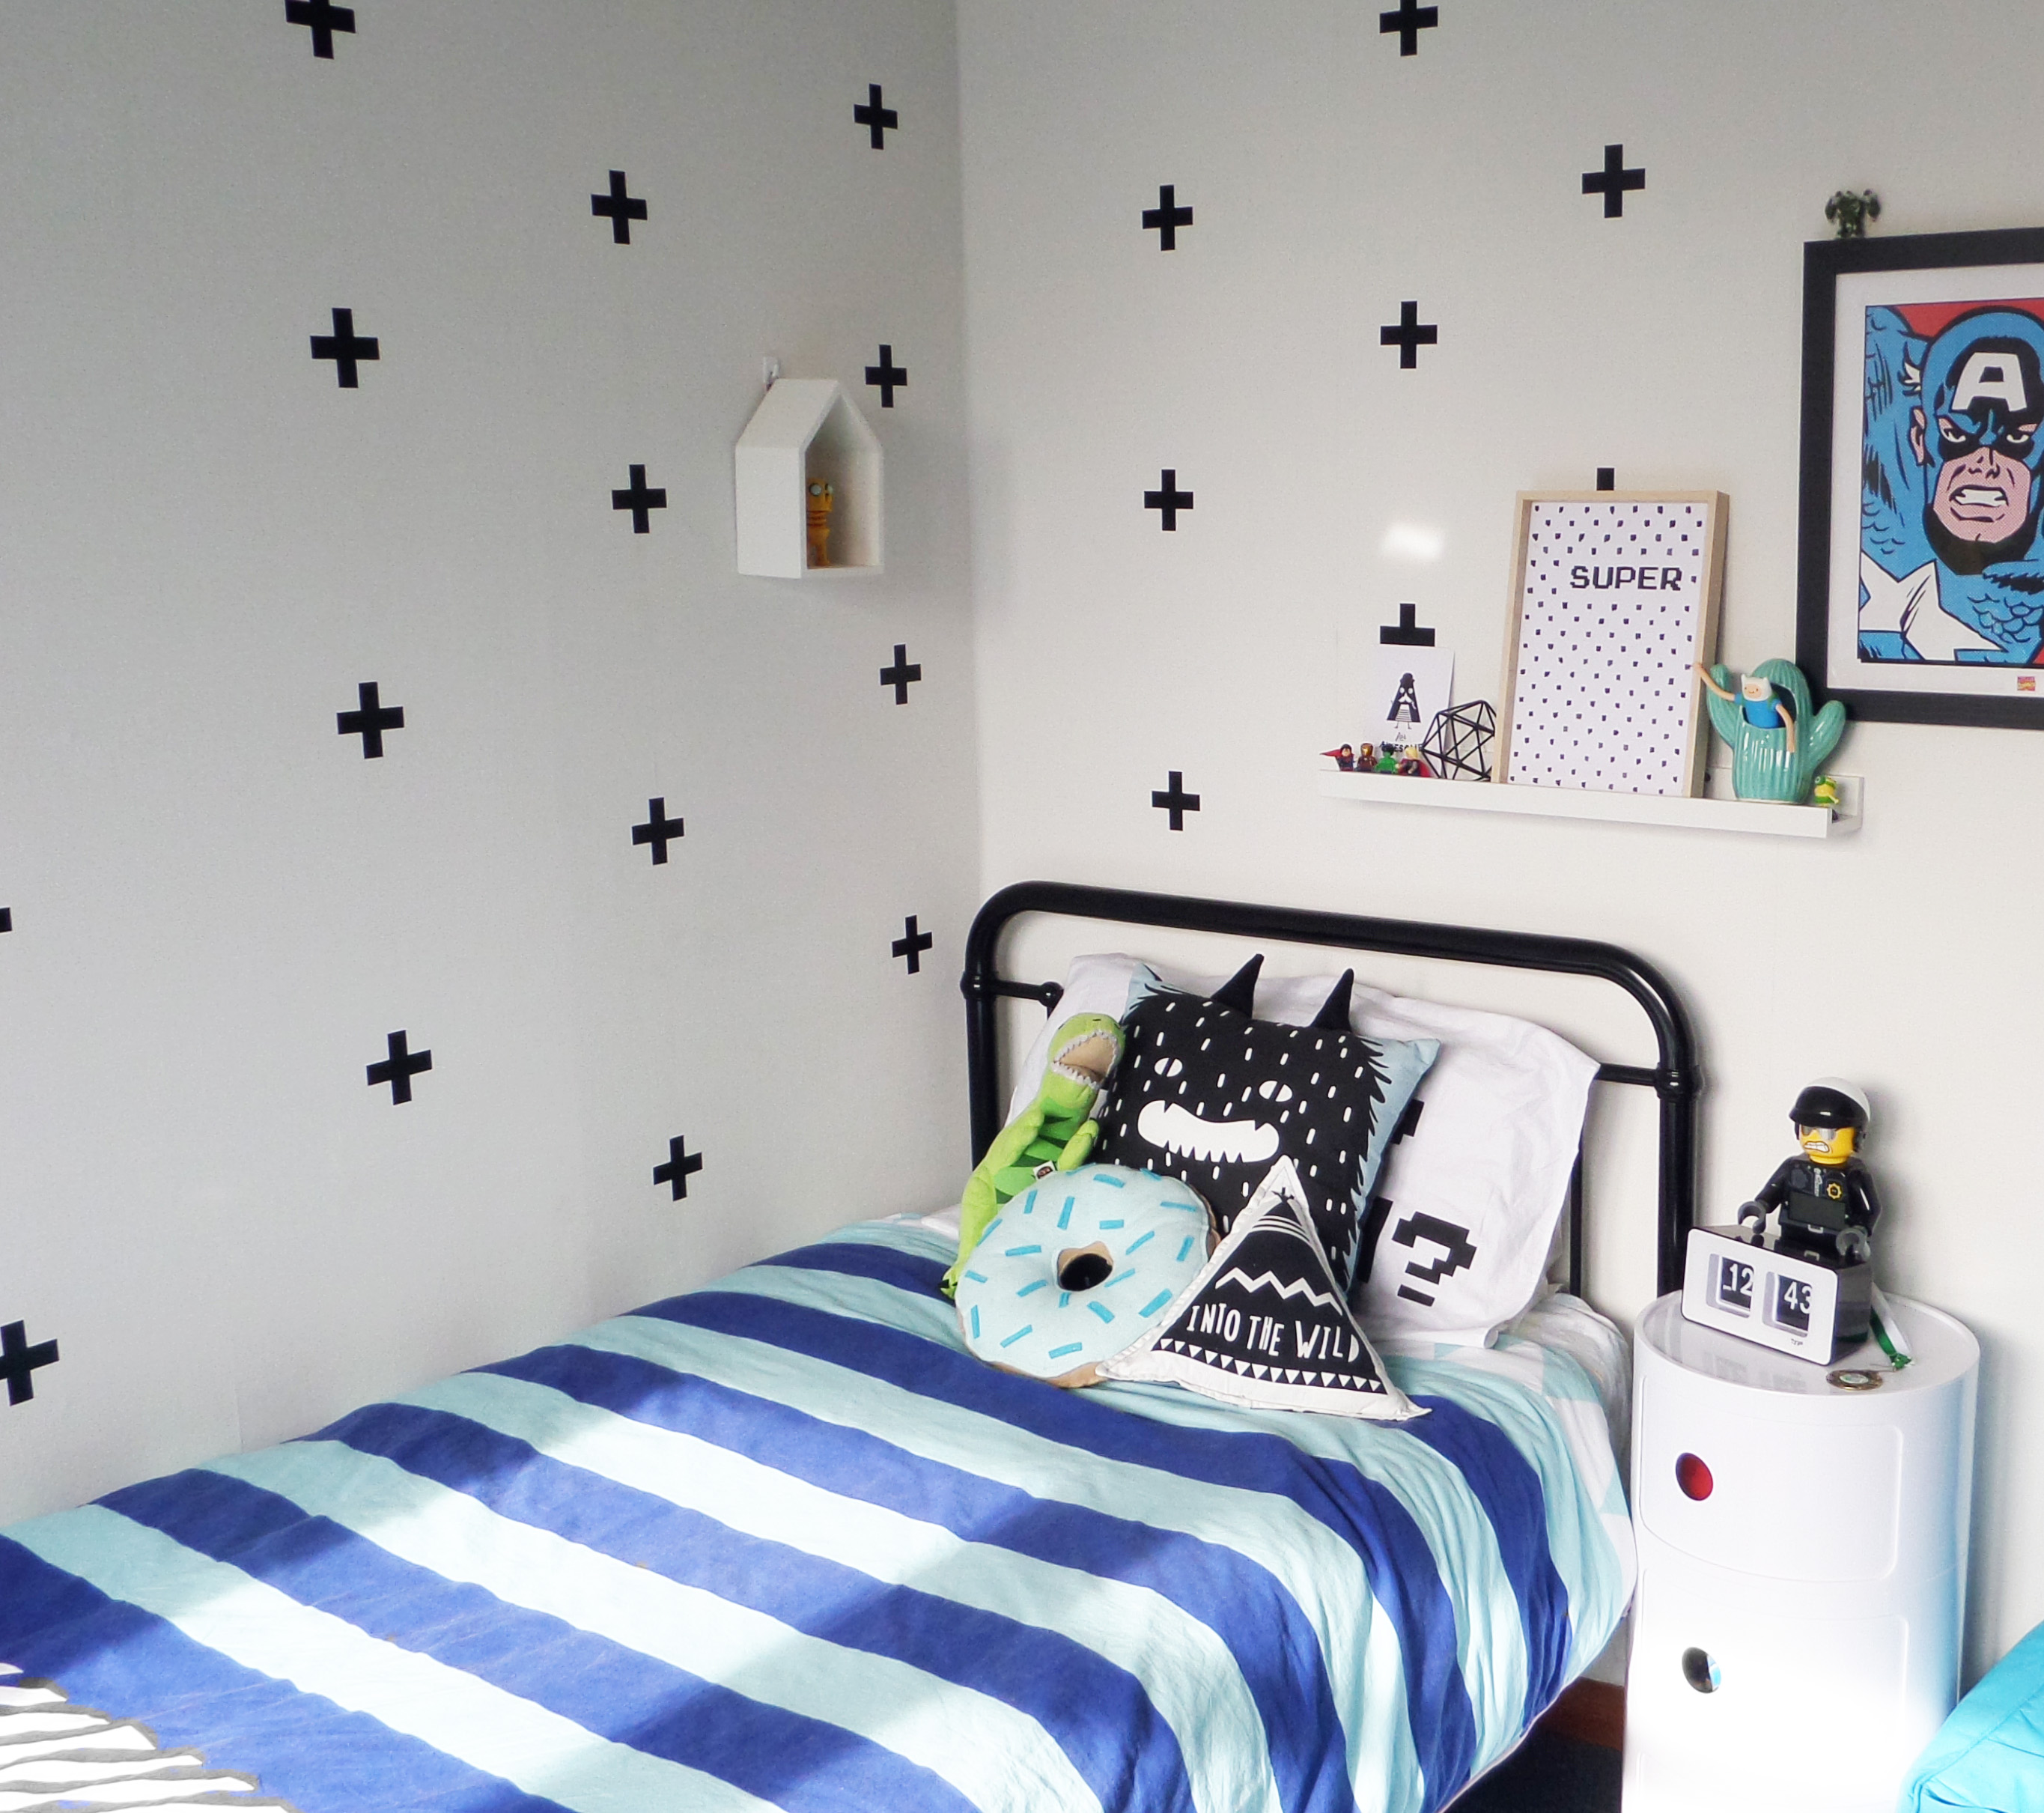
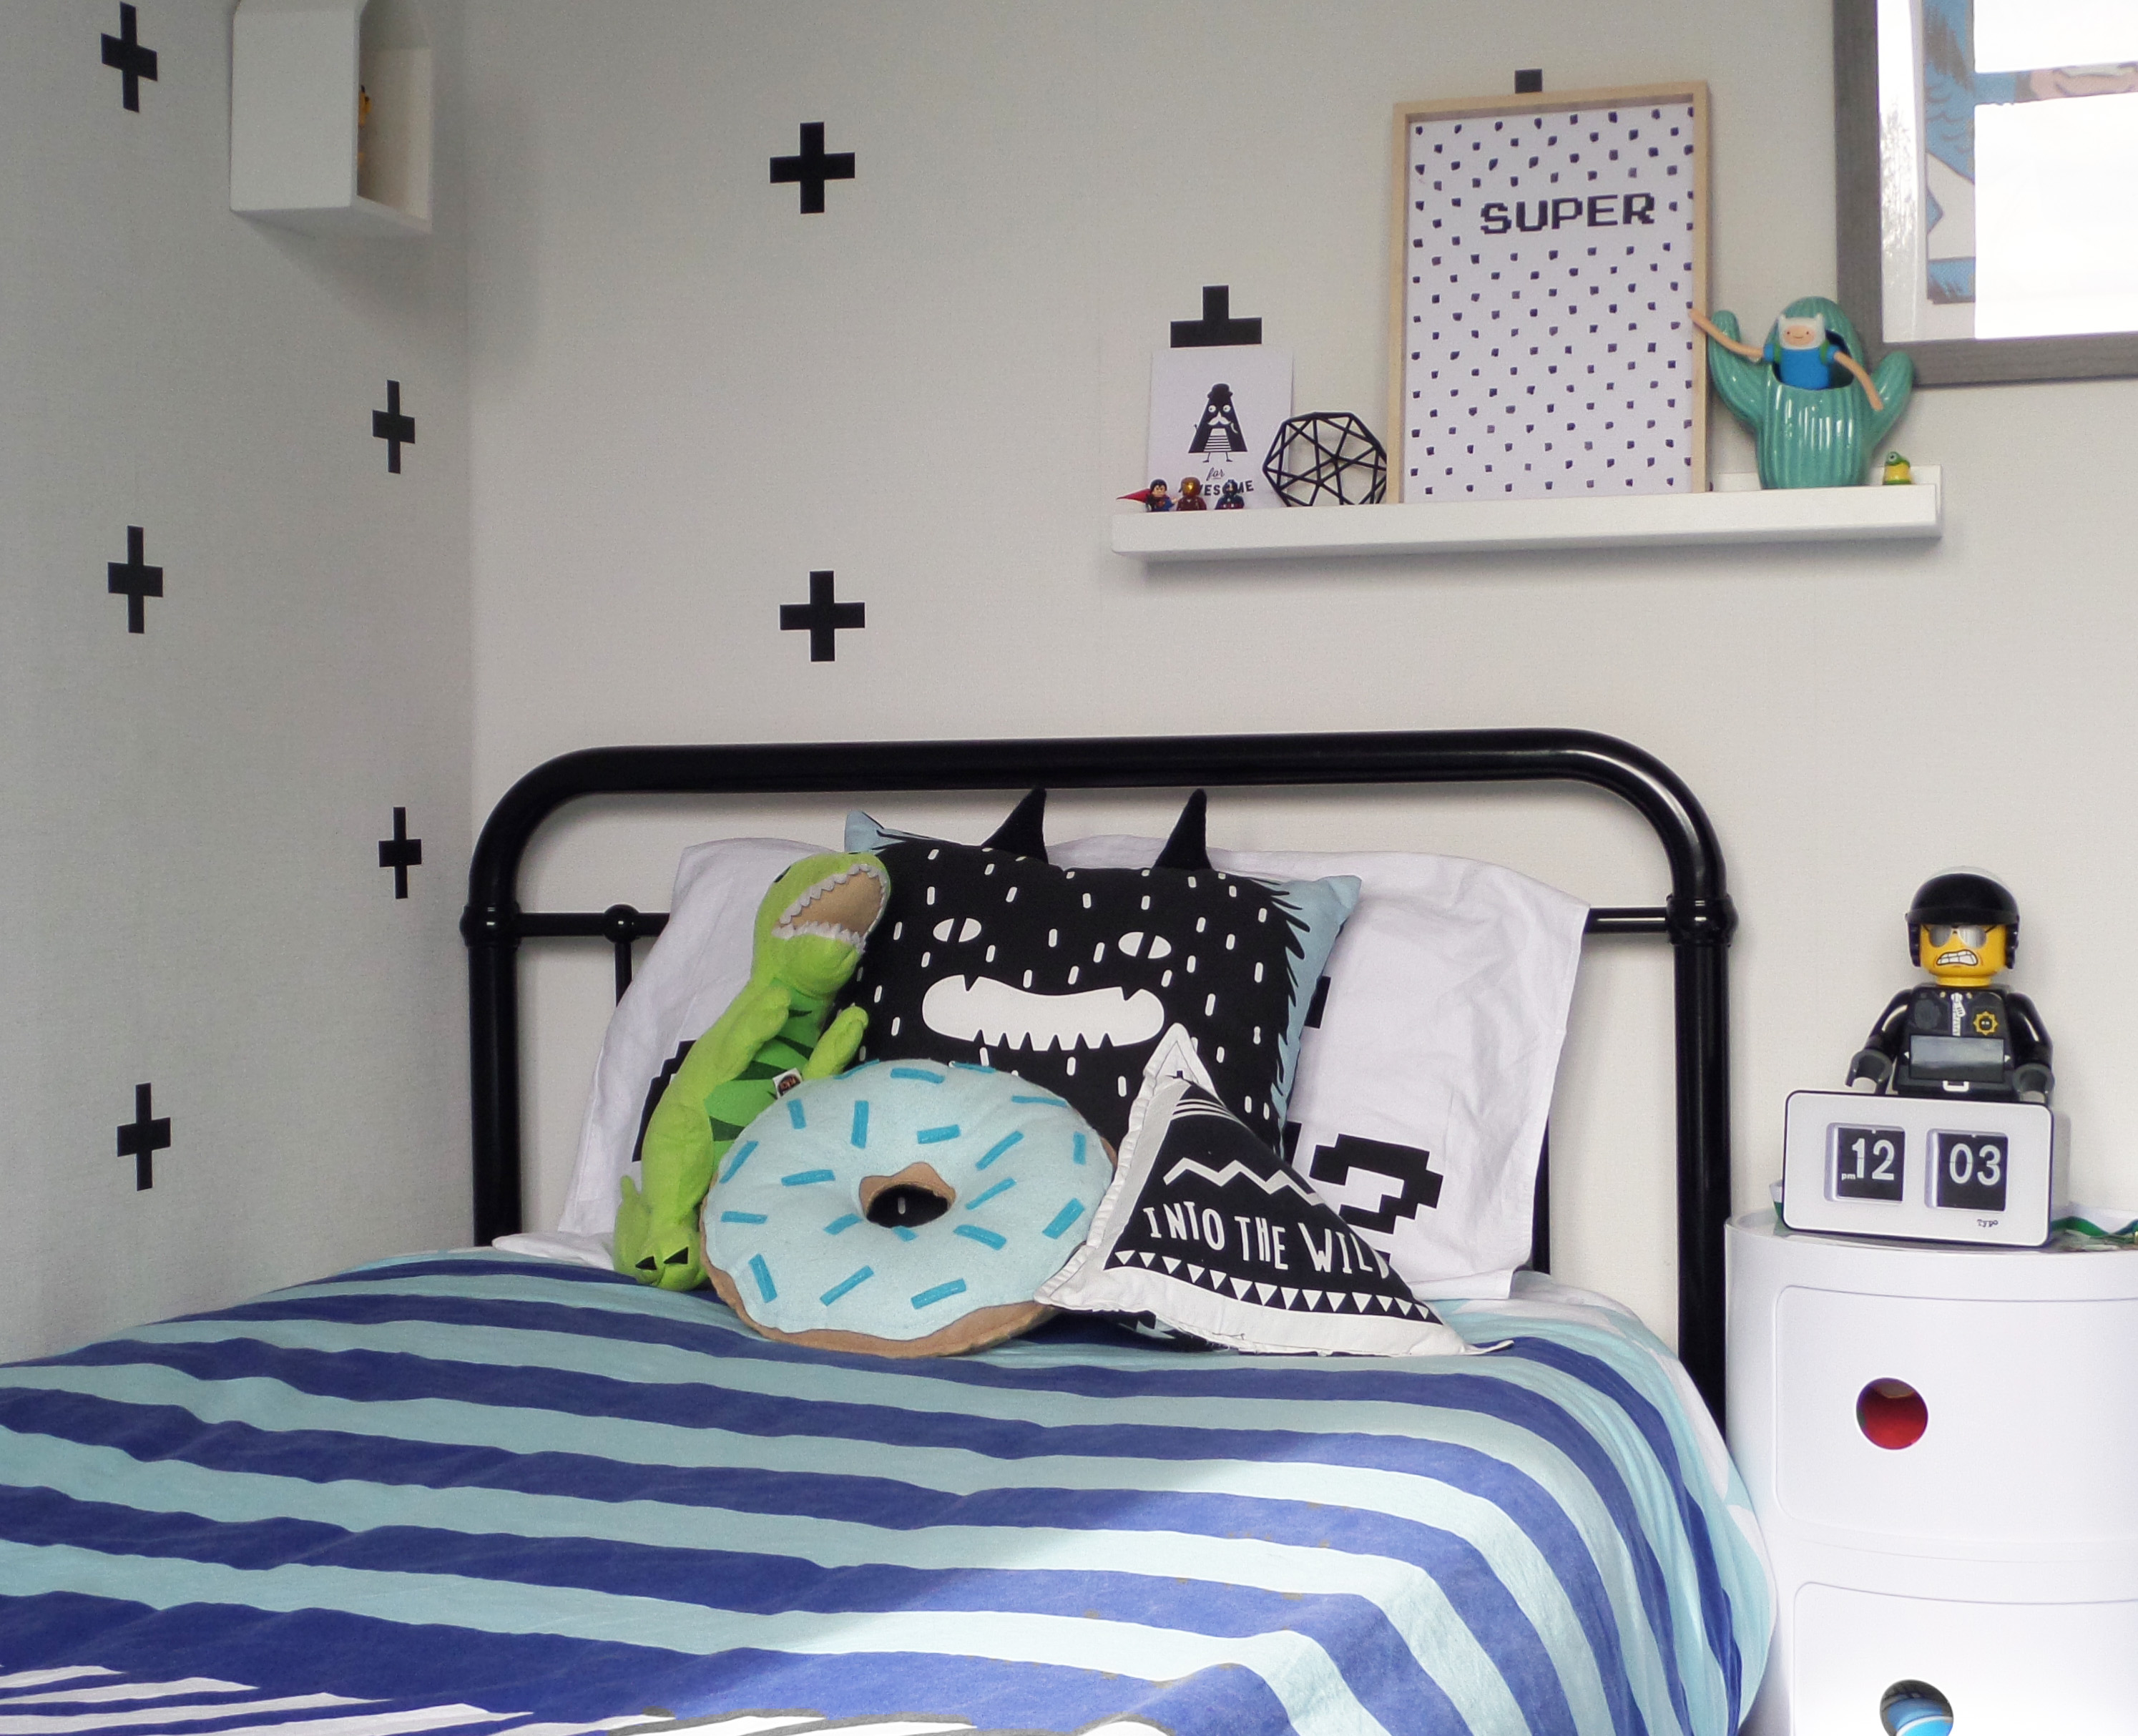
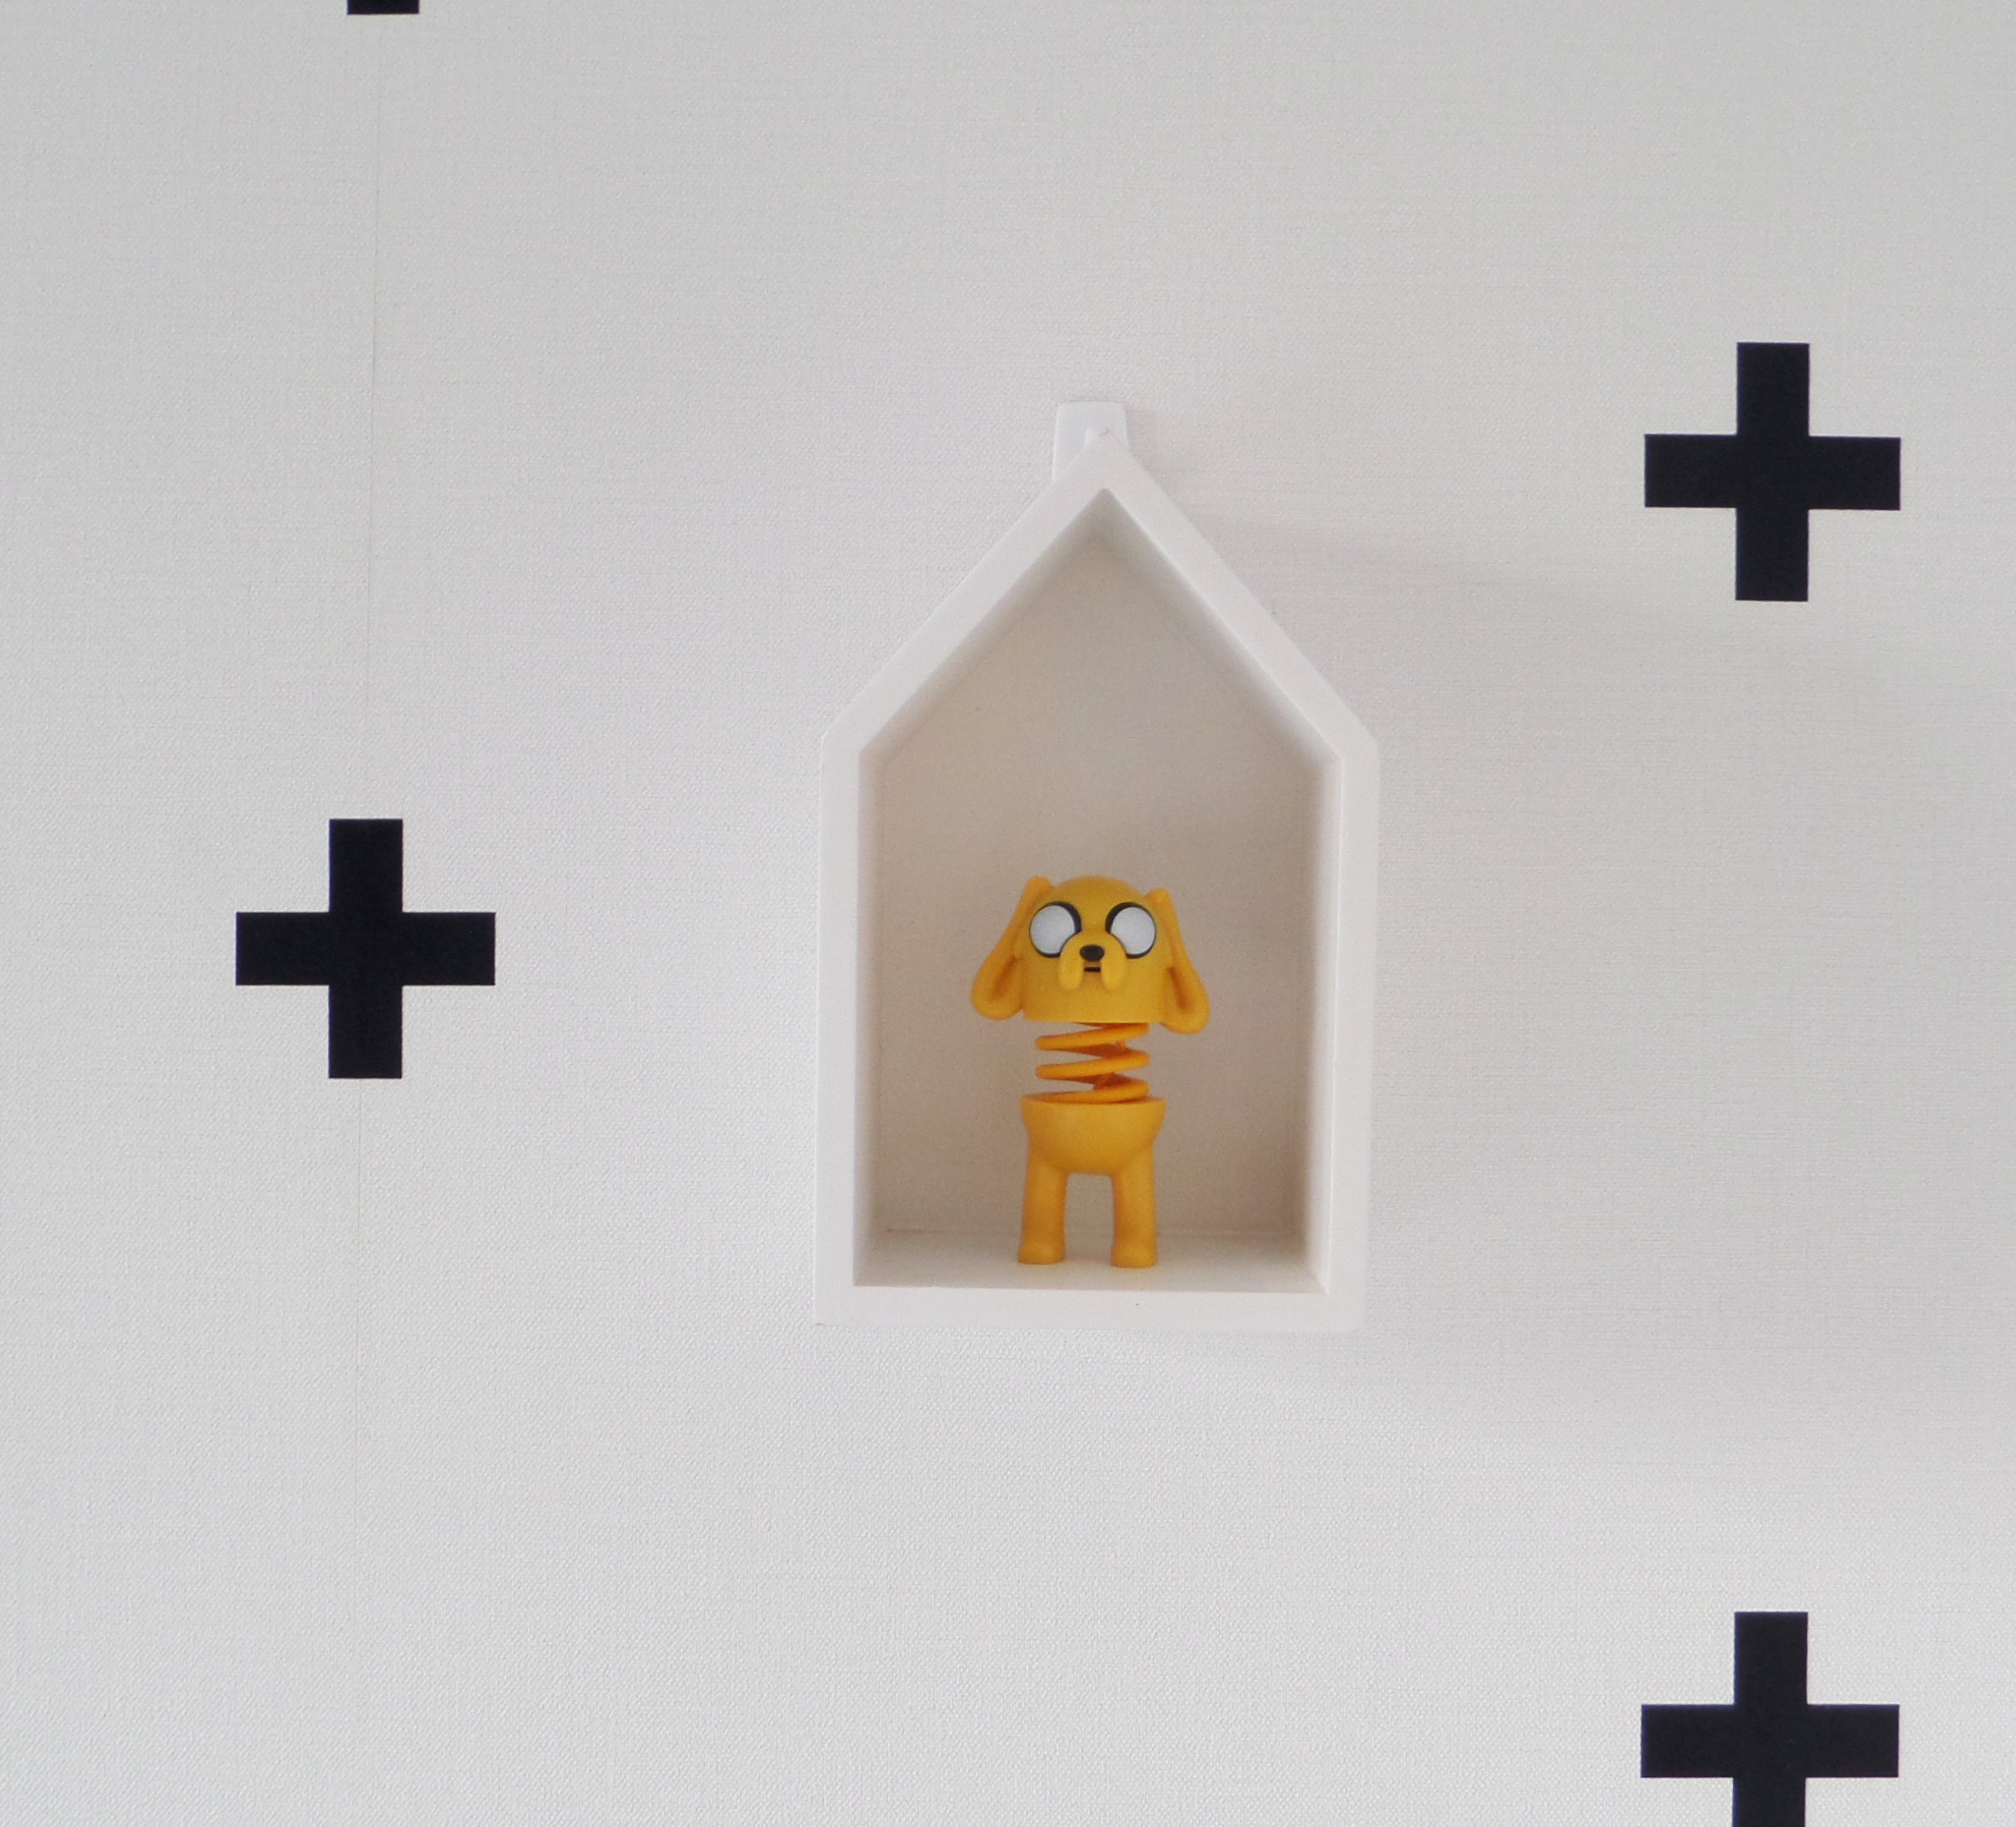
The Ikea picture ledge positioned above Jimmy’s bed gives him a dedicated space to change and put his favourite things on display.
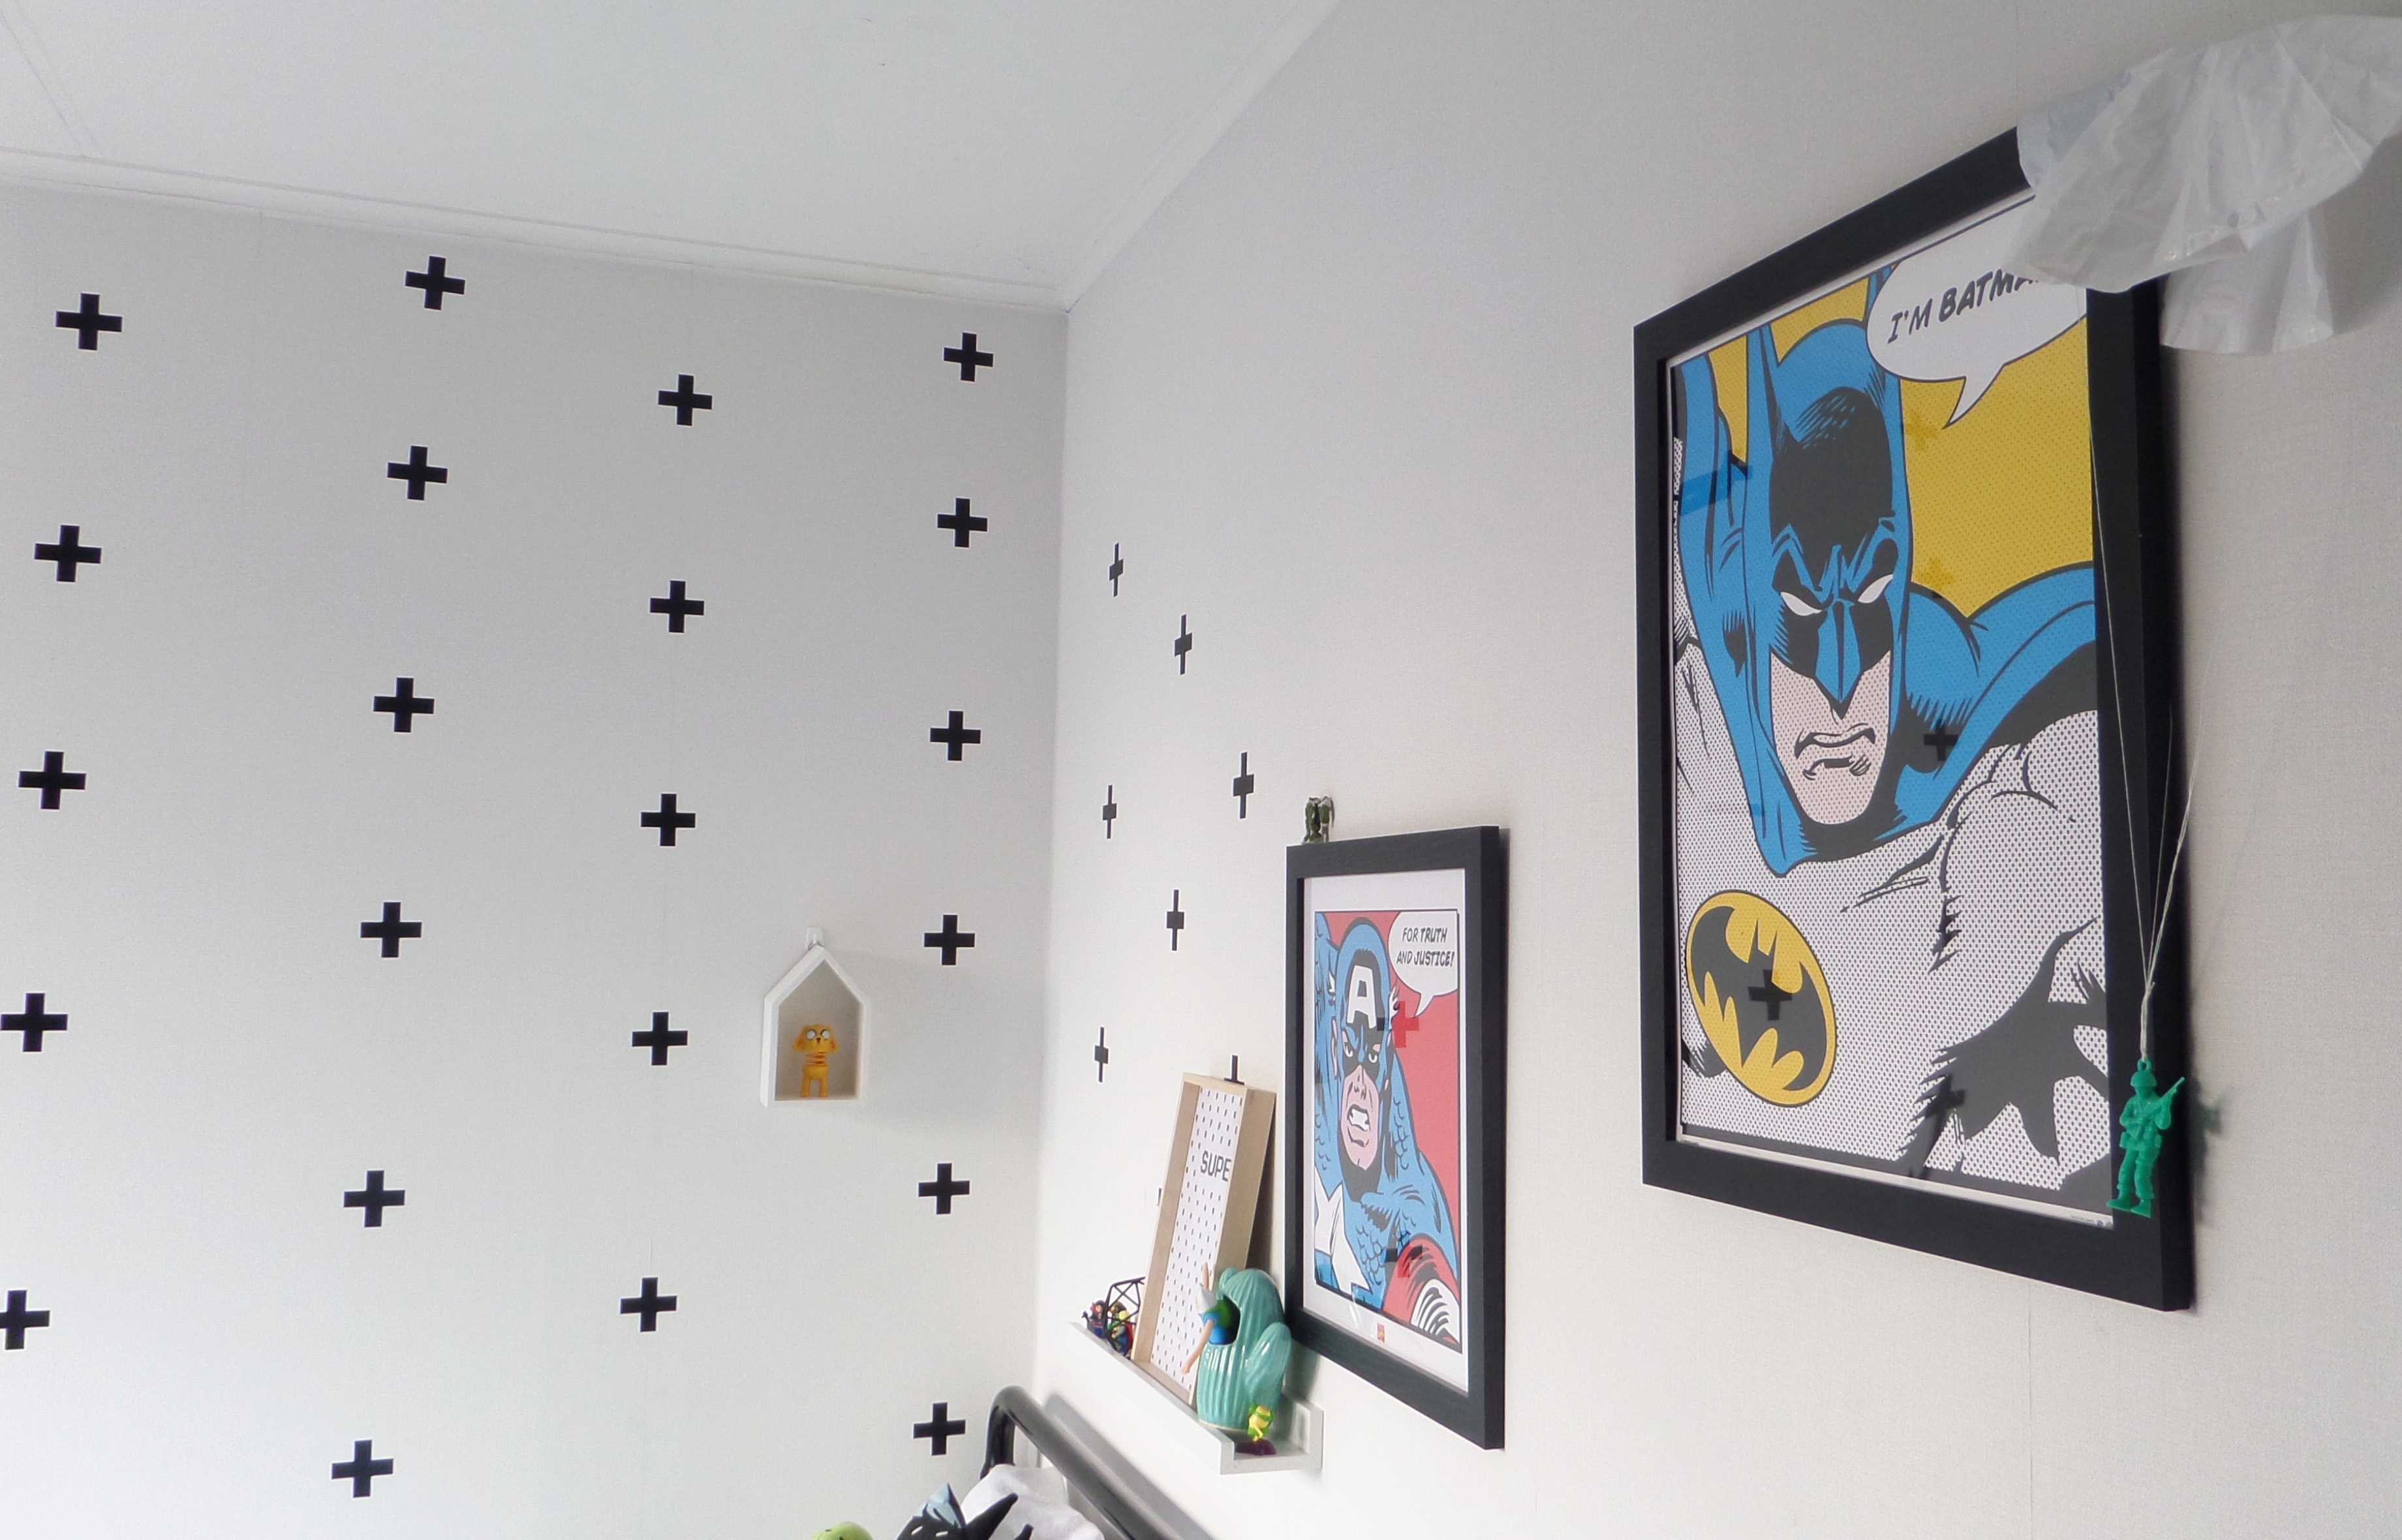
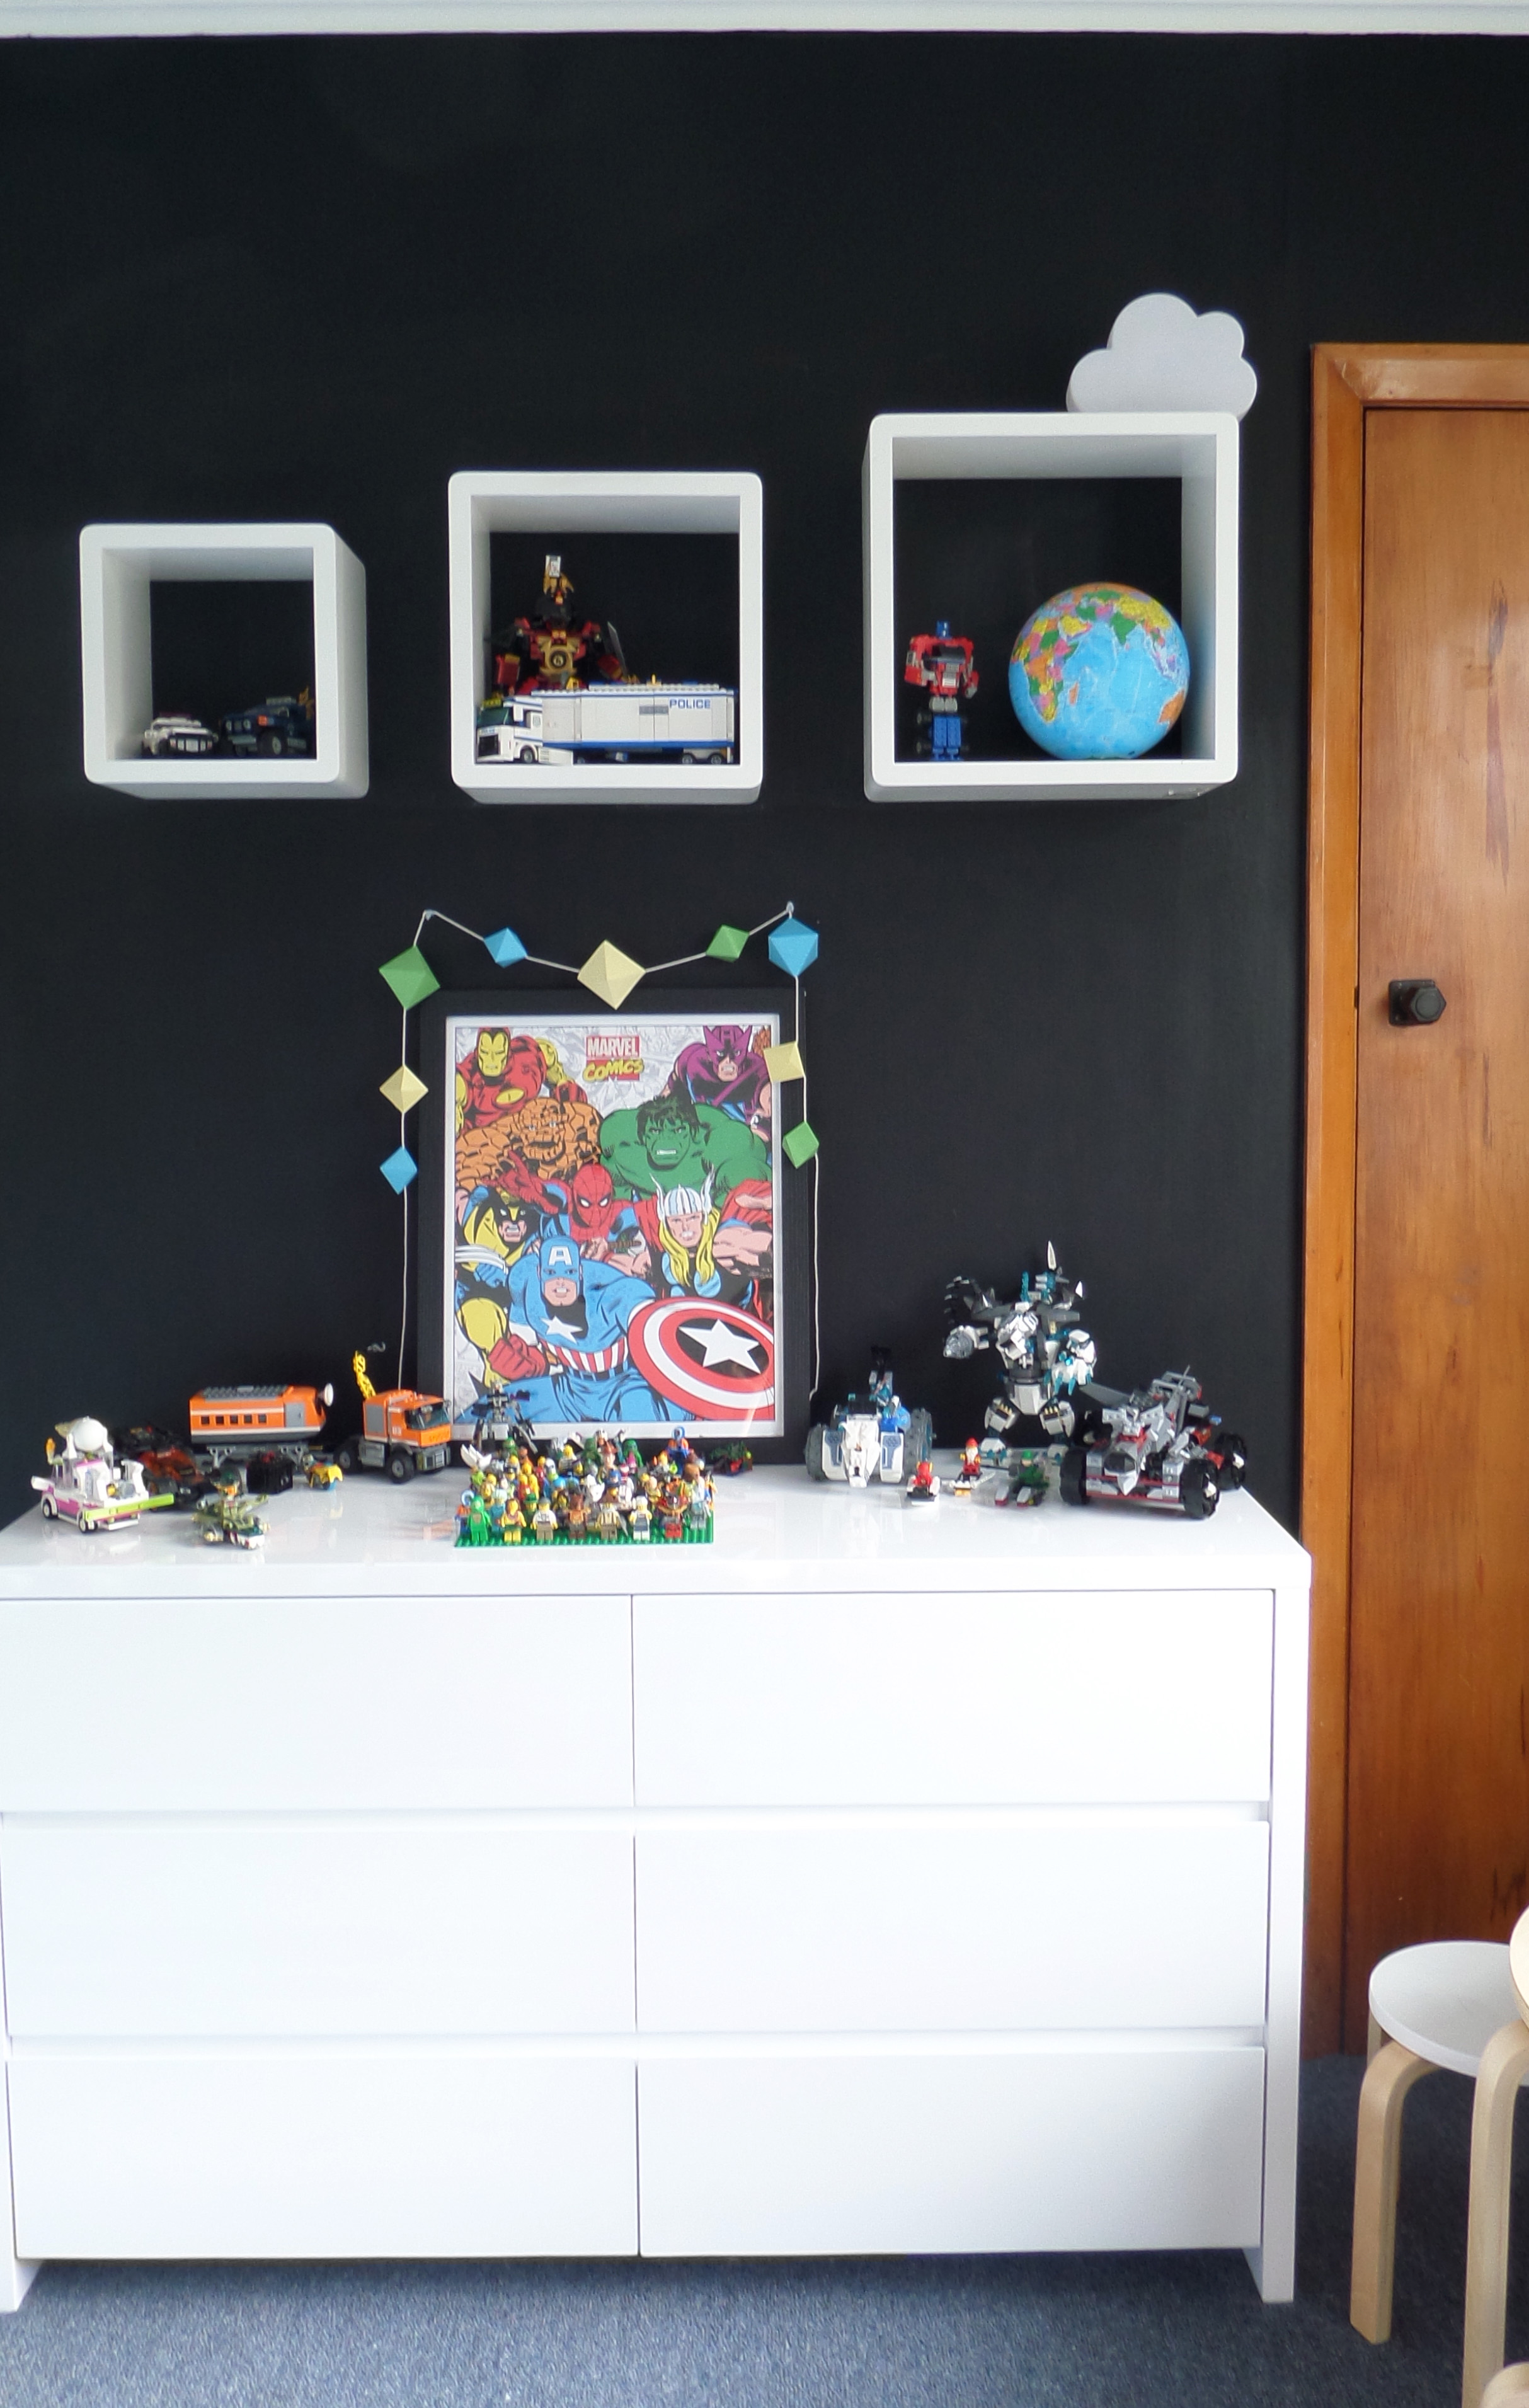
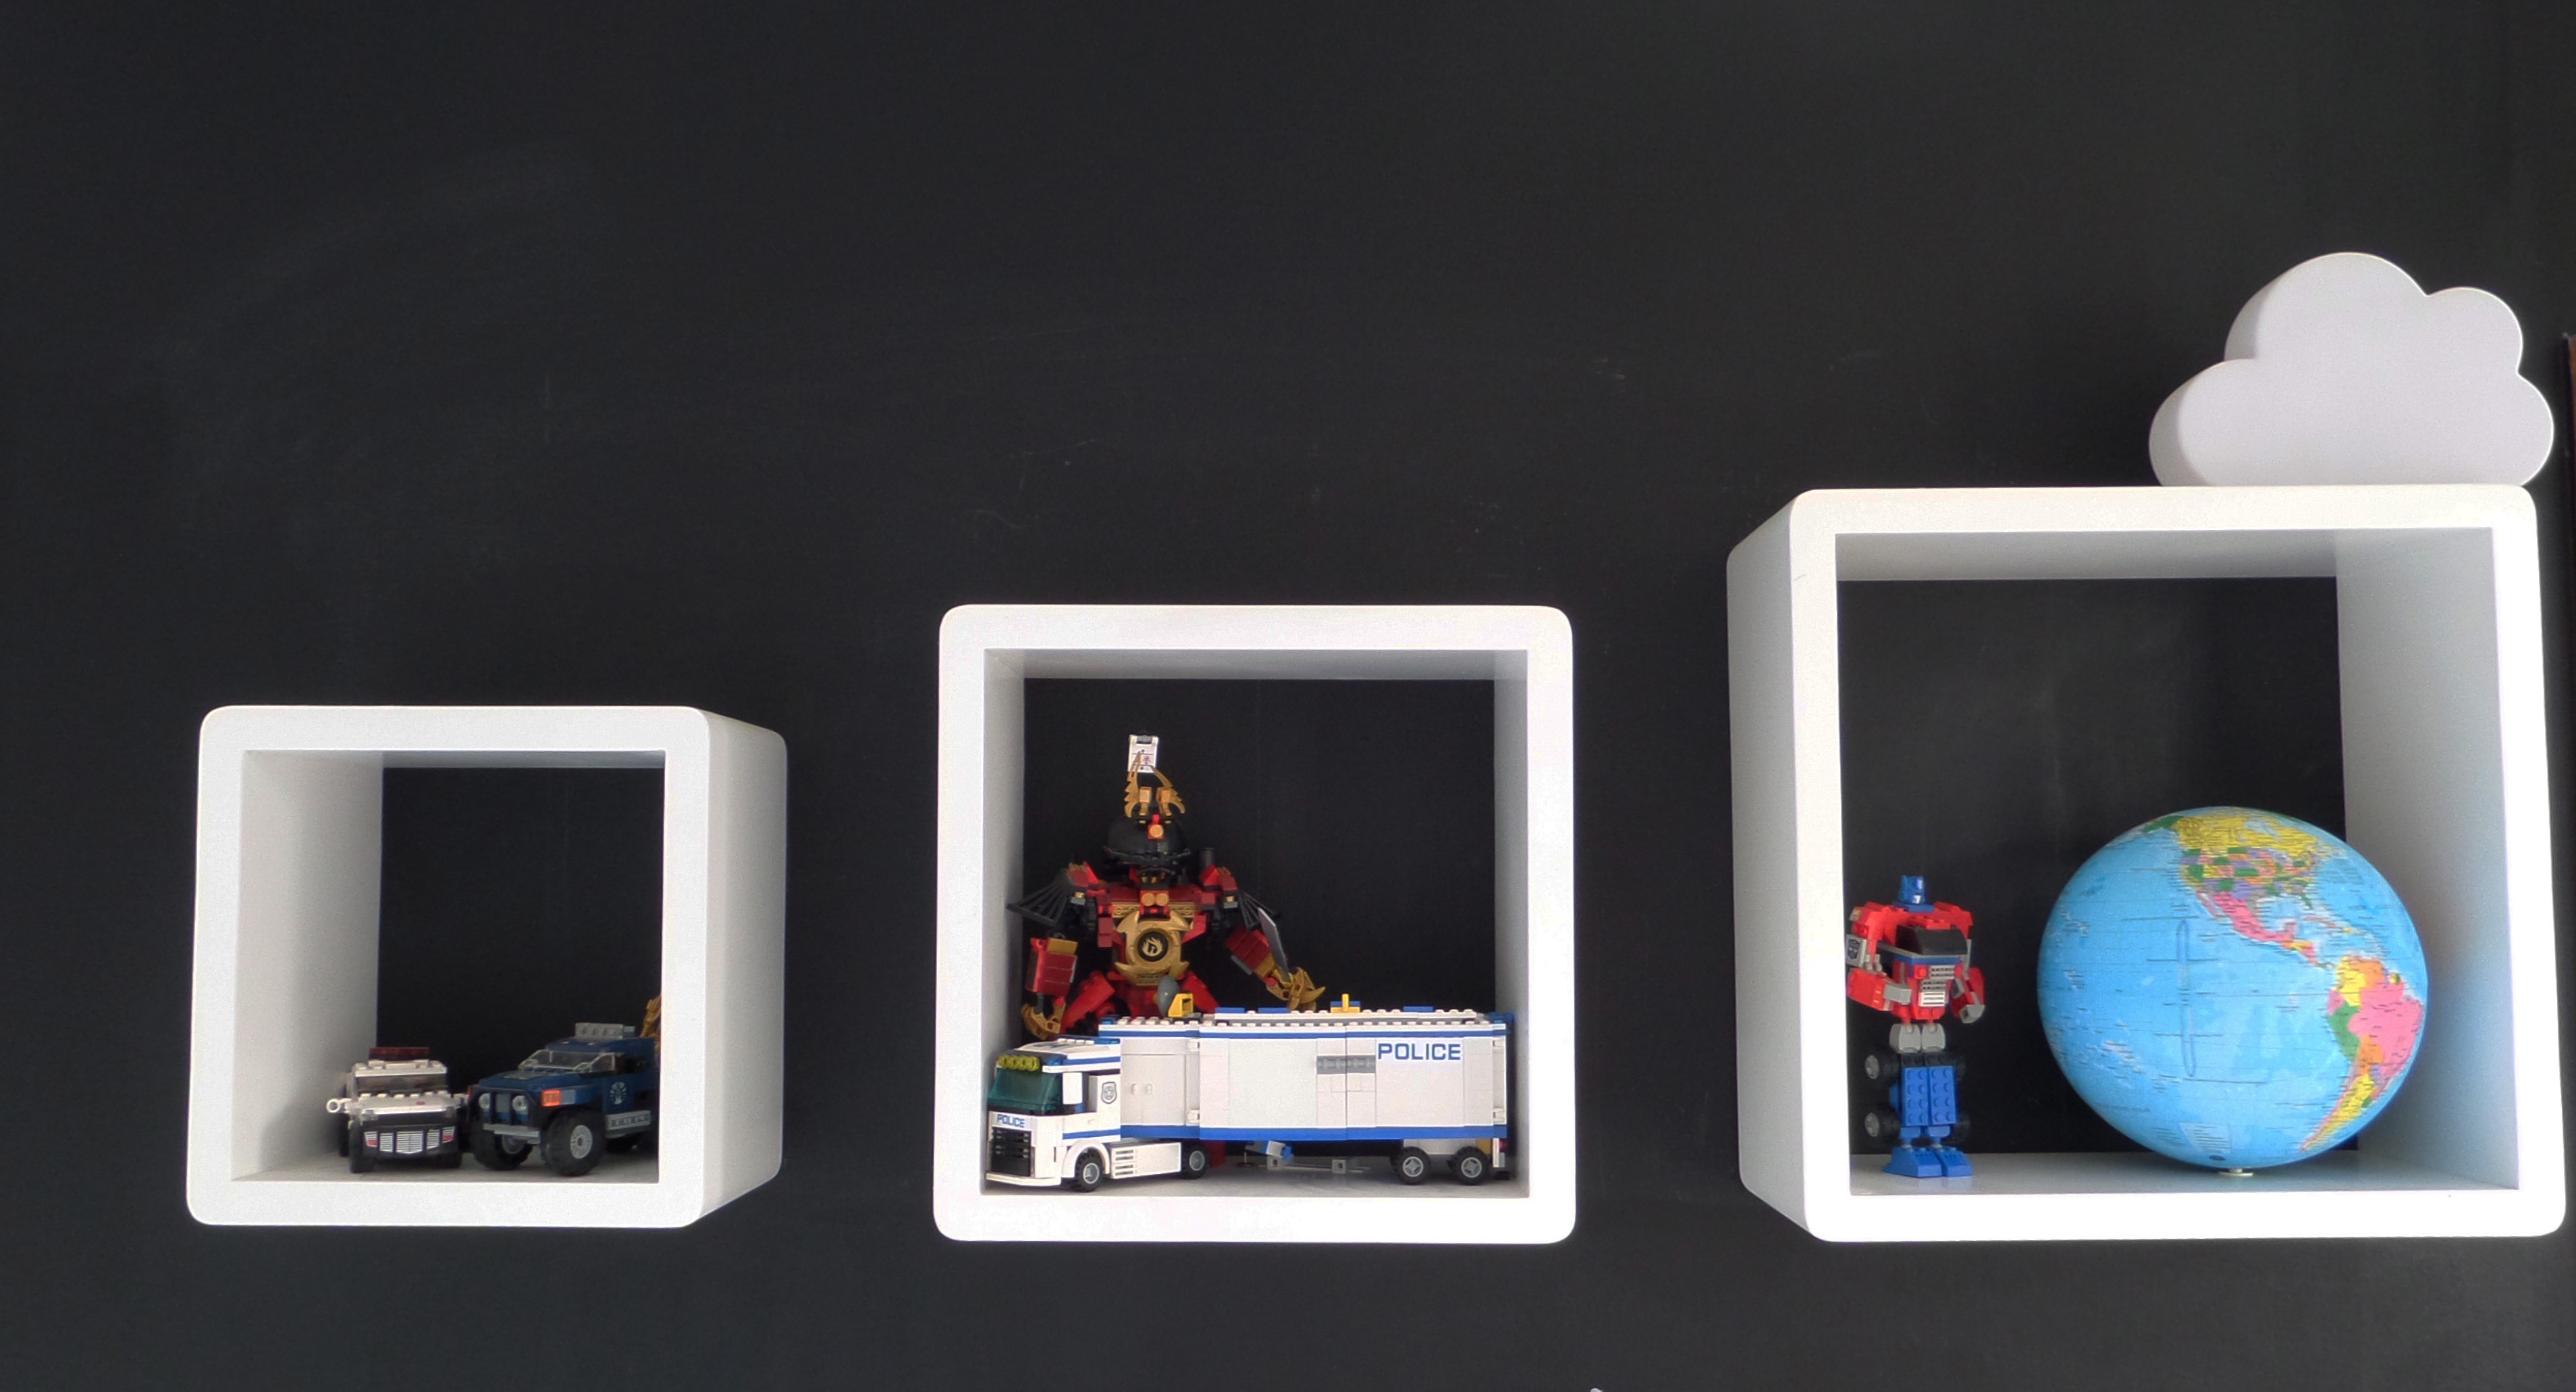
I’m obsessed with Blackboard paint and forever finding new projects to utilise the product. I created the full blackboard wall in the boys shared room 4 years ago. It was a little nerve wracking before that first paint stroke but I loved the effect the strong, black wall had on the space so I extended it in to Dylan’s new room (which I’ll share on the blog soon).
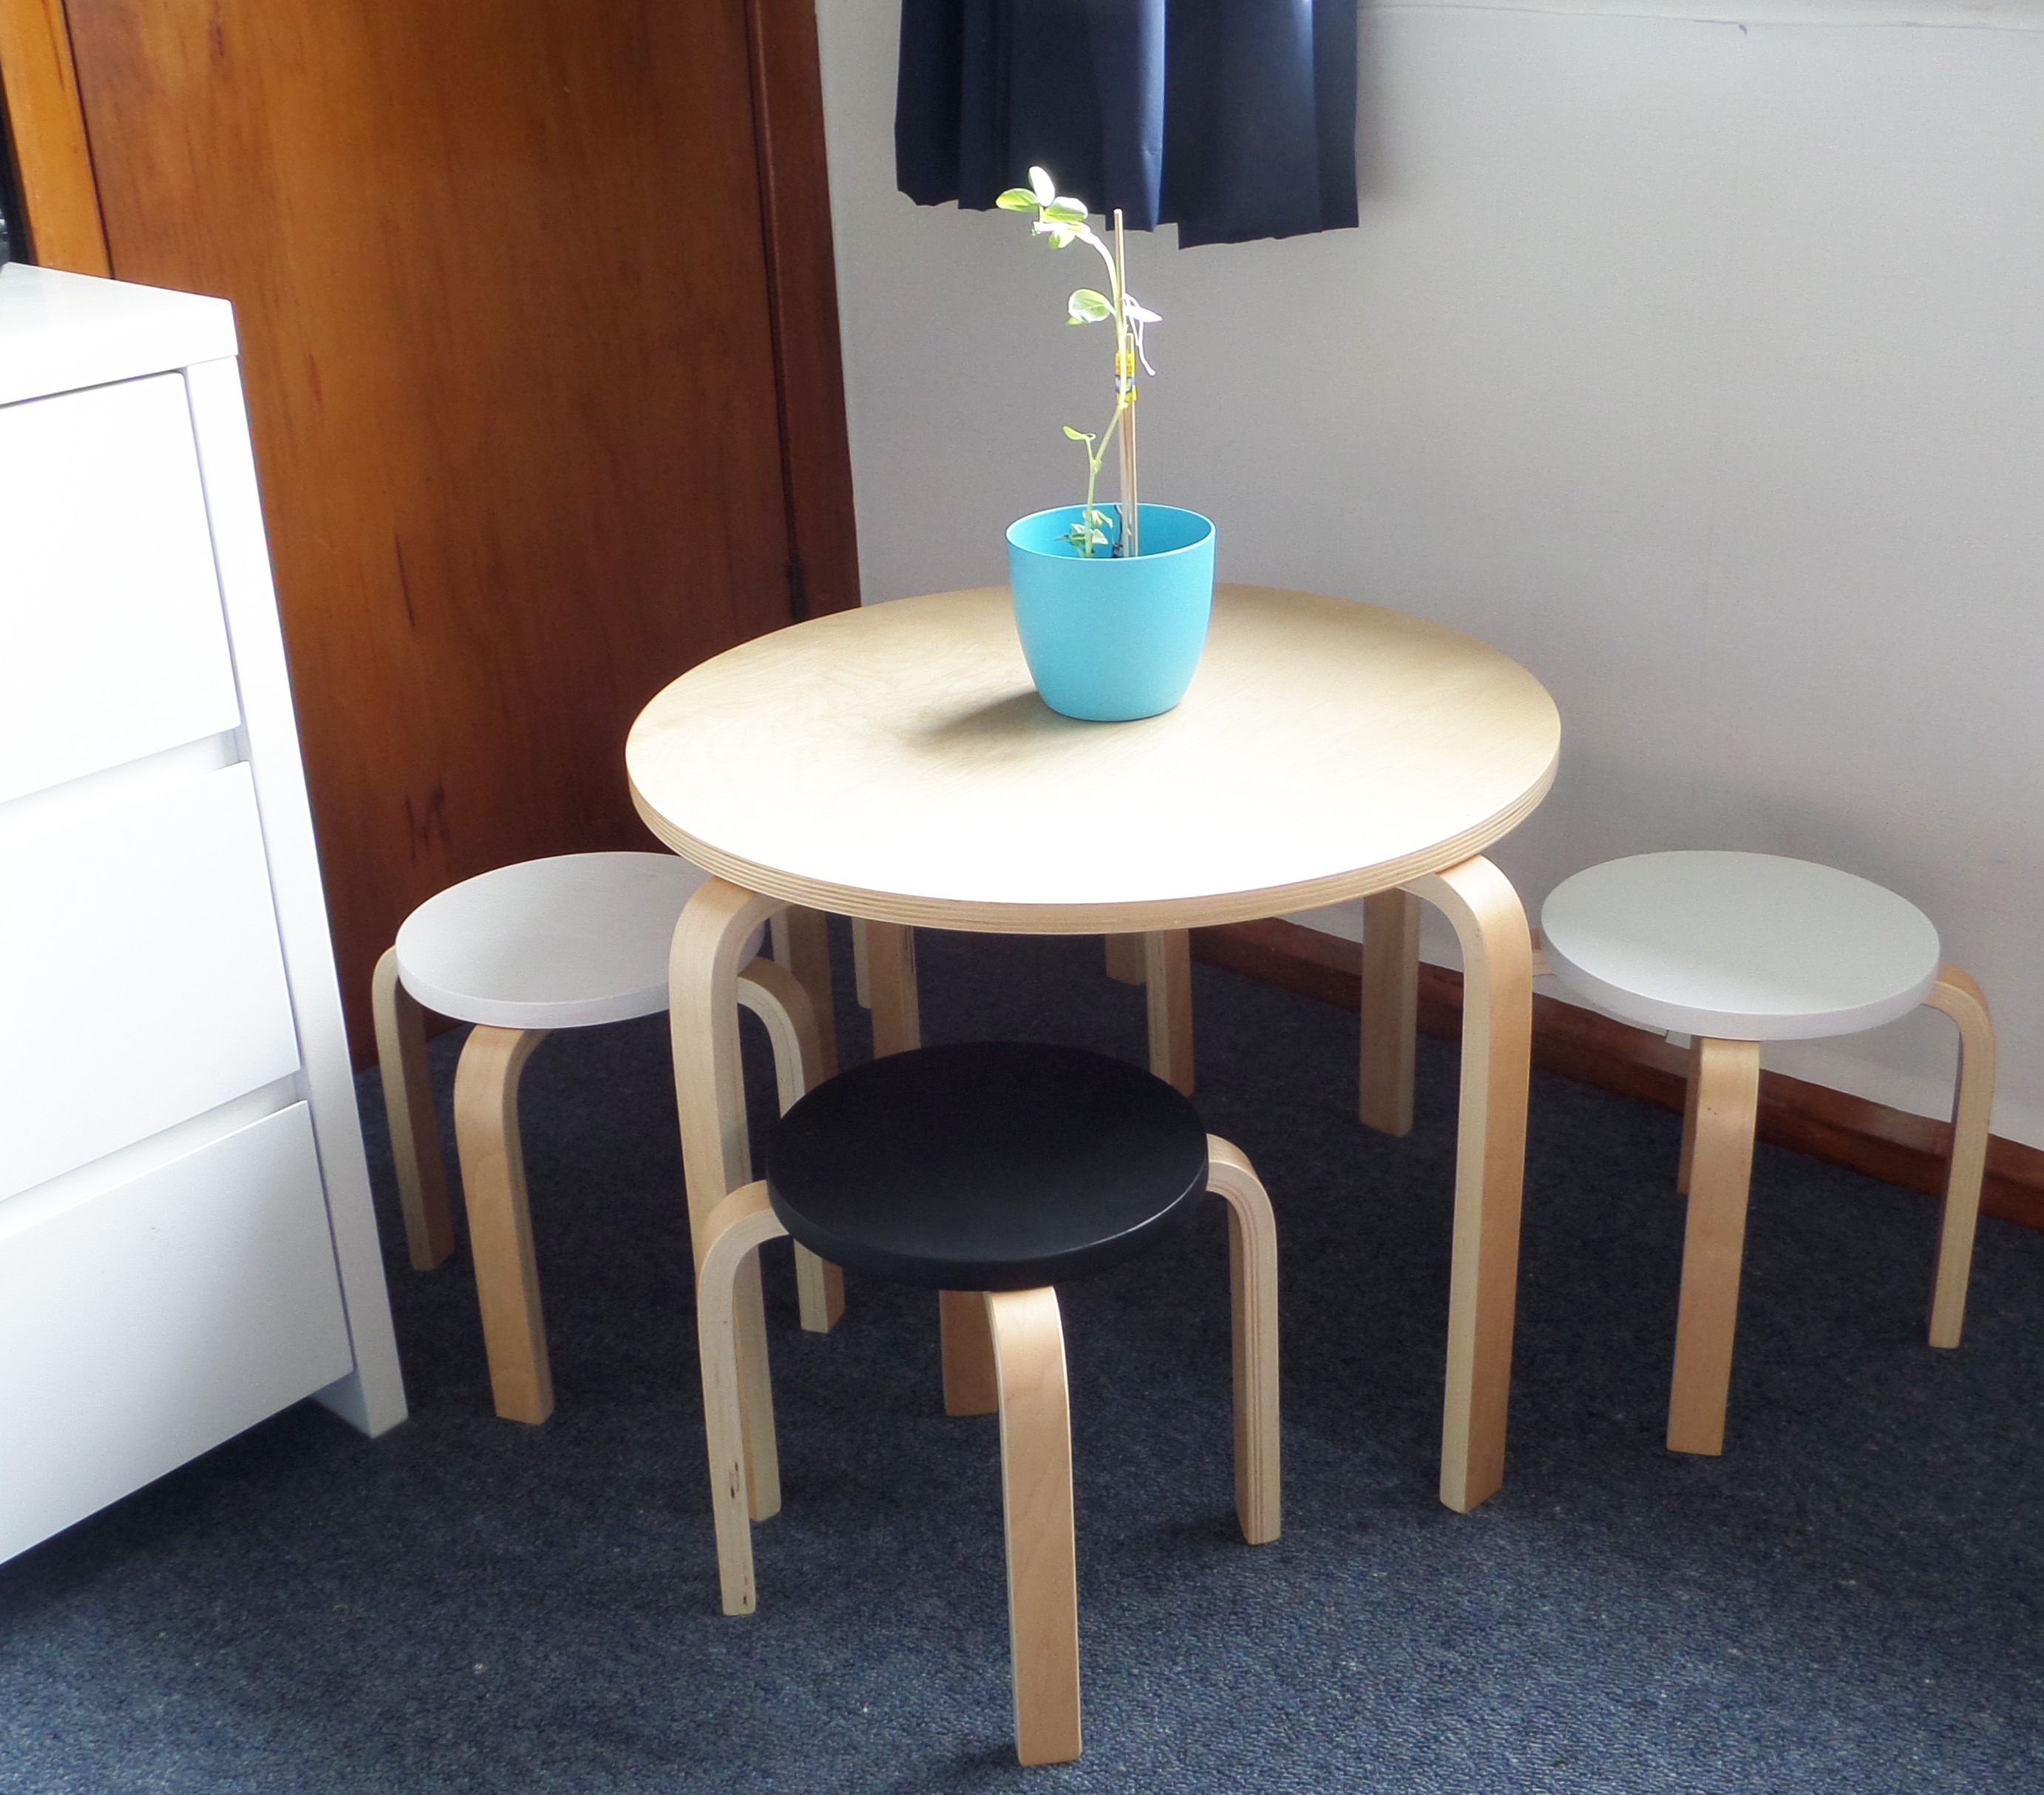
Jimmy loves to sit and draw for hours on end and I wanted to provide him with a quiet space in his room to do this. I added my own touch to the Mocka Hudson kids table and stools by painting the tops of the stools, keeping with the rooms style. We have plants throughout the house and thankfully Jimmy hasn’t developed my skill of killing nearly every house plant. This was one he grew at school and was proud as punch of his effort, he wanted it on display in his room.
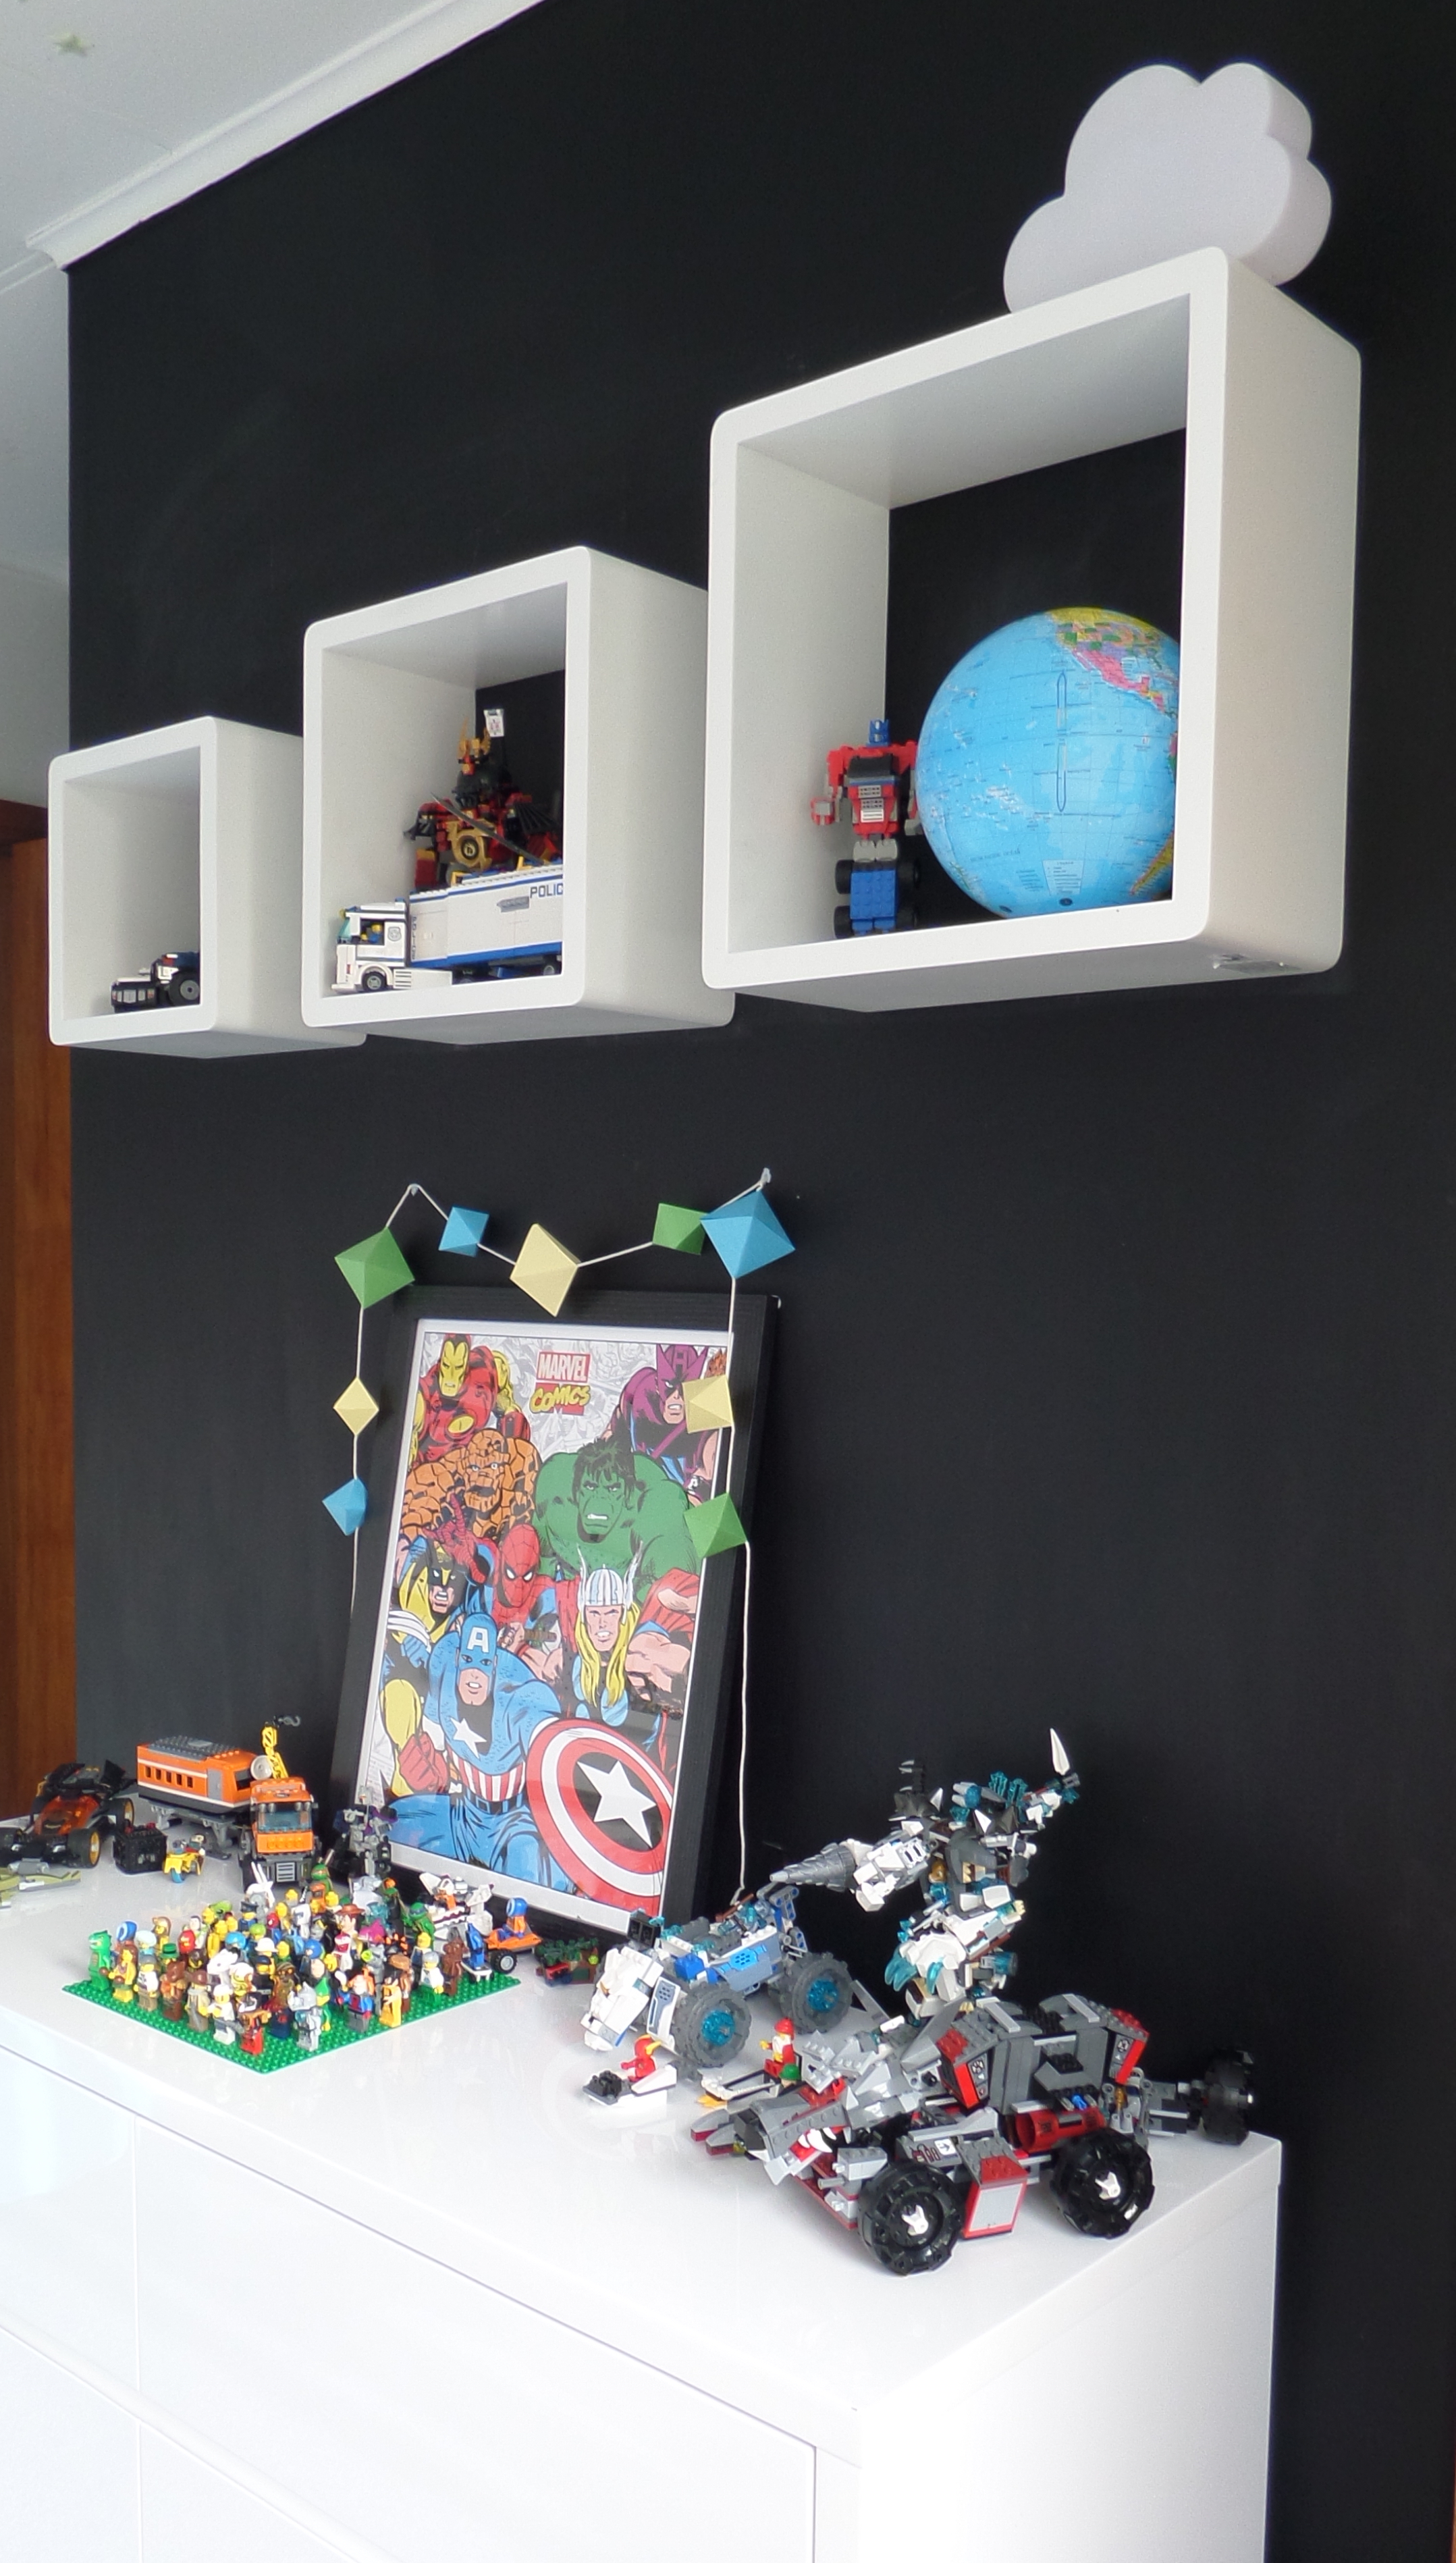
This blackboard wall wraps around the corner and behind the door. This wall is left clear of chalk to provide a clean black wall finish and Jimmy is given free reign to draw anything he likes on the two other walls. The geometric garland was one I created myself with the DIY template on the blog.
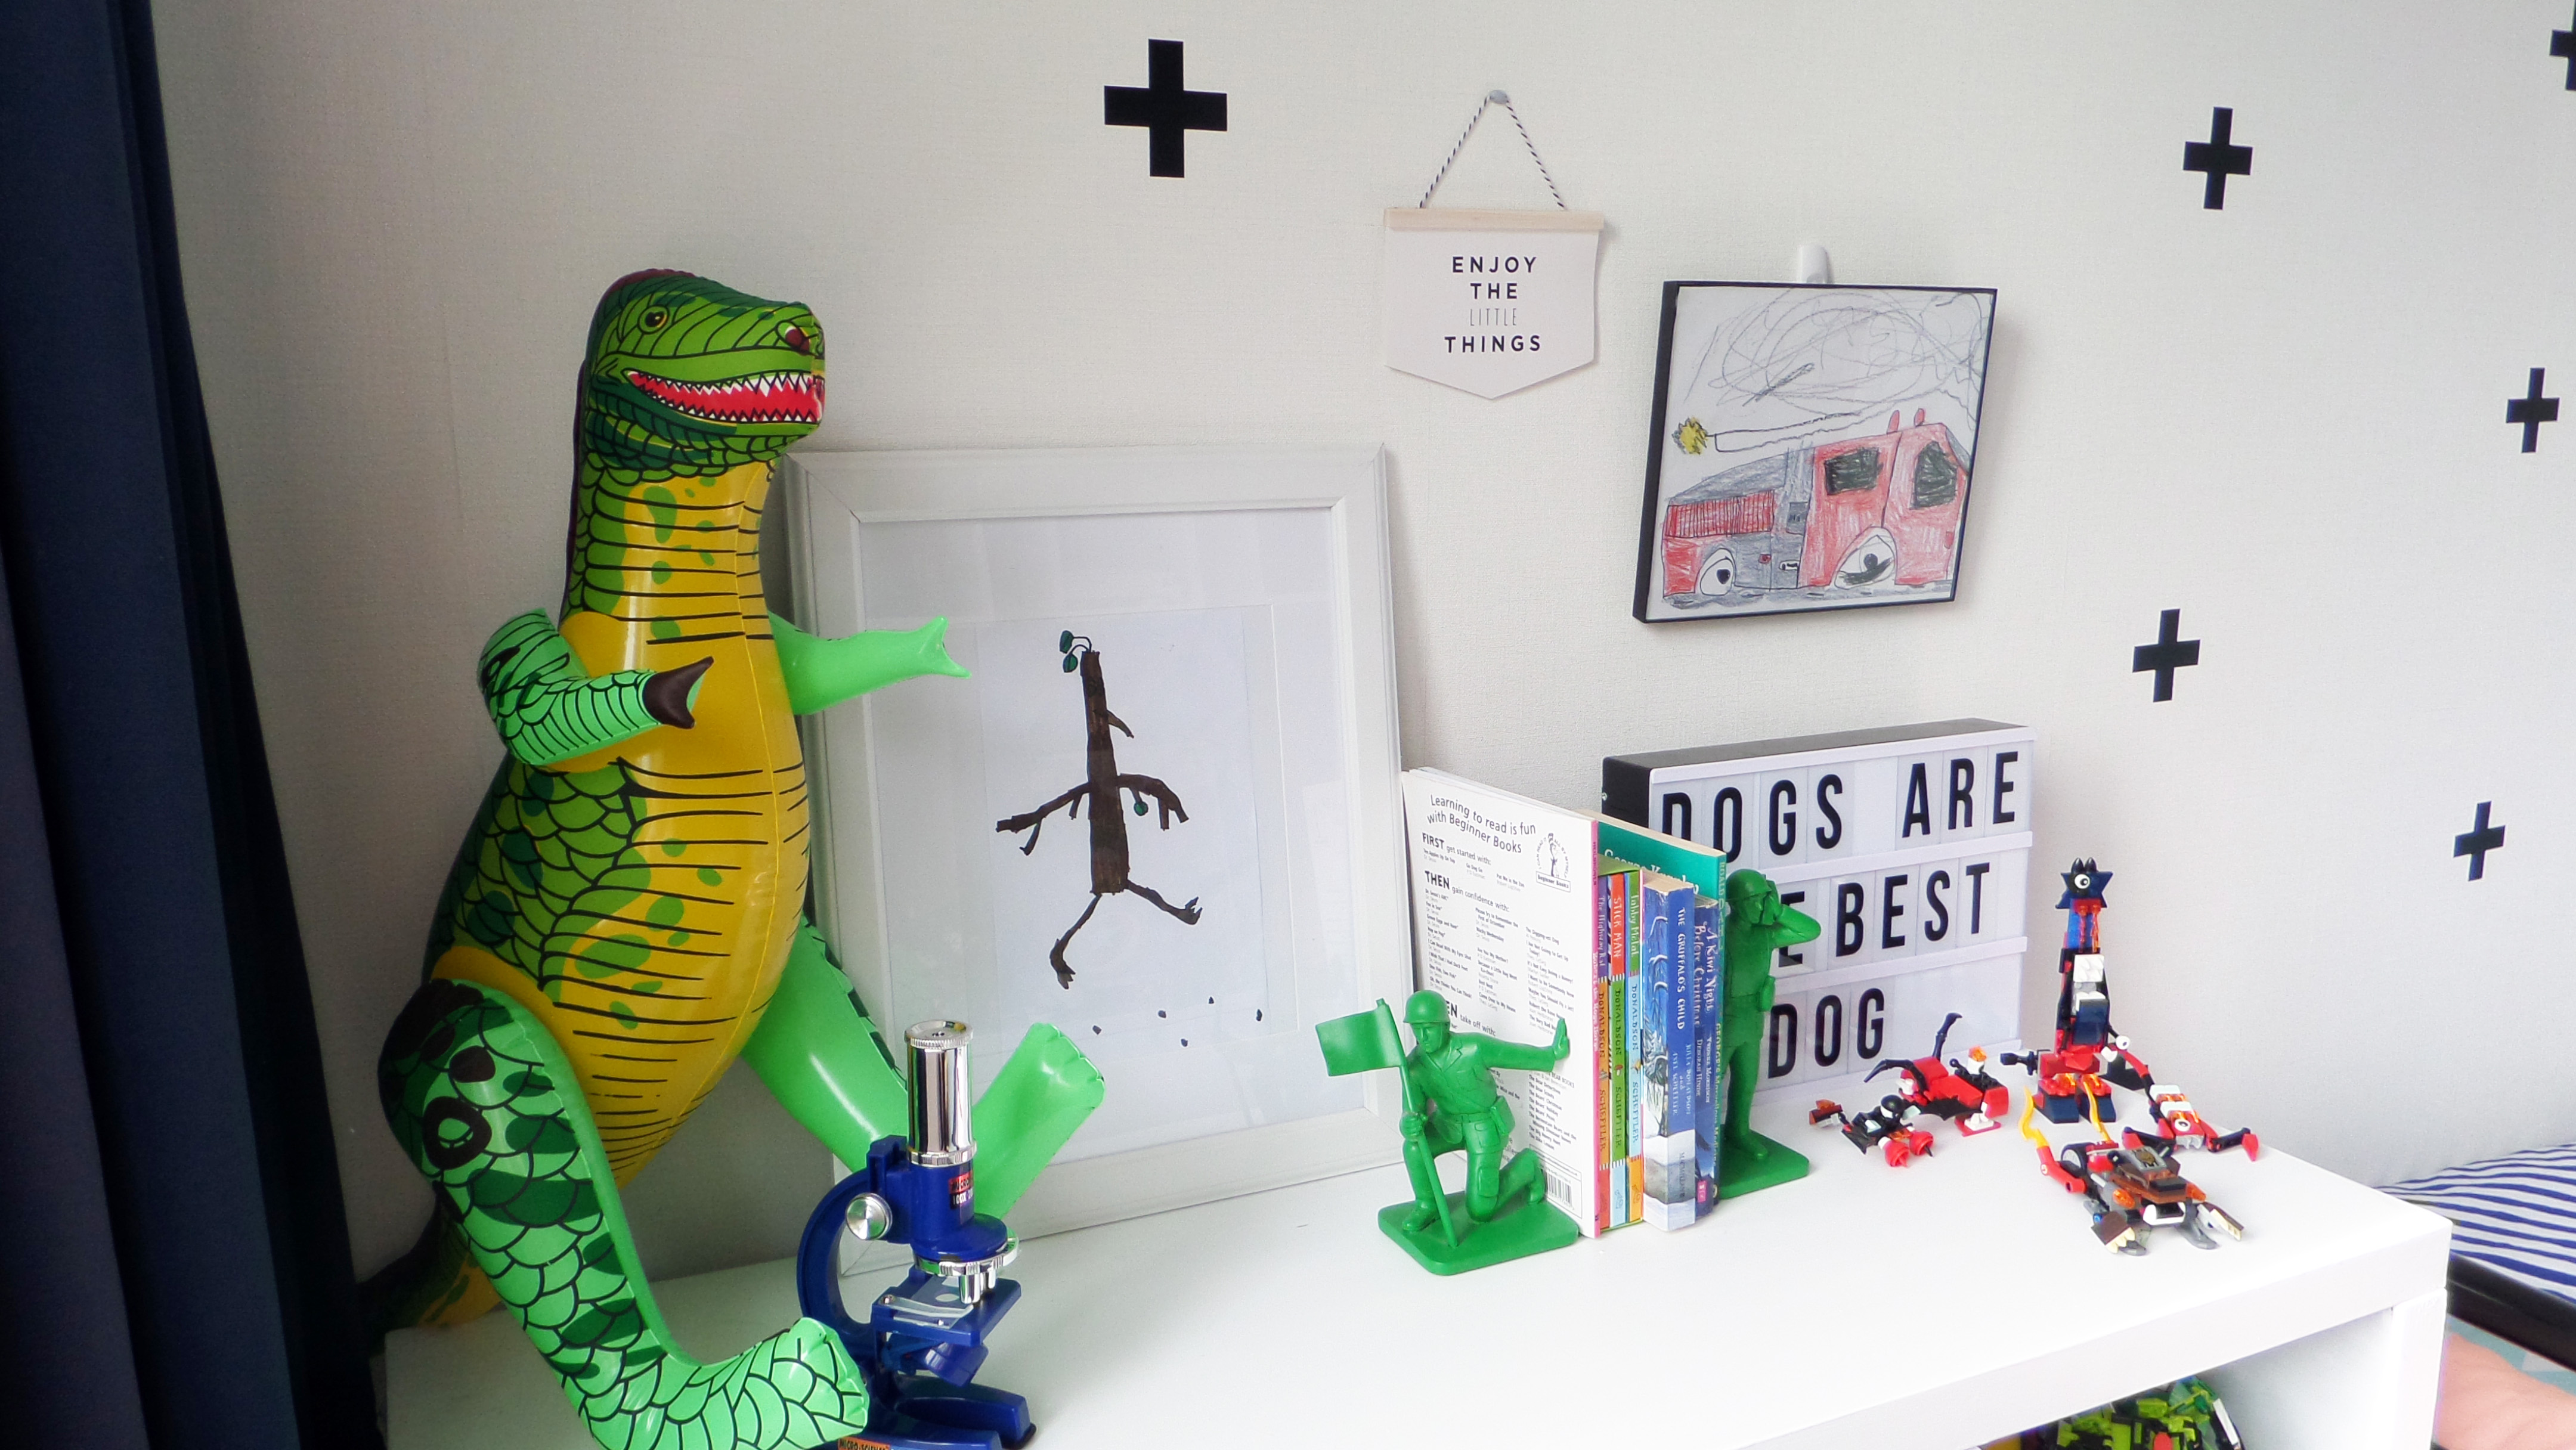
Jimmy’s love of art is on display with this one he drew from the classic book, Stickman and the fire engine he drew from copying an image from a book. He chose the lightbox and loves to change the messages up – currently stating ‘Dogs are the best dog’ (we ran out of enough “s”), too cute.
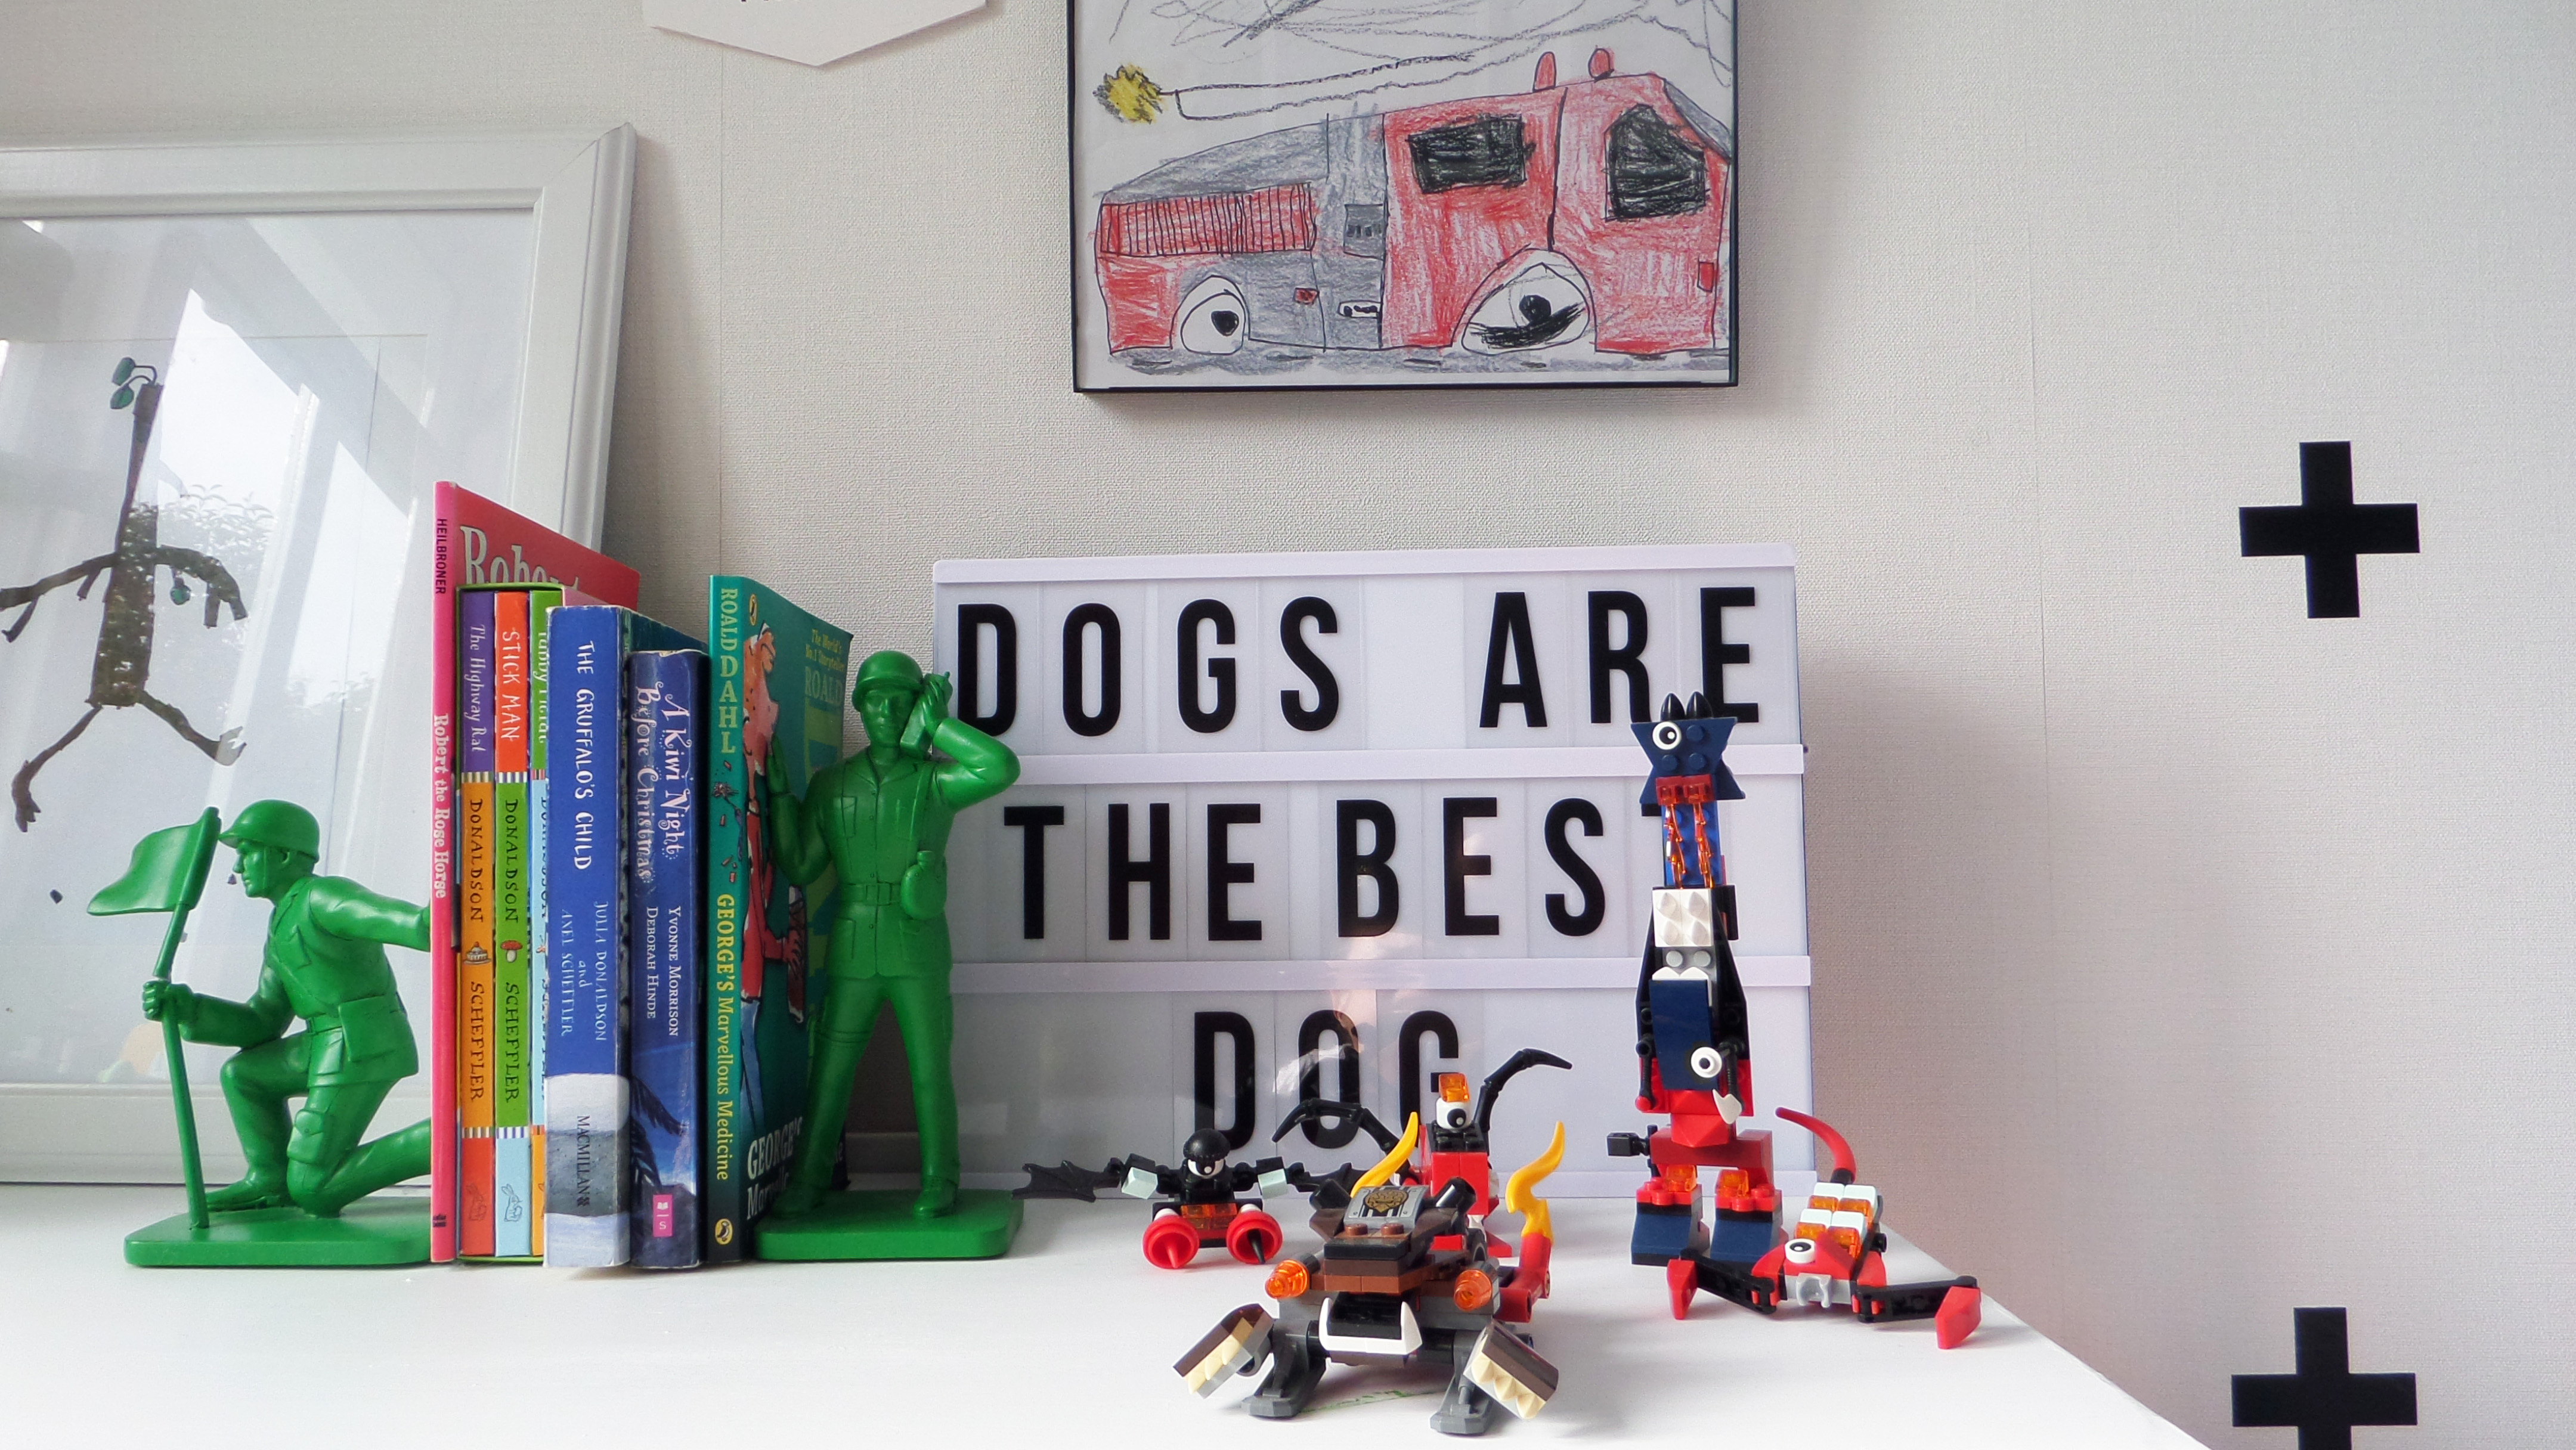
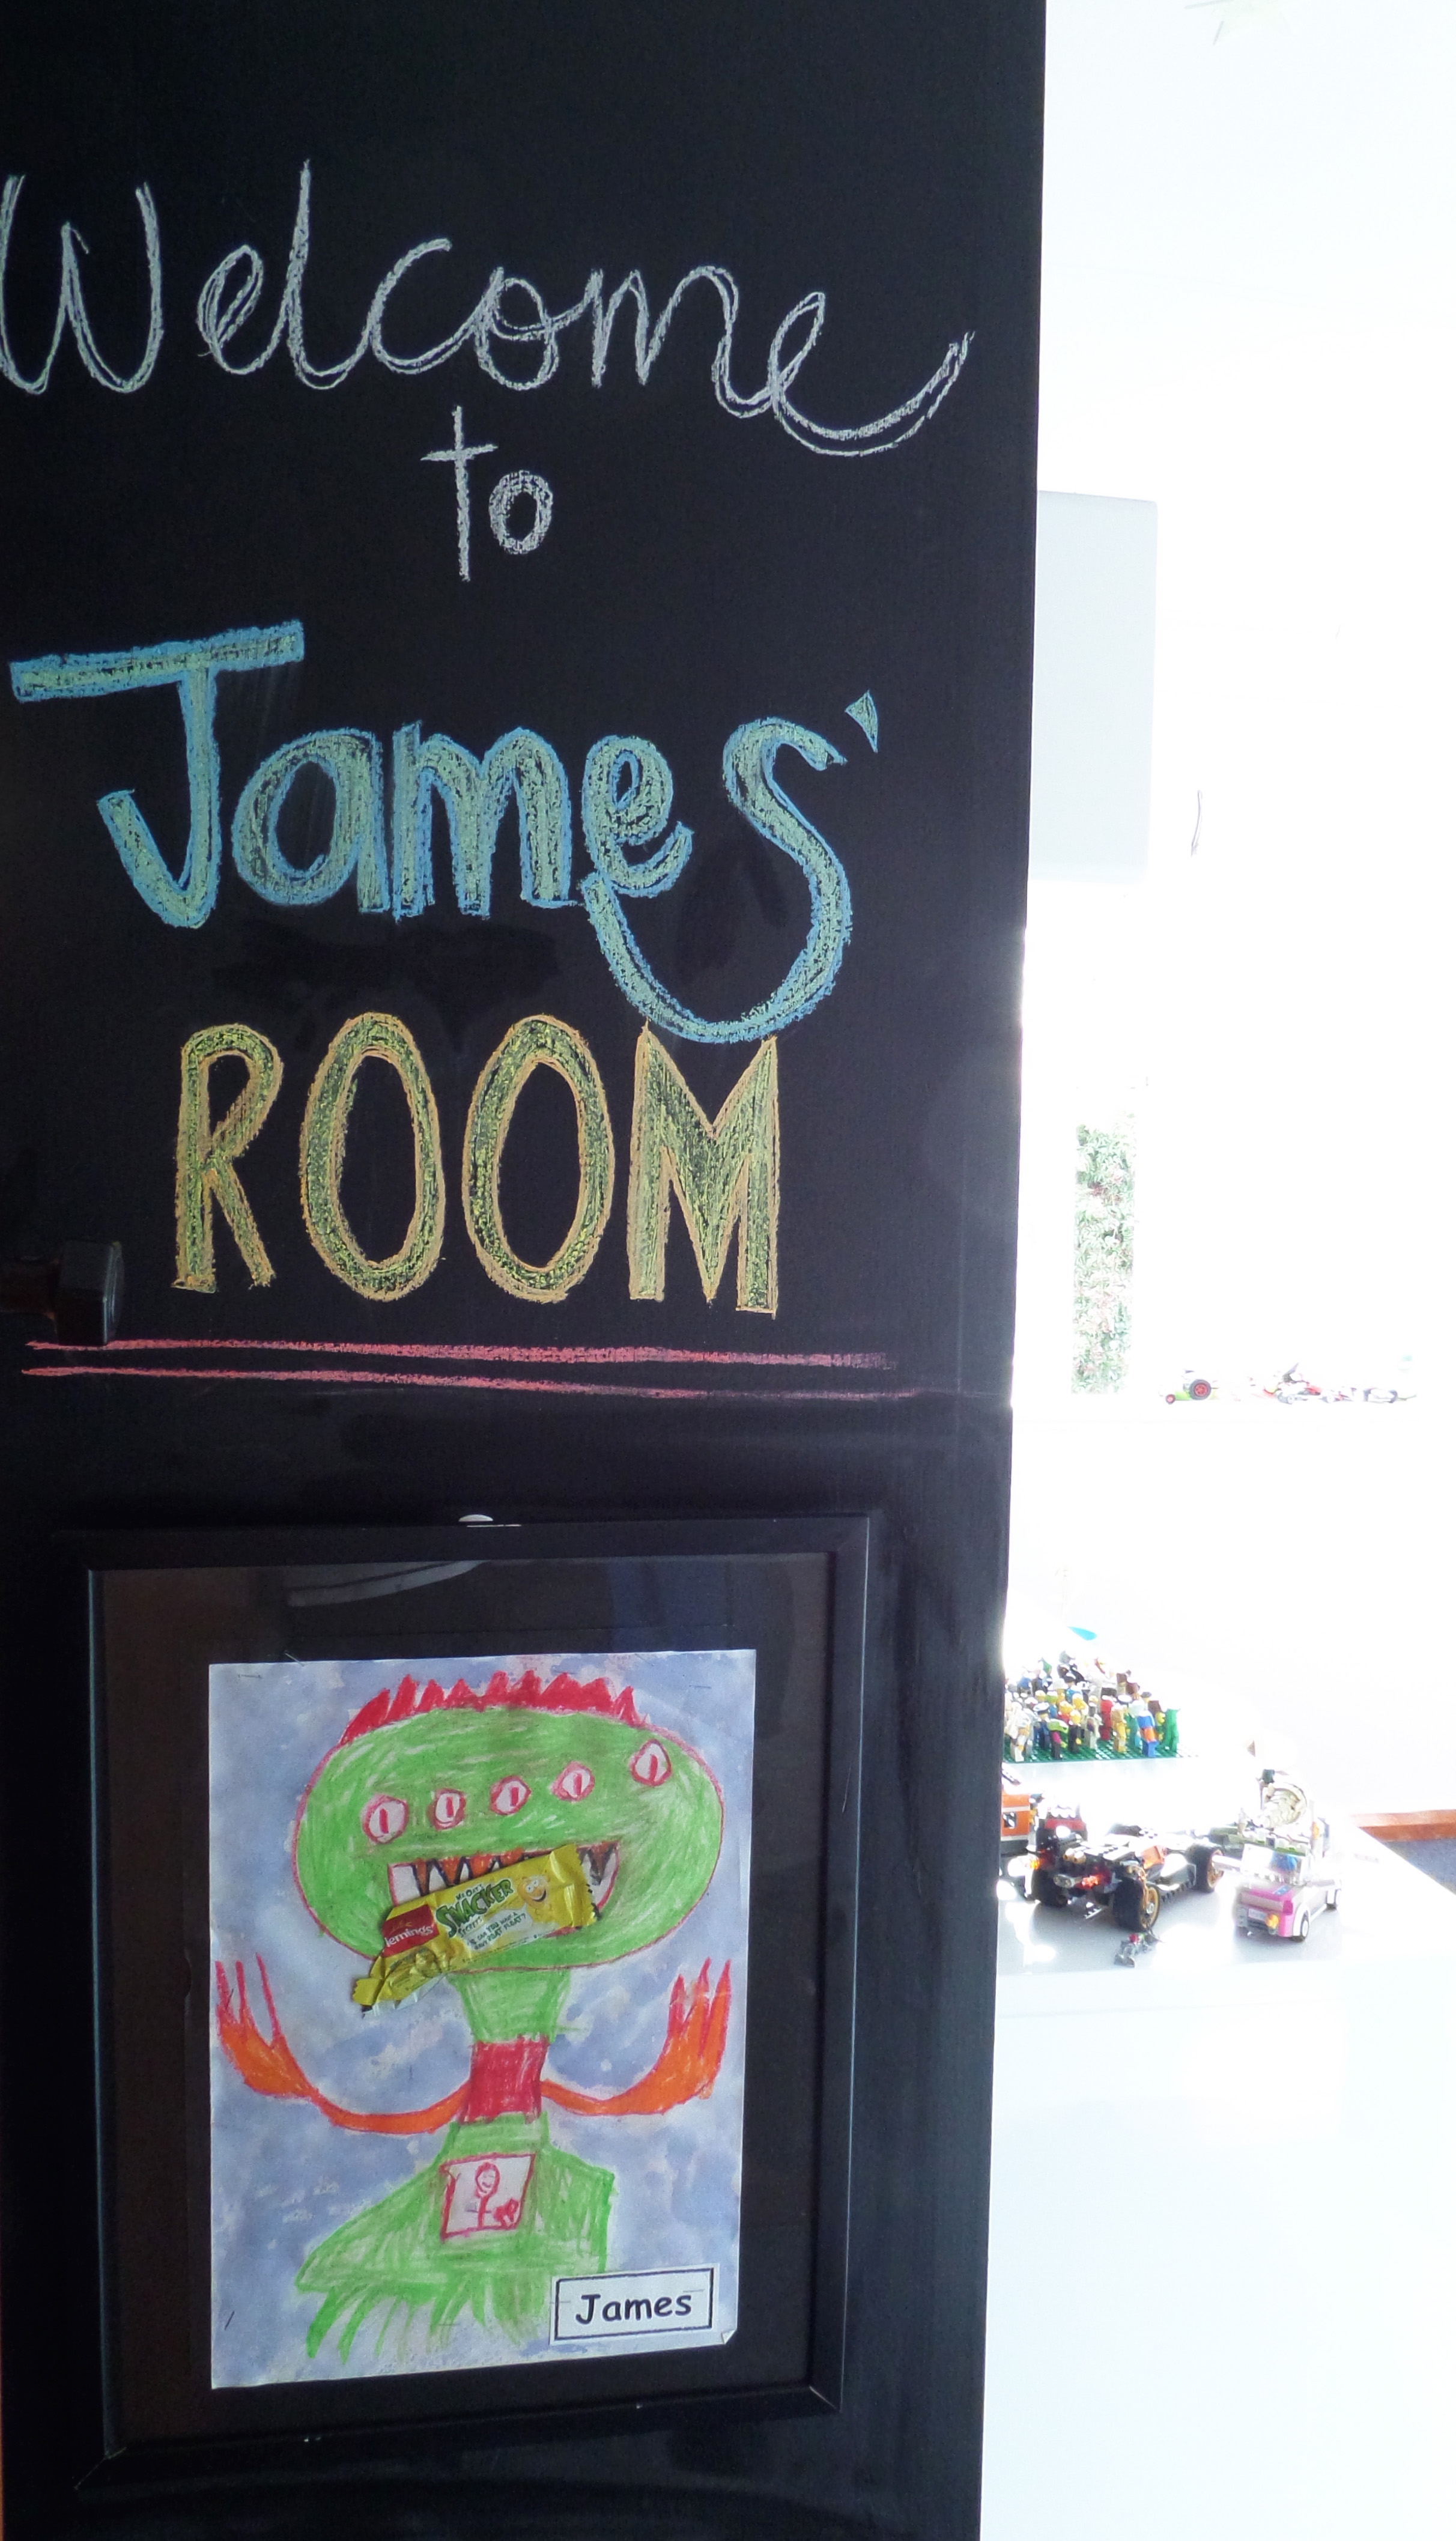
Part of the full blackboard wall, this space creates a welcoming entrance as you step into the room. Jimmy chose his monster print art work as a way to ‘warn people’ coming in, monsters live here.
There are still a few more touches to go in this room but I’m happy with how it’s come together and of course, the most important thing is Jimmy loves his room.
Happy to share any product details you might love, feel free to comment below and I’ll let you know where they were sourced from.
– Kelly

The post Jimmy’s room appeared first on The Home Scene.
]]>The post Tips and Tricks for living in a small home appeared first on The Home Scene.
]]>We are currently finishing off our last renovation jobs to our home before we move next year. Having lived in our house for nearly 12 years, add in two children and one dog later, you can understand how we have amassed household items and effectively outgrown our small first home.
Whilst there are some benefits to living in a smaller home, it’s cozy, intimate and energy efficient, – it can come with its challenges. Fitting all your ‘stuff’ in is often the first challenge to overcome while wanting to make the house feel bigger. If you’re in the same boat, I’ve learnt a few tips and tricks along the way to living in a small house.
+ White is your friend
Decorate your interiors by painting or wallpapering in white tones. By doing this you create light, airy spaces and a blank canvas for styling.
If you aren’t a natural lover of monochrome styling, don’t worry – you can still create a vibrant colourful home by adding pops of colour with furniture and your styling – think cushions, prints, and pieces for your shelving.
+ Good lighting
Good lighting is a must, particularly with small spaces. Dark rooms not only make the space feel smaller but it can also affect your mood. Creating a well lit space helps to create a feeling of space . If you have limited options with lighting, add in options like a large lamp to a living room, that not only functional but also serves as styling.
Don’t just think indoors with this one. Look at your shrubbery and trees outside any windows. Often this can be overlooked and affect the natural lighting that filters into your home. Cut back trees that block natural light and you’ll see a significant difference. An old 5 metre high plum tree was one of the first things to go when we moved into our home. It was positioned directly outside our dining and kitchen window and once this was gone, the warmth and light that came from this one change was significant.
+ Eliminate Clutter
Whether it’s the amount of furniture items you have cluttering up your home or the items we amass over the years, pare back where you can to create space.
Storage: This is your number one friend. Give everything a place to go and store the items you can’t part with. If you have children and find their toys start to take over the living space, place their favourite ones in a basket that can be packed up and moved back to their room at the end of the day. These small items can create clutter and take over the living space.
Regular spring cleans: With our home, our children acquire ‘stuff’. Bits of this and that from school, home, drawings and craft sessions….you get my drift. It’s not just our kids though. I like to do a regular spring clean several times a year. Go through cupboards, wardrobes, shelves and drawers. Get rid of anything broken and unusable, store any treasured items and donate or sell items that you no longer want.
I feel so much calmer and ready to face the day when my house is tidy and I’m not overwhelmed by clutter. It also makes it easier to tidy up at the end of the day when there is not as much unnecessary ‘stuff’ hanging around. I appreciate for some a completely tidy house with everything in its place is unrealistic so work to what is right for you.
+ Proportions
Proportions are key to a well designed space. Getting the proportions of a room right can alter the way our rooms and spaces feel.
Large oversized furniture that leaves no space to walk around is just not going to work. It’s important to create a liveable space that your family can enjoy. If you simply must have that large oversized couch, consider the other furniture that occupy the same room.
If you have inherited items, make do with them the best that you can; appreciating we can’t all go out and refurnish our homes with unlimited budgets. That said if you are on a budget, you can source items like TV units, coffee tables and smaller items for styling through second hand stores, Trade Me and local FB trading groups and up-cycle old furniture to suit your taste and style.
+ Layout
One thing my family know, is a room will never stay the same with me. My husband often comes home to find I’ve rearranged rooms. I like to play with the layout until it feels just right.
Look at the room that doesn’t feel right and consider how else you could rearrange the furniture to create a more inviting space. If you aren’t sure – start with moving the larger, key items to a different spot until you feel happy. Then start incorporating the smaller items and finish up with styling.
Don’t be restricted to placing key items of furniture in so-called ‘traditional’ locations. Feel free to play until you find your desired layout.
If you have a small space or house, I’d love to hear from you – how have you worked with a small space or what room are you looking to change?
Kelly

The post Tips and Tricks for living in a small home appeared first on The Home Scene.
]]>The post Our first home appeared first on The Home Scene.
]]>We’ve been lucky enough to have owned our first house from the tender ages of 22 & 23 after forgoing the popular OE for homeownership. The place we’ve called home for nearly 12 years now.
In 12 months time, hopefully that dream of a large spacious home will be realised for our family as we look to move on and purchase a new home; our second home.
With so many people currently trying to get in to the housing market or looking to purchase their next stage home, I thought I’d share our journey with you.
My husband and I purchased this home before we had our first son as a way to invest in our first home and a renovation project we could get stuck in to, naturally with our joint love of building and design. At the time, aged 22yrs, we spent a number of months researching the market and looking through open homes with a great deal of disappointment.
We weren’t impressed with the homes we were seeing from overpriced hot messes to sloping floors you could roll a ball across; until one day a 1950’s ex-state home with polished wooden floors and open plan living caught our eye and we snapped it up within a week. Just a little overwhelming at the time.
We saw the potential in this tired old house and could see us raising a family there.
The spacious backyard allowed for plenty of green space, although it did take two summers to clear back the overgrown gardens and all the interesting things we discovered in the back yard (think purple toilet for plants hidden under bush and old tyres). But now as our children get older we want our house to be the space their friends choose to come and hang out during their teenage years and host our own numerous dinner or garden parties.
My husband has poured his heart and soul into our home and what was a dark, outdated house is now a light, airy and warm home. Buying a doer-upper has brought other joys; our boys have discovered the fun of getting on the power tools, ripping down walls, painting and being able to say “I helped make that”. I love looking back at photos of themselves aged two on the drill with mini tool belts and that joy in their faces.
The kitchen, the bane of my existence in its typical ex-state house design, was long, small and dark. Now with its original 50’s cupboards and layout updated to a clean, refreshed white modern design (thank you Jeremy).
Our sons have their own rooms now after forgoing the spare room a year ago where I’ve loved designing a space that is individual for each of them to retreat to. The master bedroom is large enough to hold two master bedrooms after the original home owners swapped the layout of the house around – great move!
What was originally the lounge at the front of the house is now our bedroom with the lounge relocated to the back of the house to create that open plan living from kitchen-dining-lounge and out on to the deck.
Over the years our love of DIY has played a huge part in our home. Always looking to upcycle furniture items, or transform something purchased into a more individualised item, our style has evolved over the years.
We’ve learnt helpful tips and tricks along the way as well as developing our own which I look forward to sharing with you in this new series. From tricks on how to make a small home feel spacious, DIY features and inspiration to what to look for when purchasing your next home.
What would you love to hear more about – what would be helpful or just plain interesting?
Stay tuned and I can’t wait to share more blog posts to help you transform your house into a home.
– Kelly

The post Our first home appeared first on The Home Scene.
]]>The post Statement pieces appeared first on The Home Scene.
]]>Furniture can really make a house feel like a home, with statement pieces showcasing your individual style.
As we are now nearing the end of our home renovation project of our 1950’s ex-state home, we are aiming to move on to a bigger (and newer says my builder hubby) home in the next year. In the mean time, while living in a smaller home, I’ve had to be conscious of any furniture we purchase and where it’s placed to ensure it doesn’t feel cluttered.
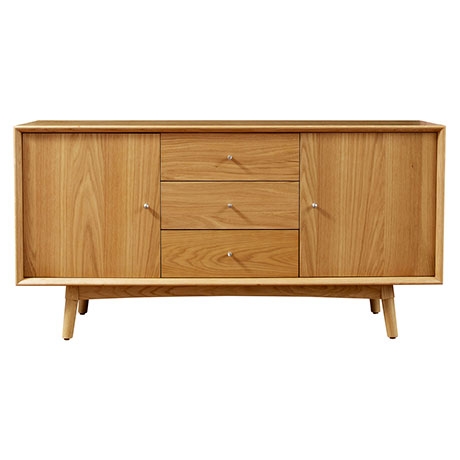
With open plan living from our kitchen through to our dining and living room, an ugly old shelving unit has remained against the wall behind our dining room table. I’ve been looking for the right piece of furniture to transform the space and as yet hadn’t settled until I found the right piece.
I’ve been looking for a natural timber buffet for some time that can easily slot into our home. One look at my pinterest board and you can tell I have been sourcing inspiration for a while. I love that a buffet can look beautiful in all its simplicity, but remain functional. After much searching I recently found the perfect one that is being delivered to our home this week.
Until I can share my own piccadilly buffet with you, here are a few styling inspirational images that I love from pinterest and it gives me a good reason to go out and purchase all new accessories to style our buffet.
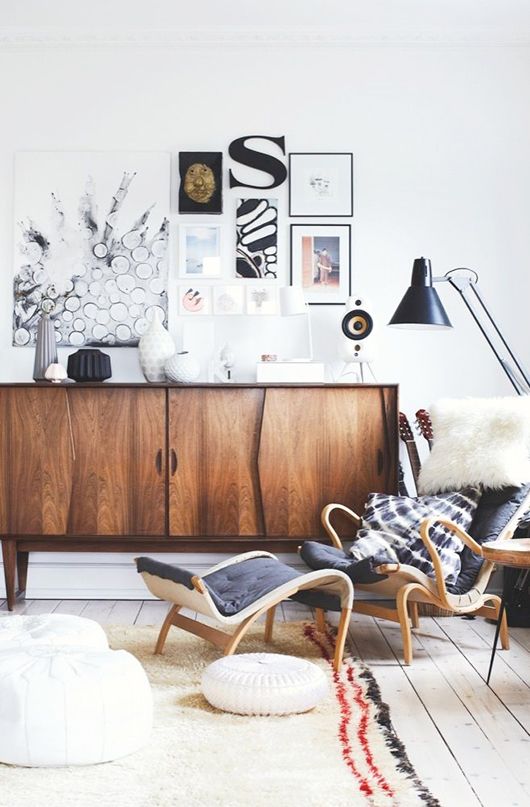
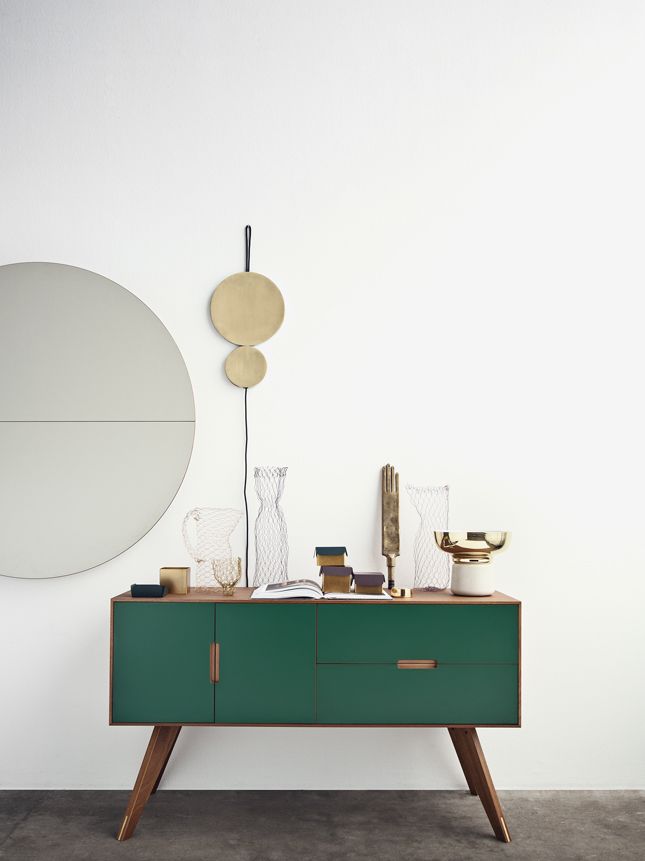
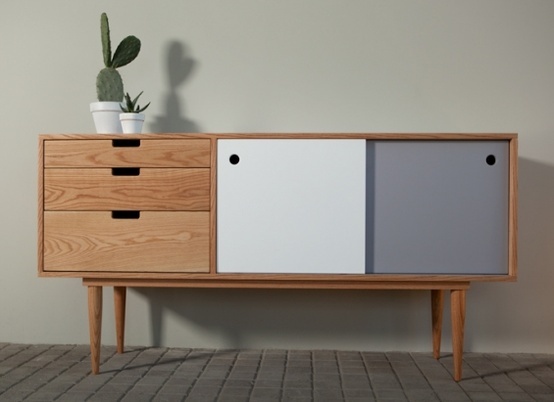
Did you know: Buffets were first used in Sweden to lay out big spreads of food and drink, known as smorgasbords. The concept of buffet tables caught on in France and then throughout the rest of Europe. Where a buffet becomes referred to as a sideboard comes down to simply where the item is placed. The further away from the dining area (e.g. the living room) it becomes referred to as a sideboard – good to know.
Kelly

The post Statement pieces appeared first on The Home Scene.
]]>The post Gather & Celebrate appeared first on The Home Scene.
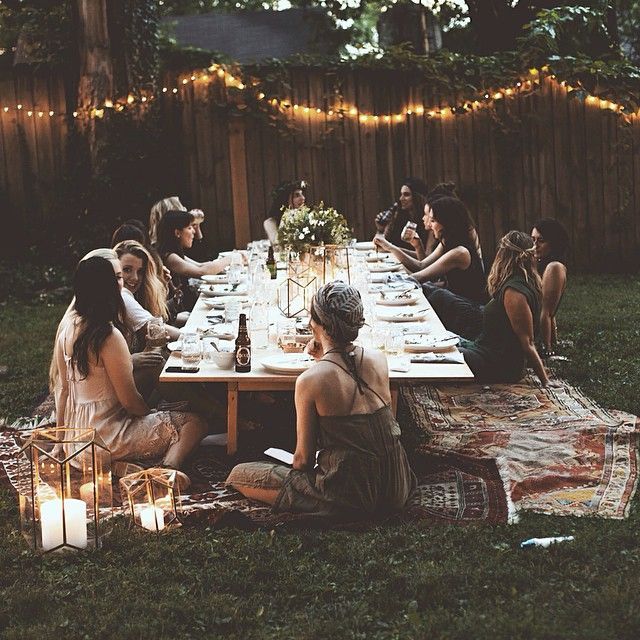
]]>With warm afternoons turning into long evenings as the sun goes down late into the night, it’s the perfect opportunity to head outdoors. Picnics, cocktail parties or casual al fresco dining, any excuse to enjoy the warmer weather.
You don’t need fancy outdoor furniture that costs an arm and a leg to create an atmosphere. I love nothing more than dragging your table outdoors, or piecing together small tables with oversized cushions to recreate these inspired settings for late summer scenes in your own backyard.
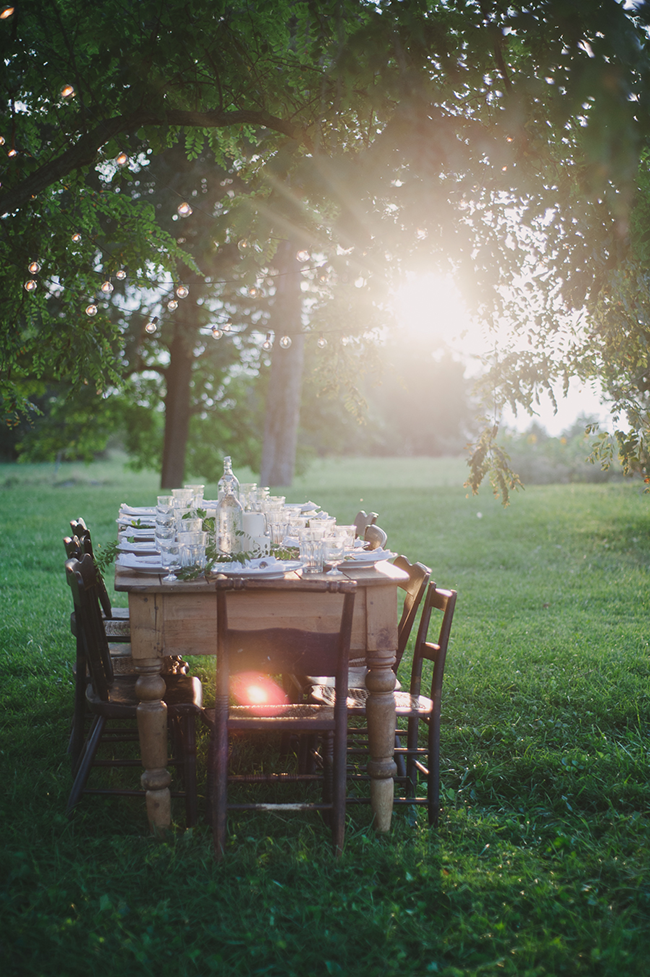
This look is perfect for a smaller get together. Forget the old stuffy table cloth and keep it rustic and green. Dinner never looked so good as it did with the sun going down behind the trees.
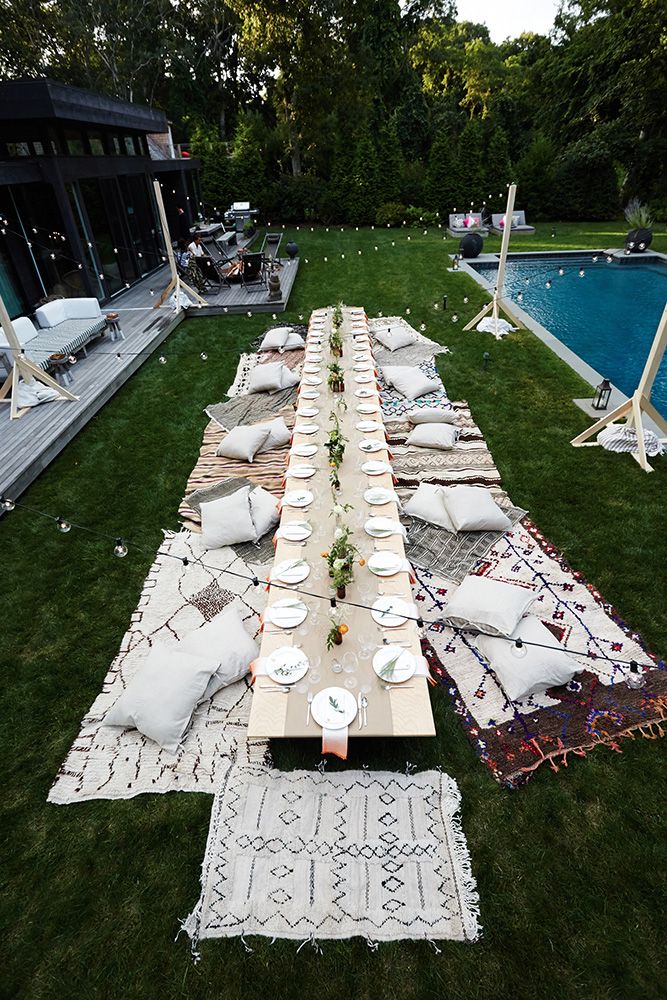
Who needs chairs? Mix it up with old rugs and pillows for leisurely comfort that takes you long into the night.
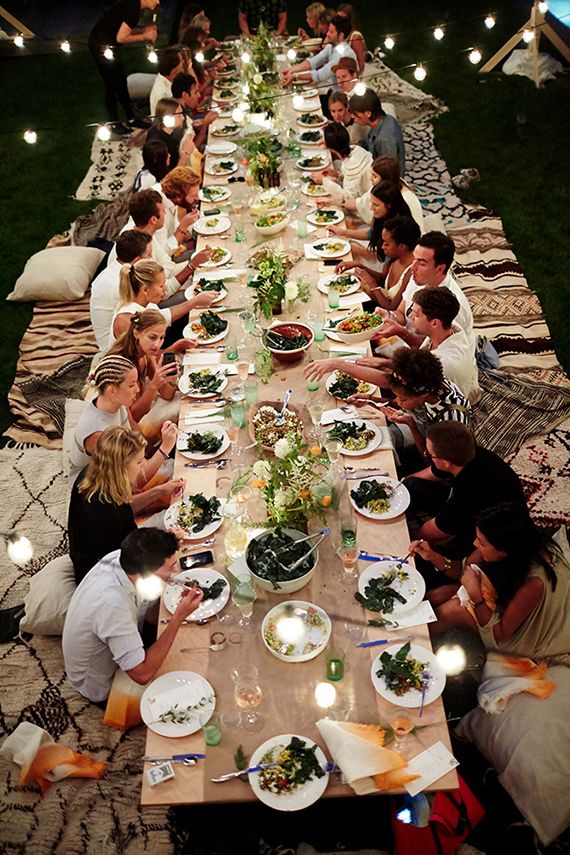
I love a relaxed outdoor setting. Mix it up rather than matching with old glass jars, different colours and different styles dotted all along the table centrepiece. Find old treasures in your home to incorporate in the setting and pick flowers and foliage from the garden for vibe.
Prolong the summer anyway you can. For more celebration inspiration visit my Celebrate board on pinterest.
Kelly

The post Gather & Celebrate appeared first on The Home Scene.
]]>